Create a Conversation Session
Edit pageConversation sessions are the lightest entry point in Hagicode. Start with dialogue, understand the repository, and decide later whether editing is necessary. The current UI opens new conversations in read-only mode by default, so you can inspect the codebase before asking the AI to change files.
Prerequisites
Section titled “Prerequisites”Before you start a conversation session, make sure you have:
- completed Desktop Installation
- completed Wizard Setup and created at least one project
- entered the Hagicode workspace for that project
What is a conversation session for?
Section titled “What is a conversation session for?”A conversation session works best when you want to understand first and edit later. Typical uses include:
- quickly analyzing an unfamiliar repository
- switching hero presets for tone, provider, or context
- staying in read-only mode until you are sure an edit is worth doing
- attaching images, quick prompts, or history context before sending the next message
If your task has already moved from “understand the problem” to “plan, review, and archive a structured change,” continue with Create Proposal Session. This page only covers conversation sessions.
Workflow overview
Section titled “Workflow overview”The main path is summarized below: create a conversation from the session list, optionally choose a hero preset, ask the first question in read-only mode, and switch to edit mode only after you confirm that direct file changes are needed.
| Stage | User action | System result |
|---|---|---|
| Enter the session | Create a conversation from the top session controls | The session opens with the default hero entry |
| Optional hero choice | Open the Presets panel and pick a hero | The session uses that role, provider, or context |
| Read-only question | Ask something such as 分析这个项目 | AI reads the repository and returns analysis |
| Decide on execution | Stay in read-only mode or turn on edit mode | Safe analysis continues or editable execution begins |
| Add more context | Use image, quick prompt, or history tools | The next message carries richer context |
The first read-only example is just a short interaction sequence. The rule is simple: the AI can inspect and explain, but it does not edit files until you switch modes.
- Enter the prompt: the user types
分析这个项目 - Send in read-only mode: the UI sends the request with default safe permissions
- Read repository context: the AI inspects folders, config, and key files
- Return analysis: the AI summarizes structure, modules, and risks
- Choose the next step: the user either continues chatting or turns on edit mode
Step 1: Create the conversation from the session list
Section titled “Step 1: Create the conversation from the session list”The current entry for a normal conversation is in the top session controls. You can start with the default hero immediately, or open the avatar dropdown on the right before entering the session.
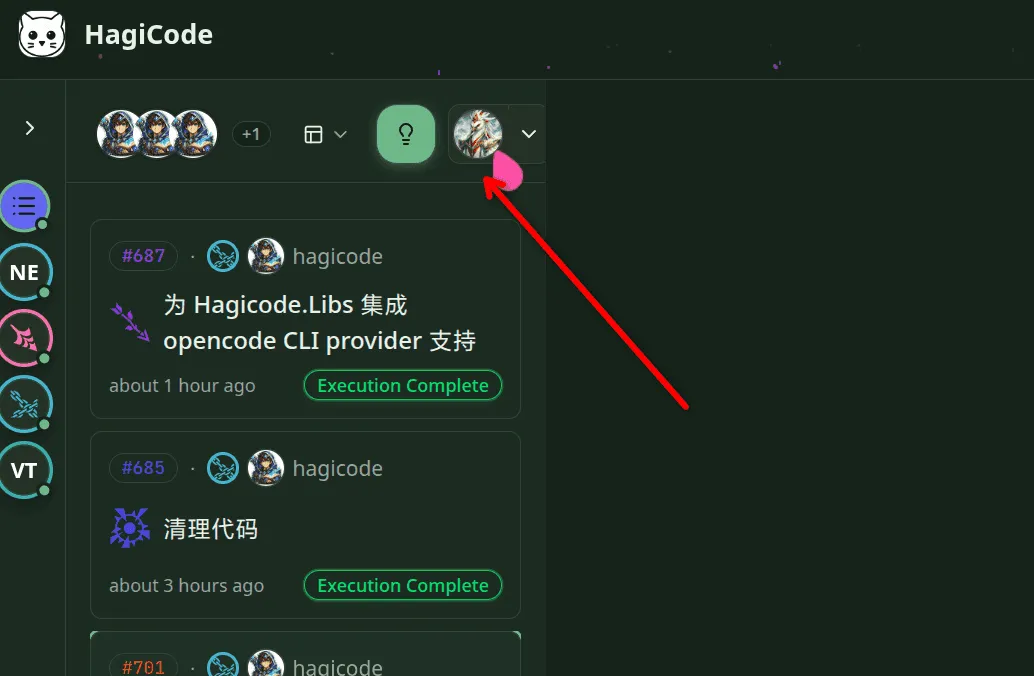
Figure: the top session controls are the current conversation entry point; the avatar dropdown opens the optional hero preset path.
Start with two details:
- The entry lives in the top controls instead of an older
Add Chatbutton flow. - Hero selection is optional. If you just want to start analyzing the repository, continue directly.
Step 2: Optionally choose a hero preset
Section titled “Step 2: Optionally choose a hero preset”If you want a different tone, model provider, or preset context, open the Presets panel and select a hero before you continue.
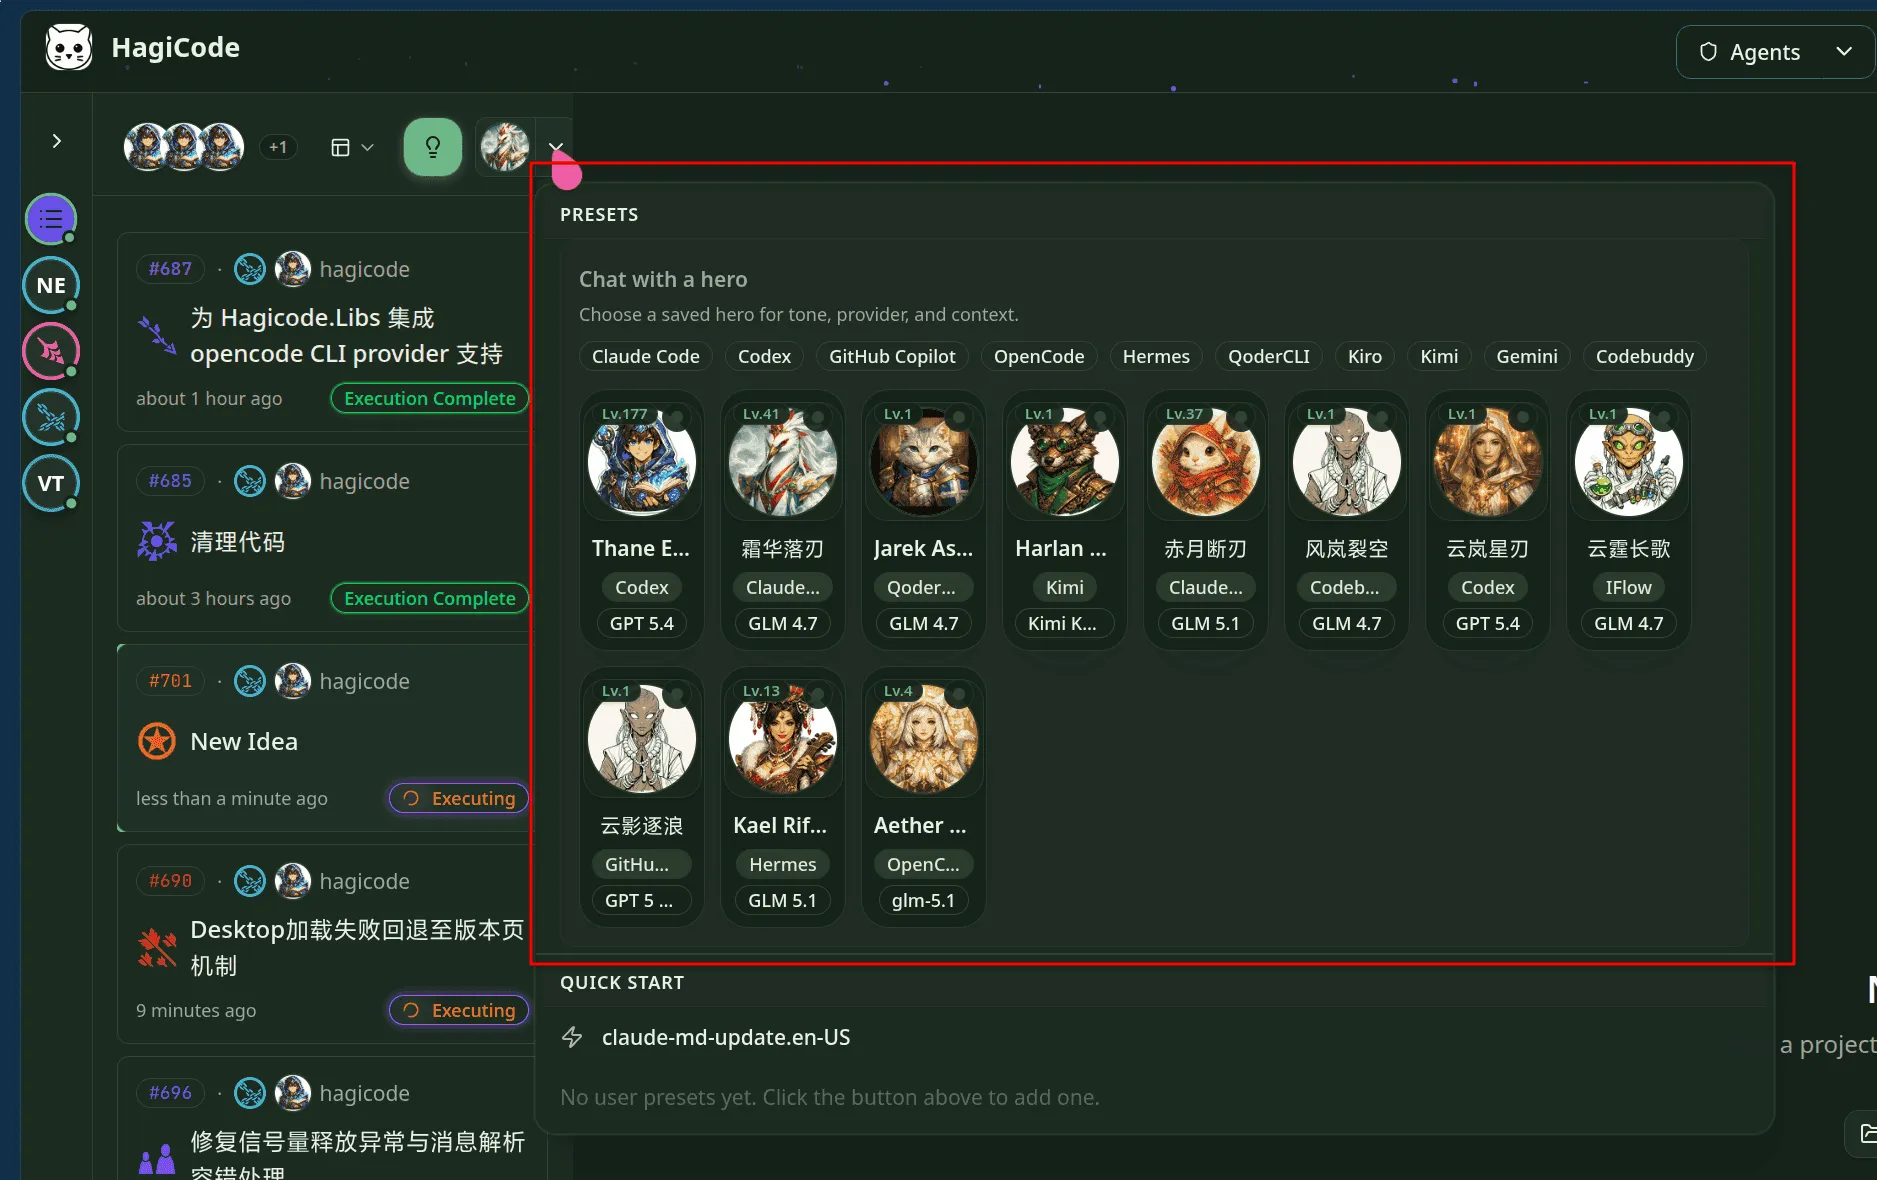
Figure: the Presets panel lists reusable hero presets; choosing one is optional and does not change the basic conversation flow.
Choosing a hero first is useful when:
- you already know which provider or style you want
- you keep different session roles for different tasks
- you want to compare multiple hero viewpoints on the same project
Step 3: Analyze the project in default read-only mode
Section titled “Step 3: Analyze the project in default read-only mode”After the session opens, read-only mode is the default safety mode. In the screenshot, the first prompt is 分析这个项目, and the AI responds by reading the repository and summarizing the project.
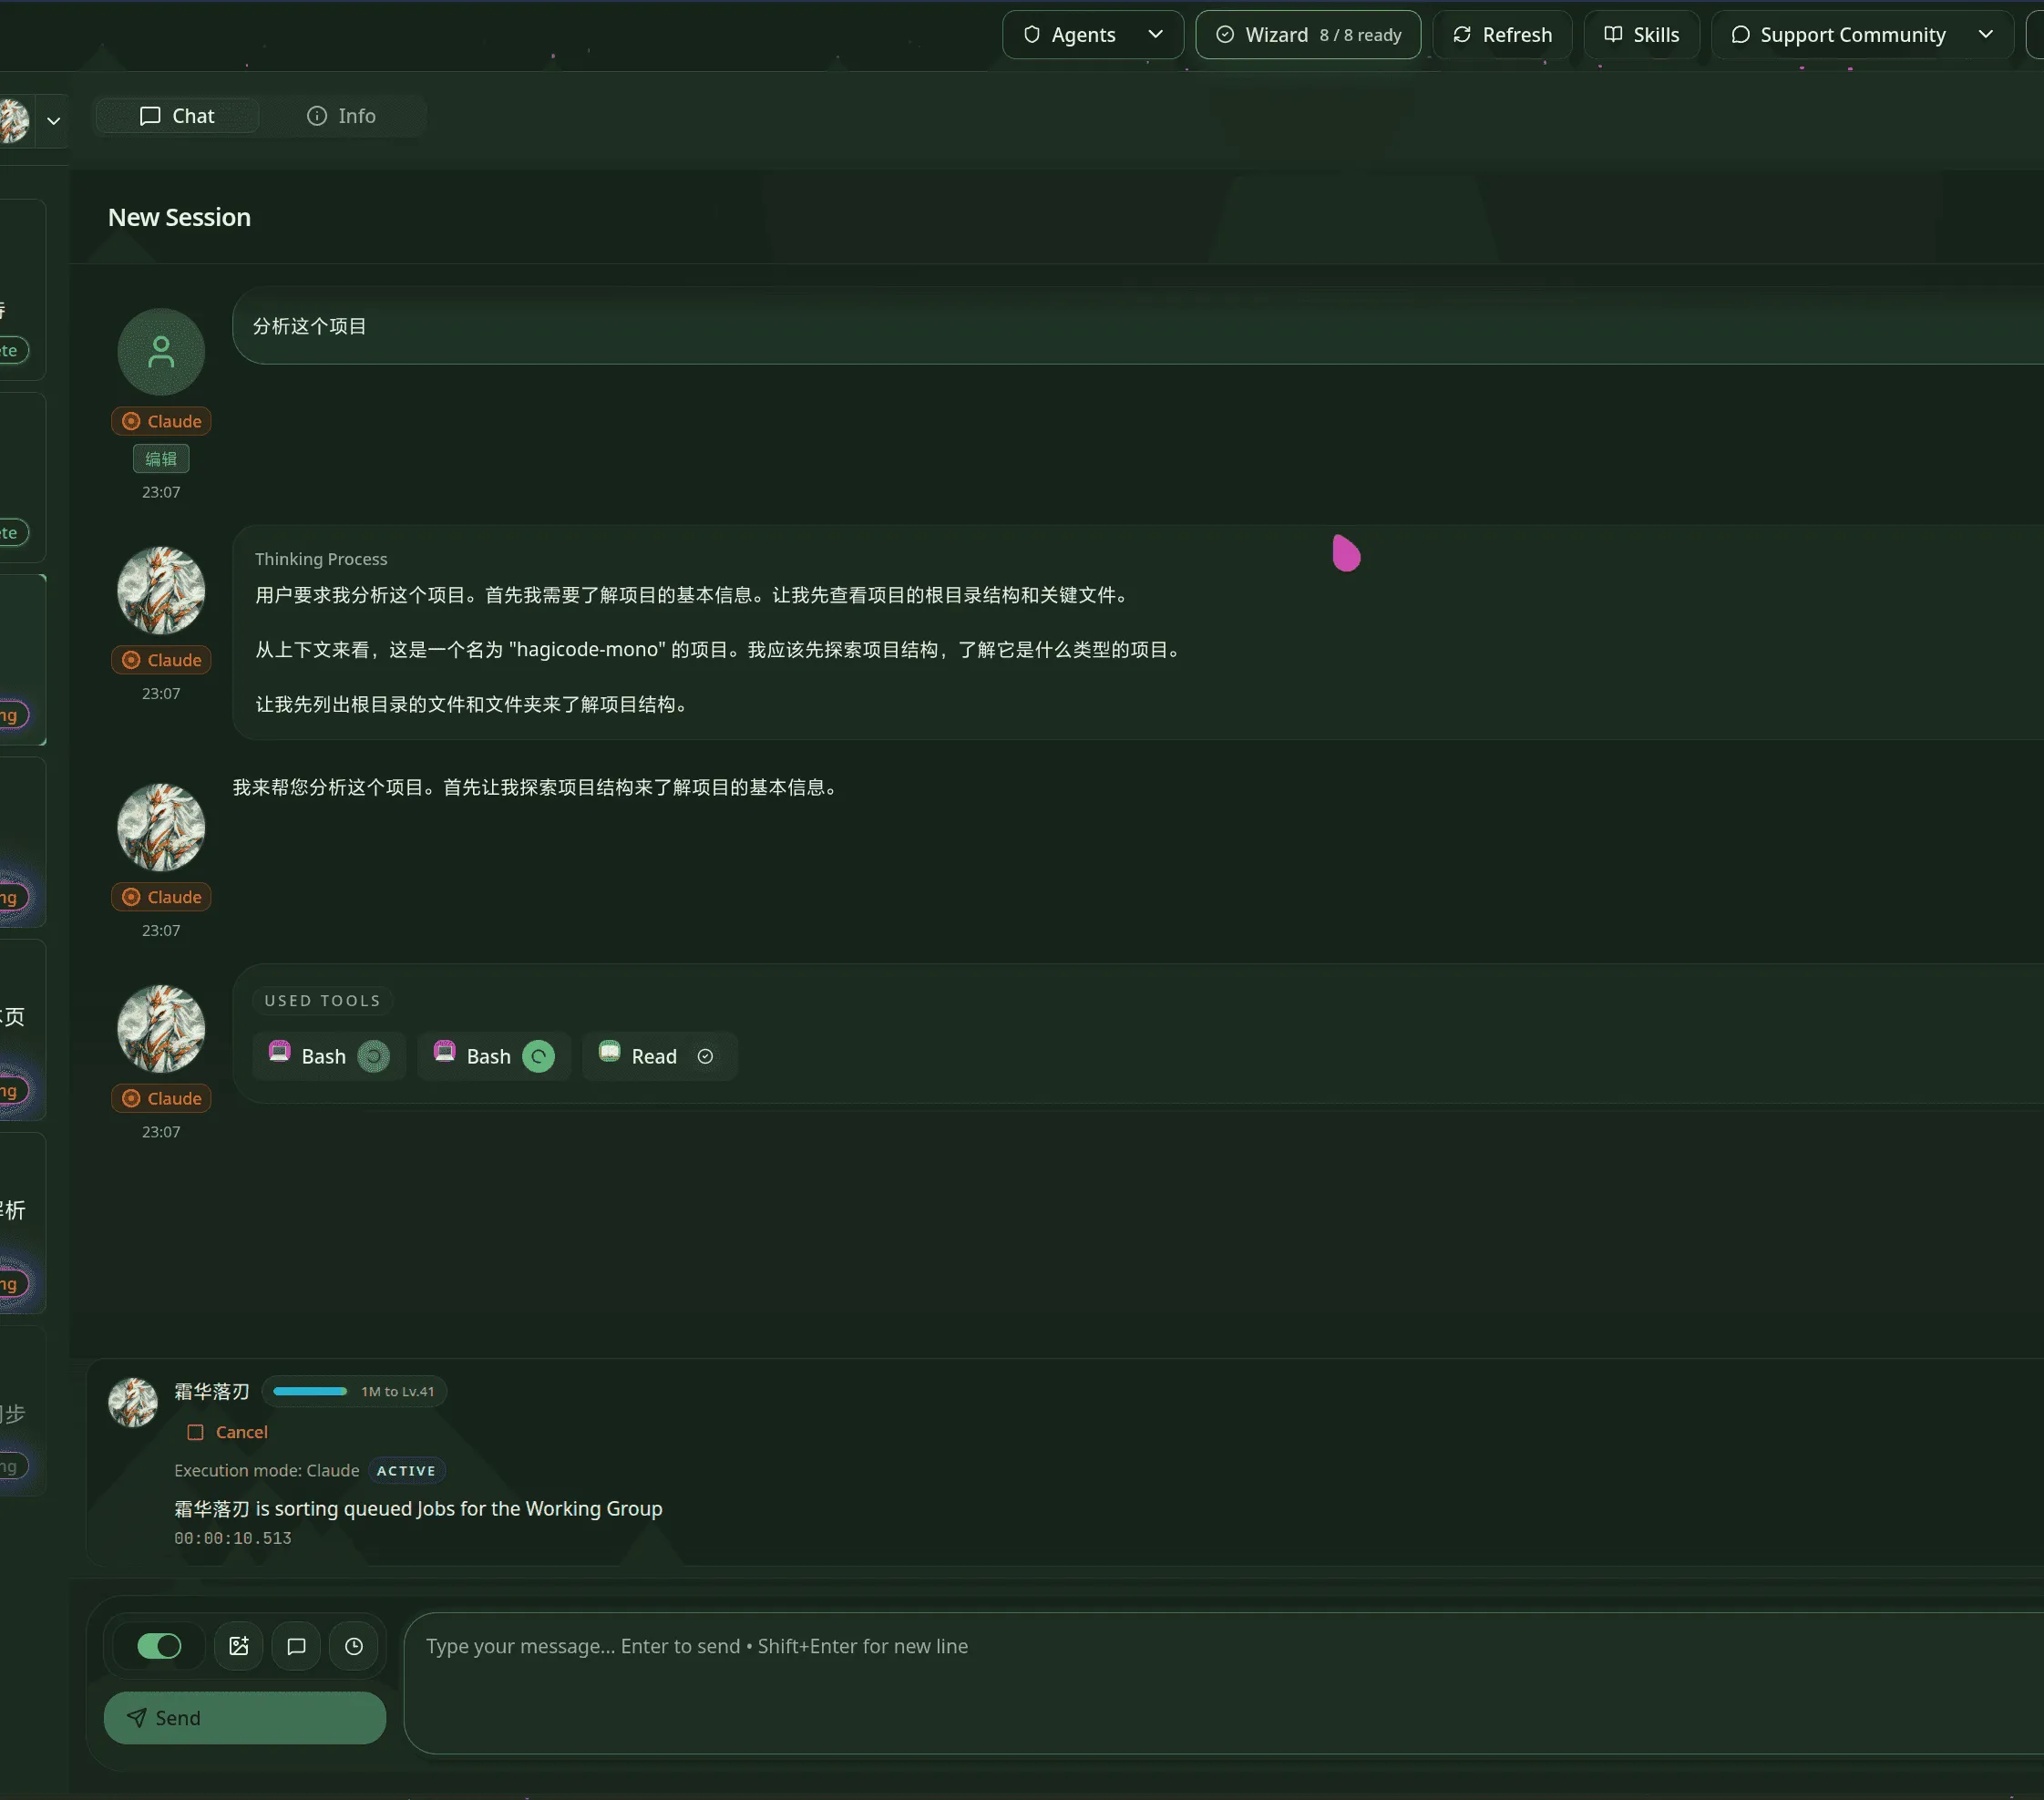
Figure: a conversation session starts in read-only mode, which is ideal for repository analysis, structure review, and context gathering.
In read-only mode, the AI can usually:
- read files and directory structure
- summarize the project purpose, key modules, and dependencies
- explain what a feature, file, or module is responsible for
In read-only mode, the AI does not directly:
- modify repository files
- execute edit-oriented changes before you switch modes
If your current goal is understanding the codebase, clarifying the problem, or preparing for later work, read-only mode is usually enough.
Step 4: Turn on edit mode and learn the toolbar
Section titled “Step 4: Turn on edit mode and learn the toolbar”When you are ready for direct changes, switch the session into edit mode. The current UI places the mode toggle and helper tools in the toolbar row above the send button.
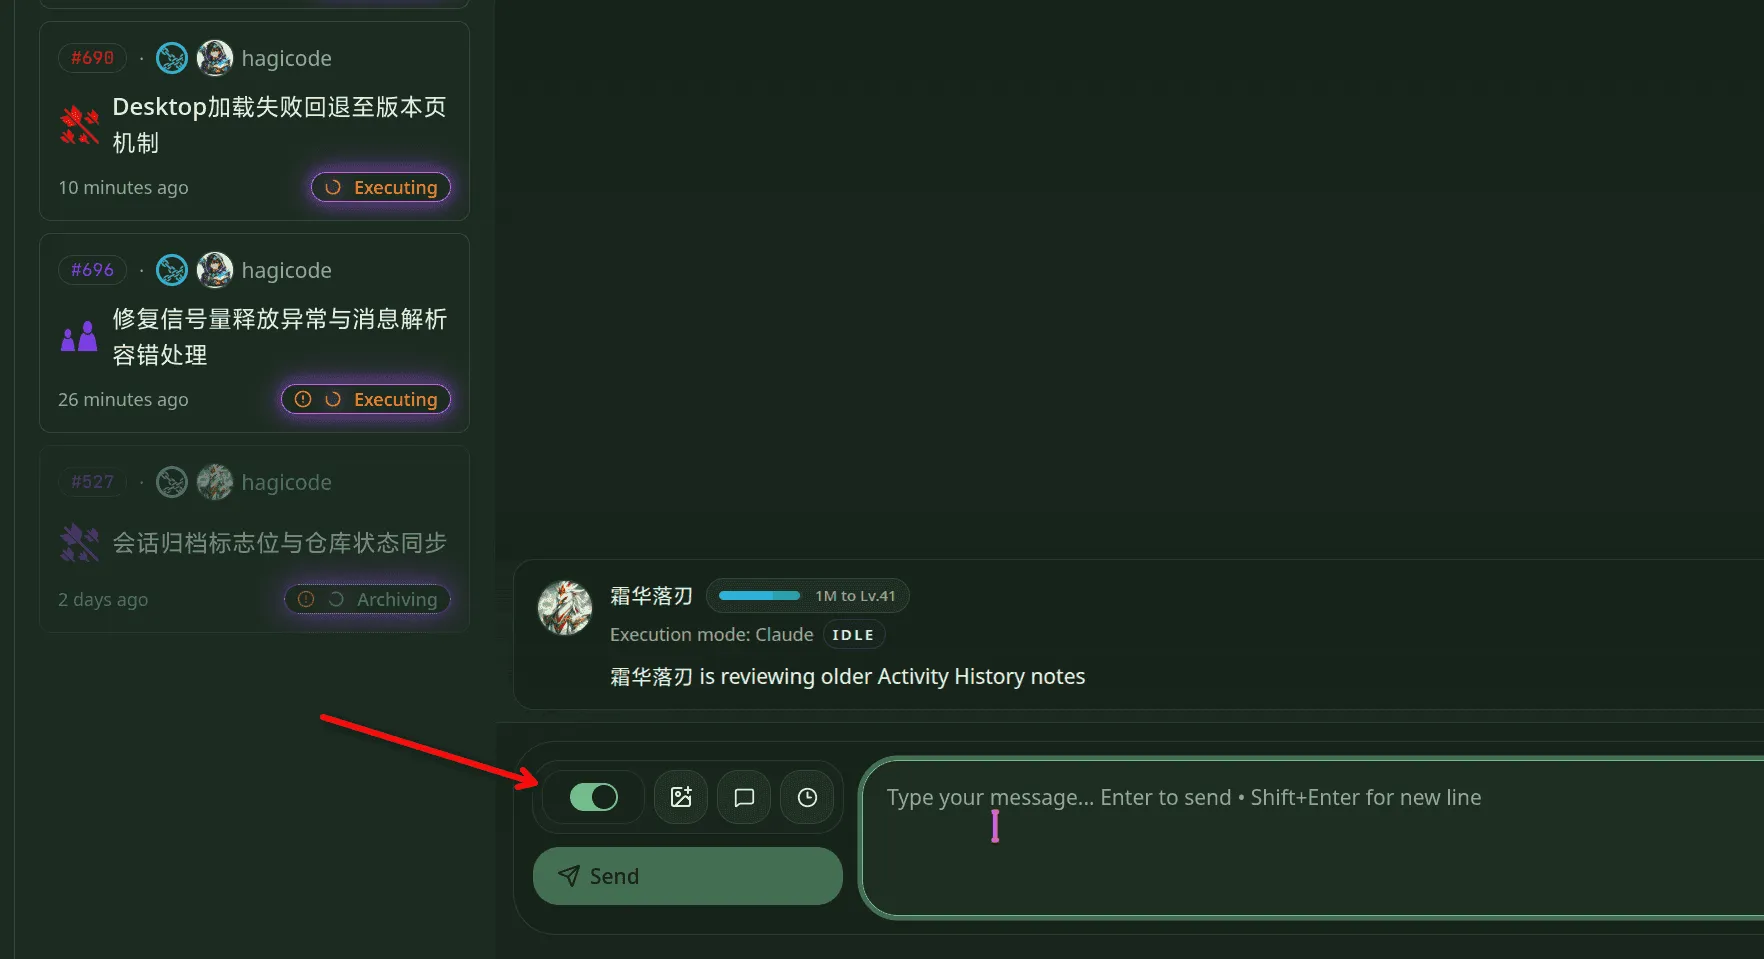
Figure: the toolbar row includes the mode toggle first, then image insertion, quick prompt, and history entry points.
Each control has a distinct purpose:
- Mode toggle: switches the session from default read-only mode into edit mode so the AI can make actual changes.
- Image button: attaches image context before the next message is sent.
- Quick prompt button: inserts reusable prompt shortcuts into the conversation.
- History button: opens earlier session context or related history.
The safer pattern is simple: confirm direction in read-only mode first, then turn on edit mode when you actually want execution.
Step 5: Attach an image before sending the next message
Section titled “Step 5: Attach an image before sending the next message”Conversation sessions support image attachment directly inside the current composer. The image is added as extra context above the input area, and the same composer still keeps the mode toggle and helper tools available.
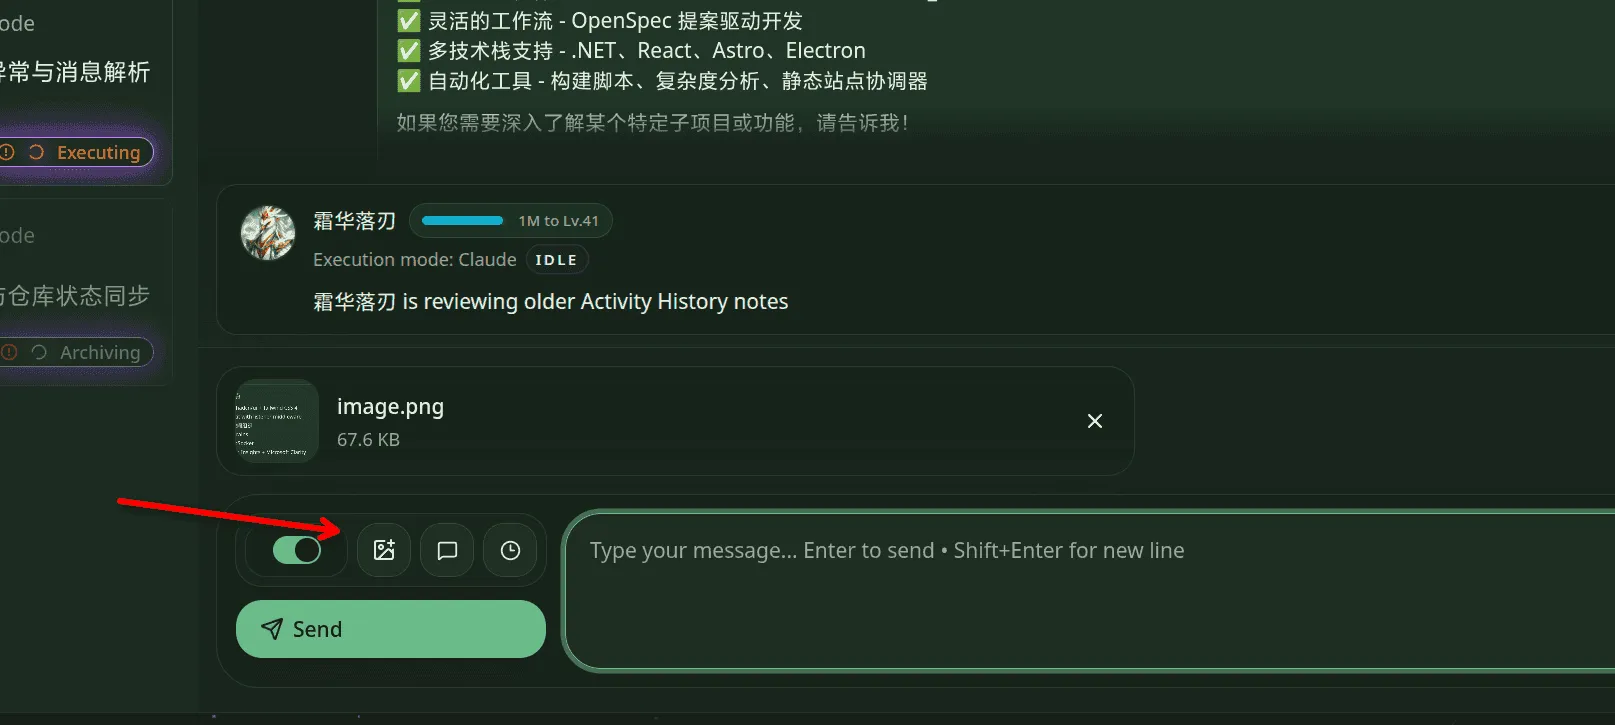
Figure: the image preview appears inside the composer area first, and you can still use the toggle and helper tools before sending.
This is useful when you want to:
- ask the AI to explain an interface screenshot
- attach an error screenshot or design mockup and add follow-up instructions
- enrich the next prompt with visual context before switching into execution
Typical use cases and progression
Section titled “Typical use cases and progression”Across the five screenshots, the recommended flow is:
- Enter the session quickly from the top controls.
- Pick a hero only when needed through the Presets panel.
- Start with read-only analysis using prompts such as
分析这个项目. - Escalate to edit mode deliberately when direct file changes become necessary.
- Add more context through images, quick prompts, and history before the next message.
If the task now needs planning, review, and archival discipline, continue with the proposal-session guide next.