Turn Ideas into Code with Proposal Sessions
Have a great idea but don’t know how to implement it? Proposal sessions are here to help! This guide will show you how to use proposal sessions (also known as idea sessions) to transform abstract ideas into executable code through OpenSpec’s structured workflow.
Prerequisites
Section titled “Prerequisites”Before using proposal sessions, make sure you have:
- Created a project and initialized OpenSpec (see Create Your First Project)
- Basic understanding of conversation sessions (see Create Conversation Session)
What is a Proposal Session?
Section titled “What is a Proposal Session?”A proposal session is a structured workflow that guides you through the process of transforming abstract ideas into executed code.
Proposal Session vs. Conversation Session
Section titled “Proposal Session vs. Conversation Session”Understanding the differences between them is crucial when choosing which session type to use:
| Feature | Conversation Session | Proposal Session |
|---|---|---|
| Working Method | Free conversation, ask and answer | Structured 9-stage lifecycle |
| Use Cases | Quick consultation, code explanation, simple modifications | Complex feature development, architecture design, multi-file changes |
| Planning Level | Minimal planning, direct execution | Complete proposals, tasks, design documents |
| Review Process | No formal review process | Three-tier annotation system (inline, file, global) |
| Iterative Optimization | Relies on you actively suggesting improvements | AI automatically optimizes descriptions, supports multi-round annotation adjustments |
| Traceability | Only retains conversation history | Generates complete OpenSpec documents (proposals, tasks, specifications) |
| History Utilization | Cannot effectively utilize historical experience | Uses “memory fragments” system, continuously learns and improves |
| Code Quality | Depends on single conversation quality | Higher quality through planning, review, and iteration |
| Team Collaboration | Difficult to share and collaborate | Planning documents can be shared, facilitating team review |
Why Are Proposal Sessions So Important?
Section titled “Why Are Proposal Sessions So Important?”1. Structured Thinking, Avoid Omissions
Proposal sessions force you to think through 9 stages:
- ✅ What exactly do I want to implement? (Stage 0-1: Clarify requirements)
- ✅ How to implement? (Stage 3: Generate detailed planning)
- ✅ Is the planning reasonable? (Stage 4: Review and annotate)
- ✅ Are you satisfied with the results? (Stage 6: Verify and adjust)
2. Multi-round Optimization, Continuous Improvement
Unlike the “one-time output” of conversation sessions, proposal sessions support:
- 🔄 AI automatically optimizes your vague descriptions
- 🔄 Precisely adjust planning through three-tier annotation system
- 🔄 Can continue optimizing in edit mode after execution
- 🔄 Multiple iterations until completely satisfied
3. Memory Fragments, Get Smarter with Use
After each proposal is archived, OpenSpec saves:
- 📦 Proposal document (what you want to implement)
- 📦 Task list (steps for implementation)
- 📦 Design document (why design this way)
- 📦 Specification files (technical specifications and constraints)
Next time when proposing, AI will:
- 🧠 Reference historical architecture decisions, maintain consistency
- 🧠 Reuse existing code patterns and specifications
- 🧠 Avoid re-implementing existing functionality
- 🧠 Understand the project’s technical debt and design trade-offs
4. Team Collaboration, Knowledge Inheritance
Generated OpenSpec documents can:
- 👥 Serve as reference descriptions for Pull Requests
- 👥 Help new members understand architecture decisions
- 👥 Record the thinking process of “why implement this way”
- 👥 Form the project’s technical knowledge base
When to Use Proposal Sessions?
Section titled “When to Use Proposal Sessions?”✅ Recommended scenarios for using proposal sessions:
- Need to create new functional modules
- Systematic changes involving multiple files
- Need architecture design and technology selection
- Want to retain detailed design documents
- Team projects, need traceable change records
- Implementation of complex business logic
❌ Recommended scenarios for using conversation sessions:
- Simple code question consultation
- Single-file bug fixes
- Quick code explanation or learning
- Temporary code snippet generation
The 9-Stage Lifecycle of Proposal Sessions
Section titled “The 9-Stage Lifecycle of Proposal Sessions”Proposal sessions follow the defined 9-stage lifecycle:
- Stage 0: Initialization - Define your idea
- Stage 1: Optimizing - AI refines your description
- Stage 2: Draft - Review and manual editing
- Stage 3: Generating - AI creates detailed planning
- Stage 4: Reviewing - Annotate and approve changes
- Stage 5: Executing - AI implements changes
- Stage 6: Execution Complete - Verify in IDE
- Stage 7: Archiving - Finalize proposal
- Stage 8: Archived - Lifecycle complete

Stage 0: Initialization
Section titled “Stage 0: Initialization”The first step is to create a new idea and provide an initial description.
Create New Idea
Section titled “Create New Idea”- On the session list dashboard, click the + New Idea button
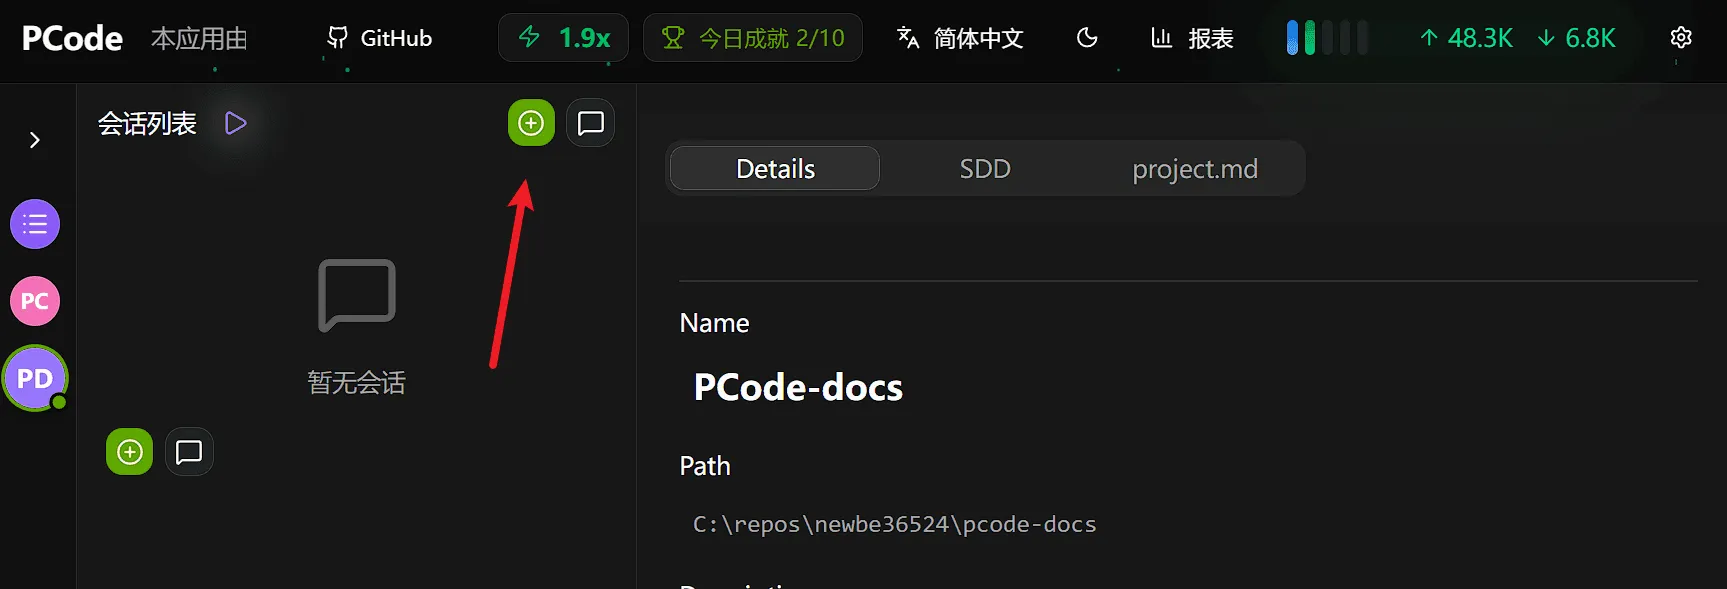
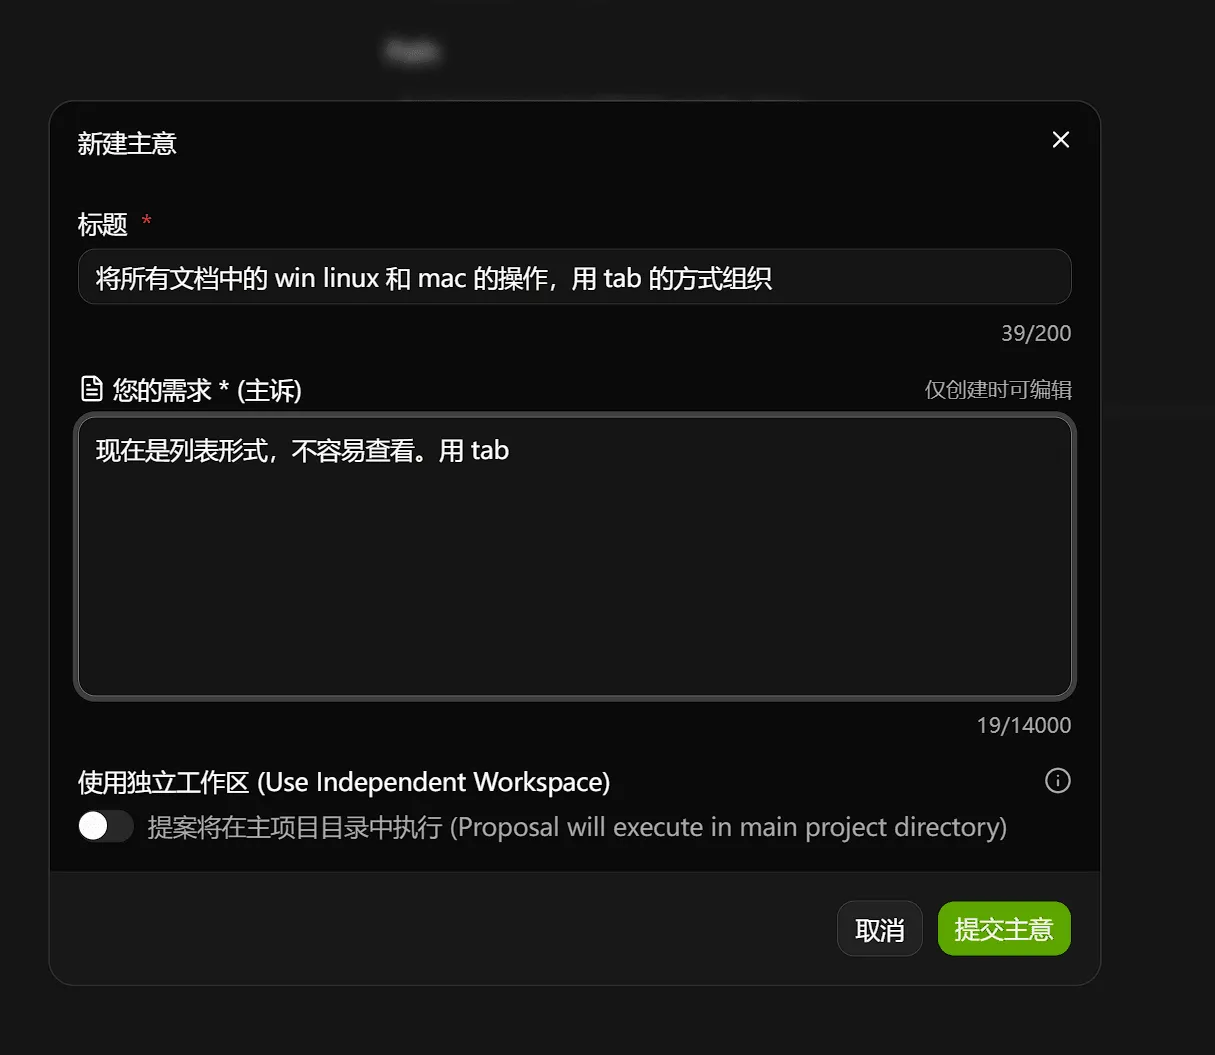
- Enter the proposal title
- Describe what you want to accomplish
Tips for Writing Good Initial Descriptions
Section titled “Tips for Writing Good Initial Descriptions”- Keep it simple: Ideas don’t need detailed planning, just describe the problem in simple language
- Colloquial expression: Just talk directly about your needs like talking to a developer
- Focus on problems: Explain the problems you encounter or want to improve
- Don’t worry about details: AI will automatically optimize the description based on the actual project situation in subsequent stages
Example (as shown in the screenshot):
Use list format instead of commas, easier to view, please use tabsSuch a simple description is sufficient! AI will automatically optimize it into a complete technical proposal.
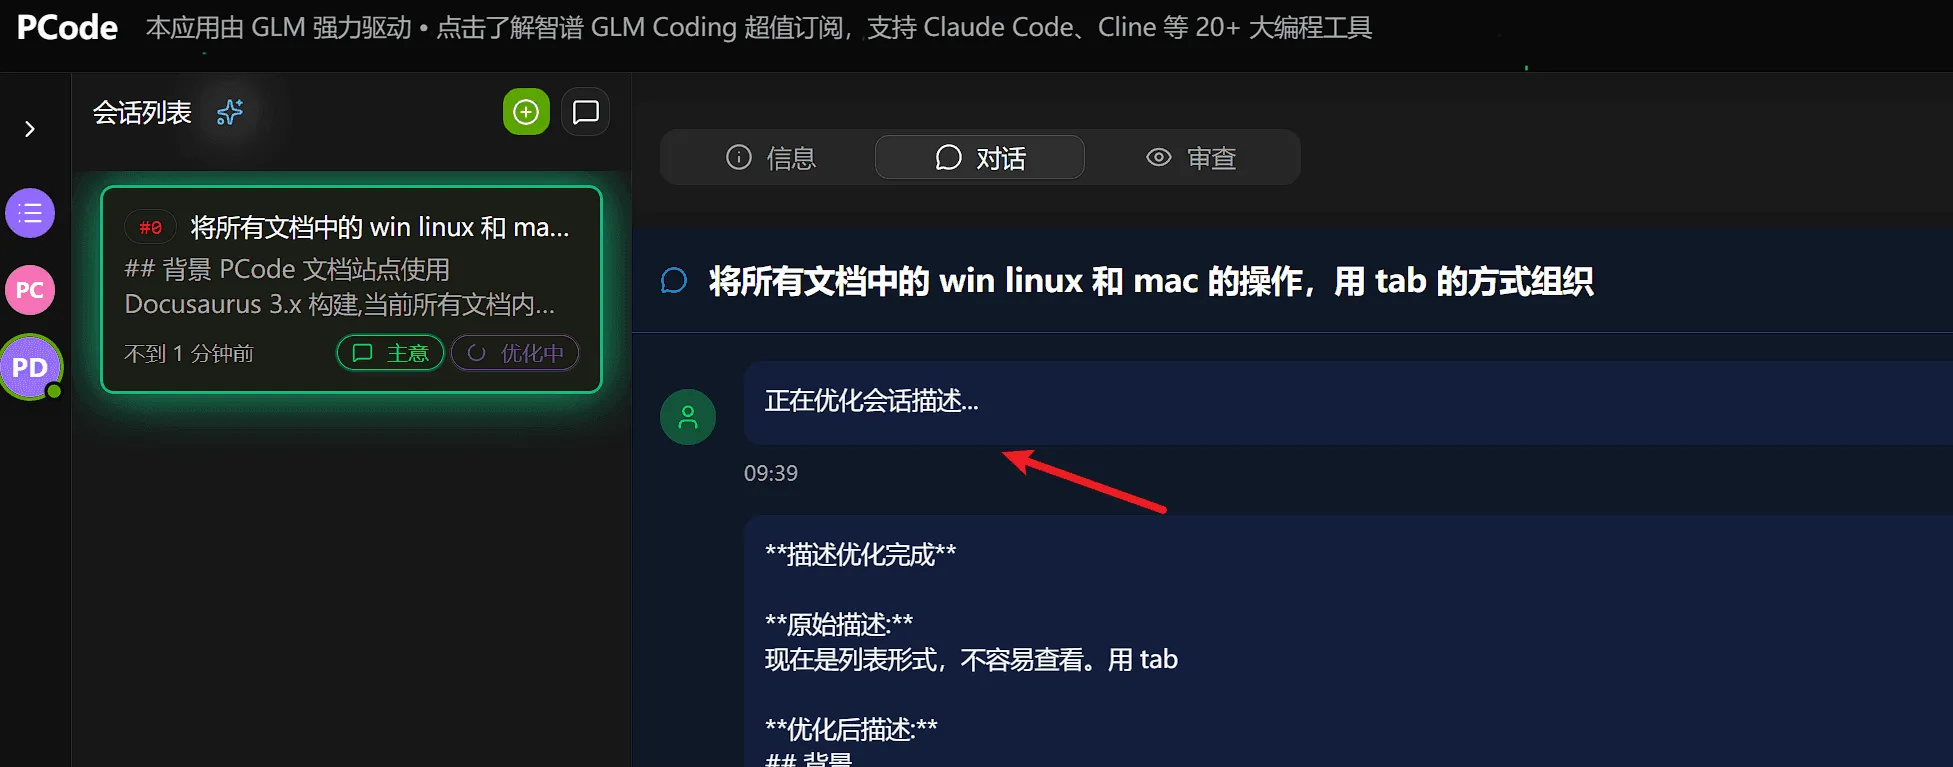
Stage 1: Optimizing (AI Automatic)
Section titled “Stage 1: Optimizing (AI Automatic)”After submitting the idea, AI will automatically process and refine it.
What Happens During Optimization
Section titled “What Happens During Optimization”AI analyzes your description and:
- Clarify vague requirements
- Suggest appropriate technologies
- Identify potential edge cases
- Generate proposal name
No User Action Required
Section titled “No User Action Required”This stage is fully automated. You will see a loading indicator while AI is working.
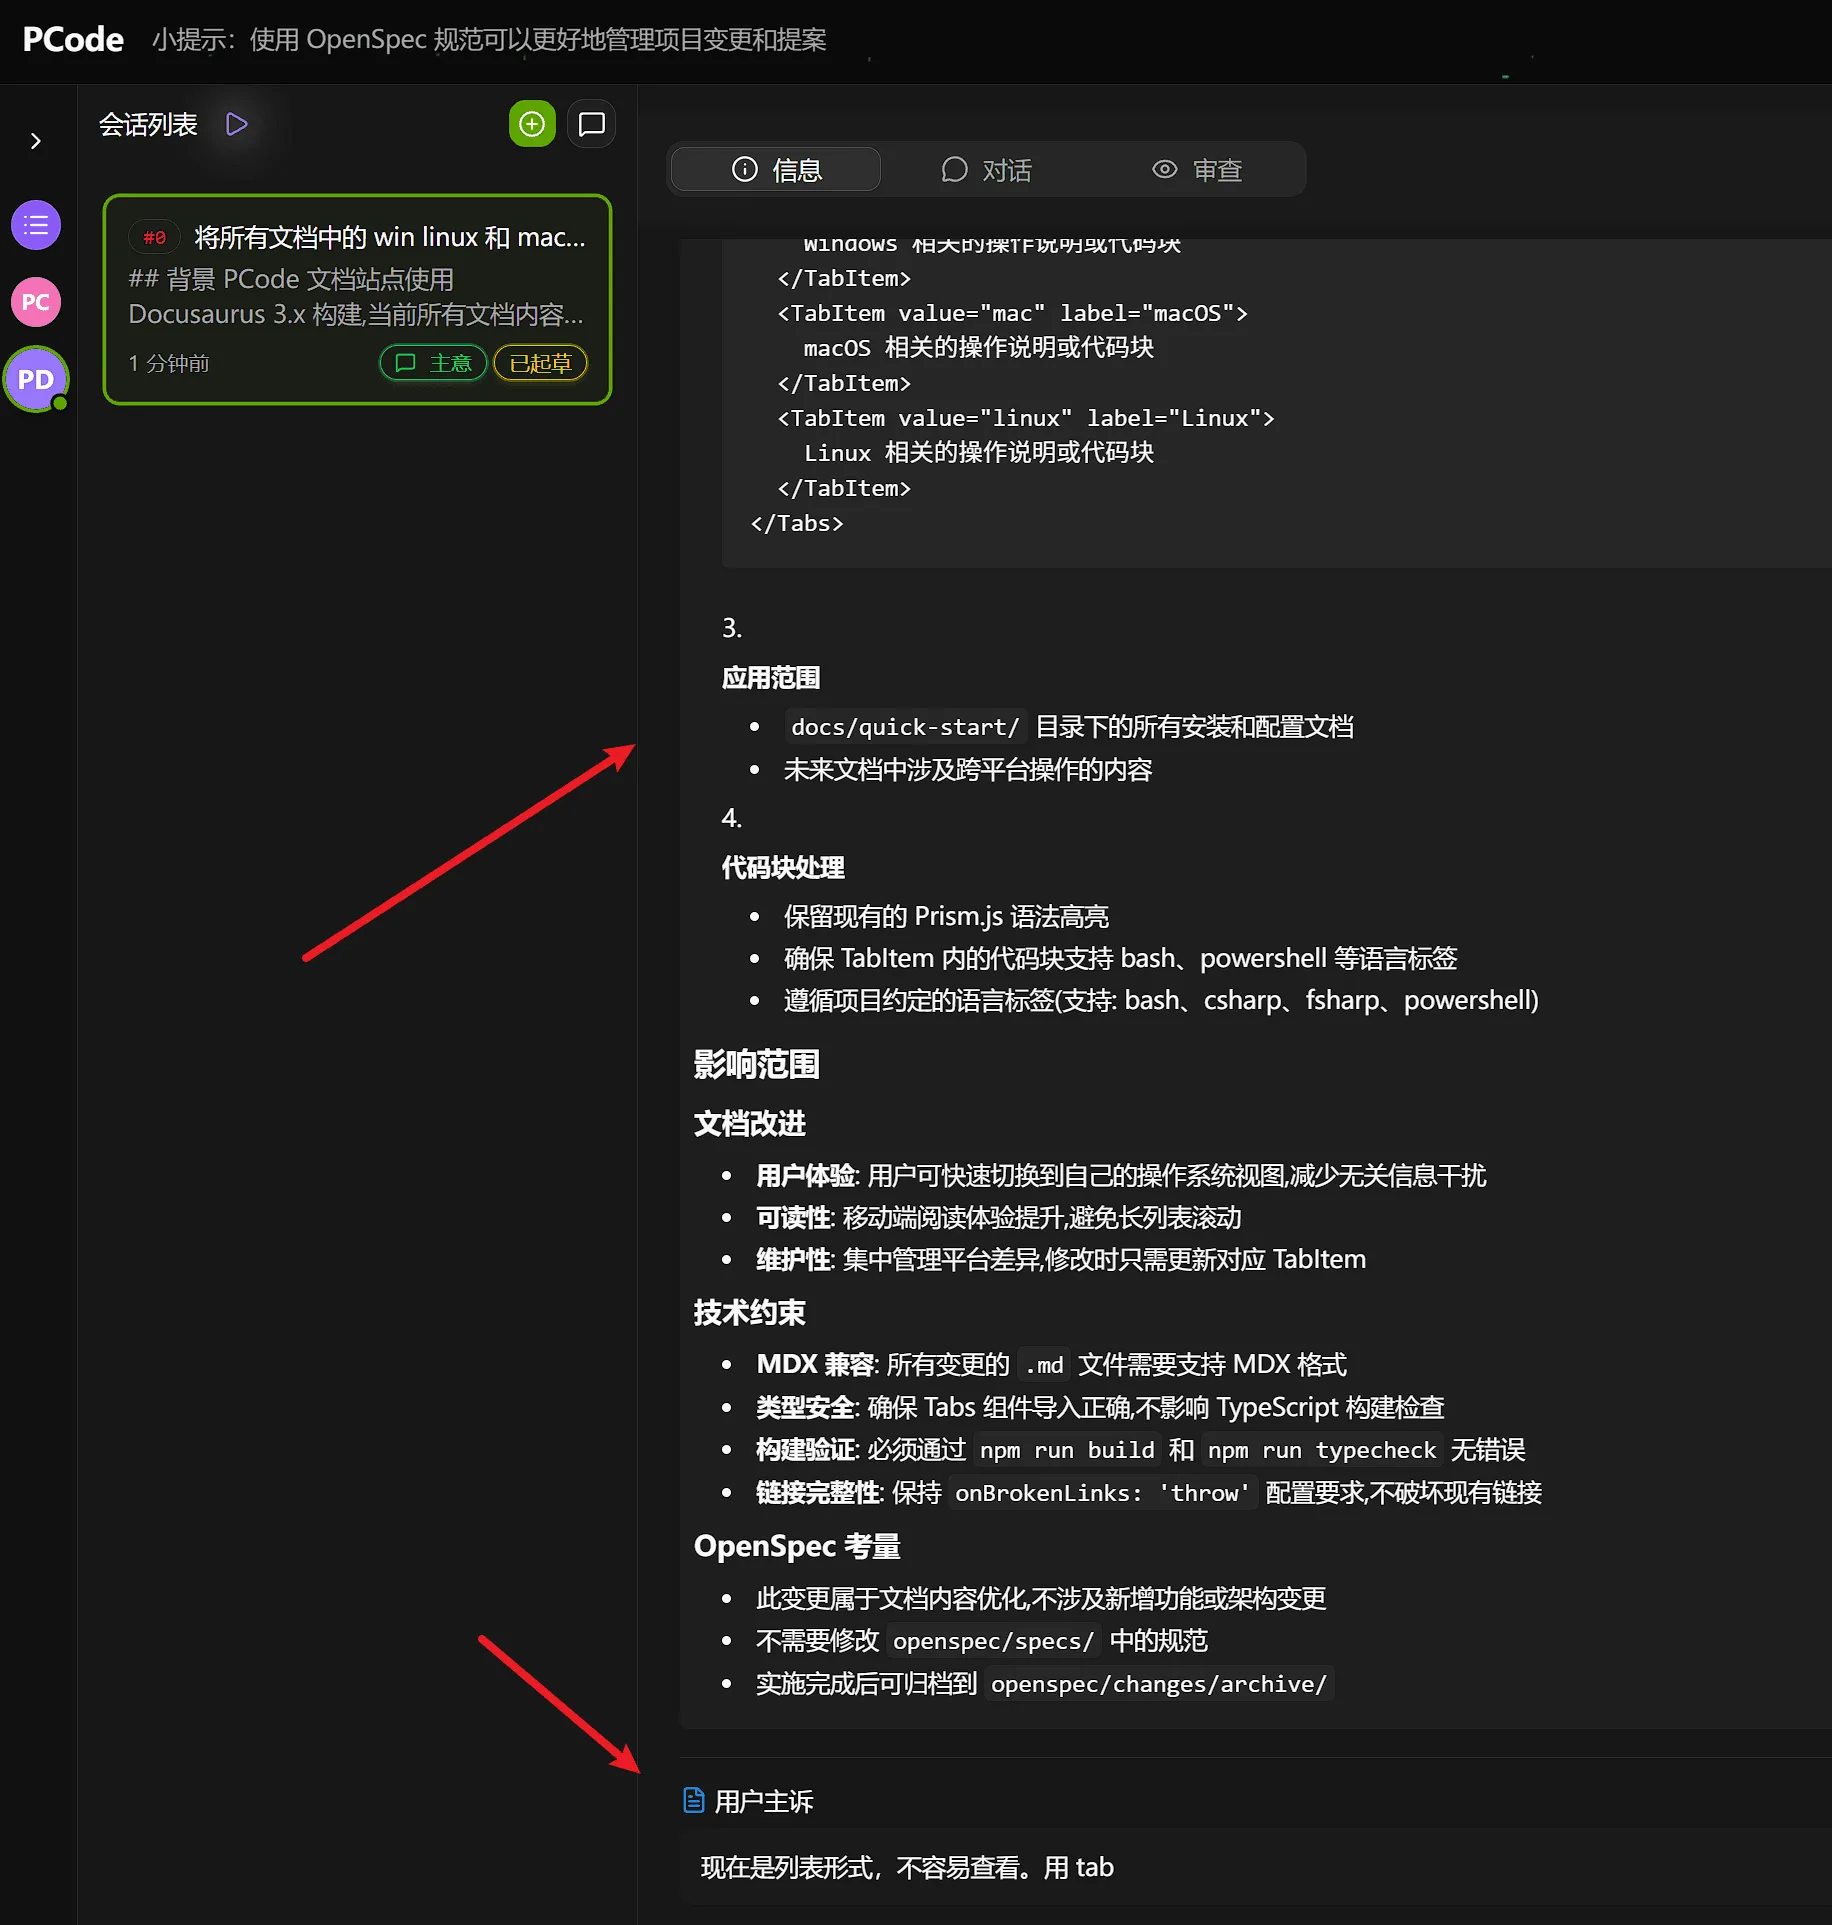
- Generated proposal name
- Refined description with additional details
- Identified scope and boundaries
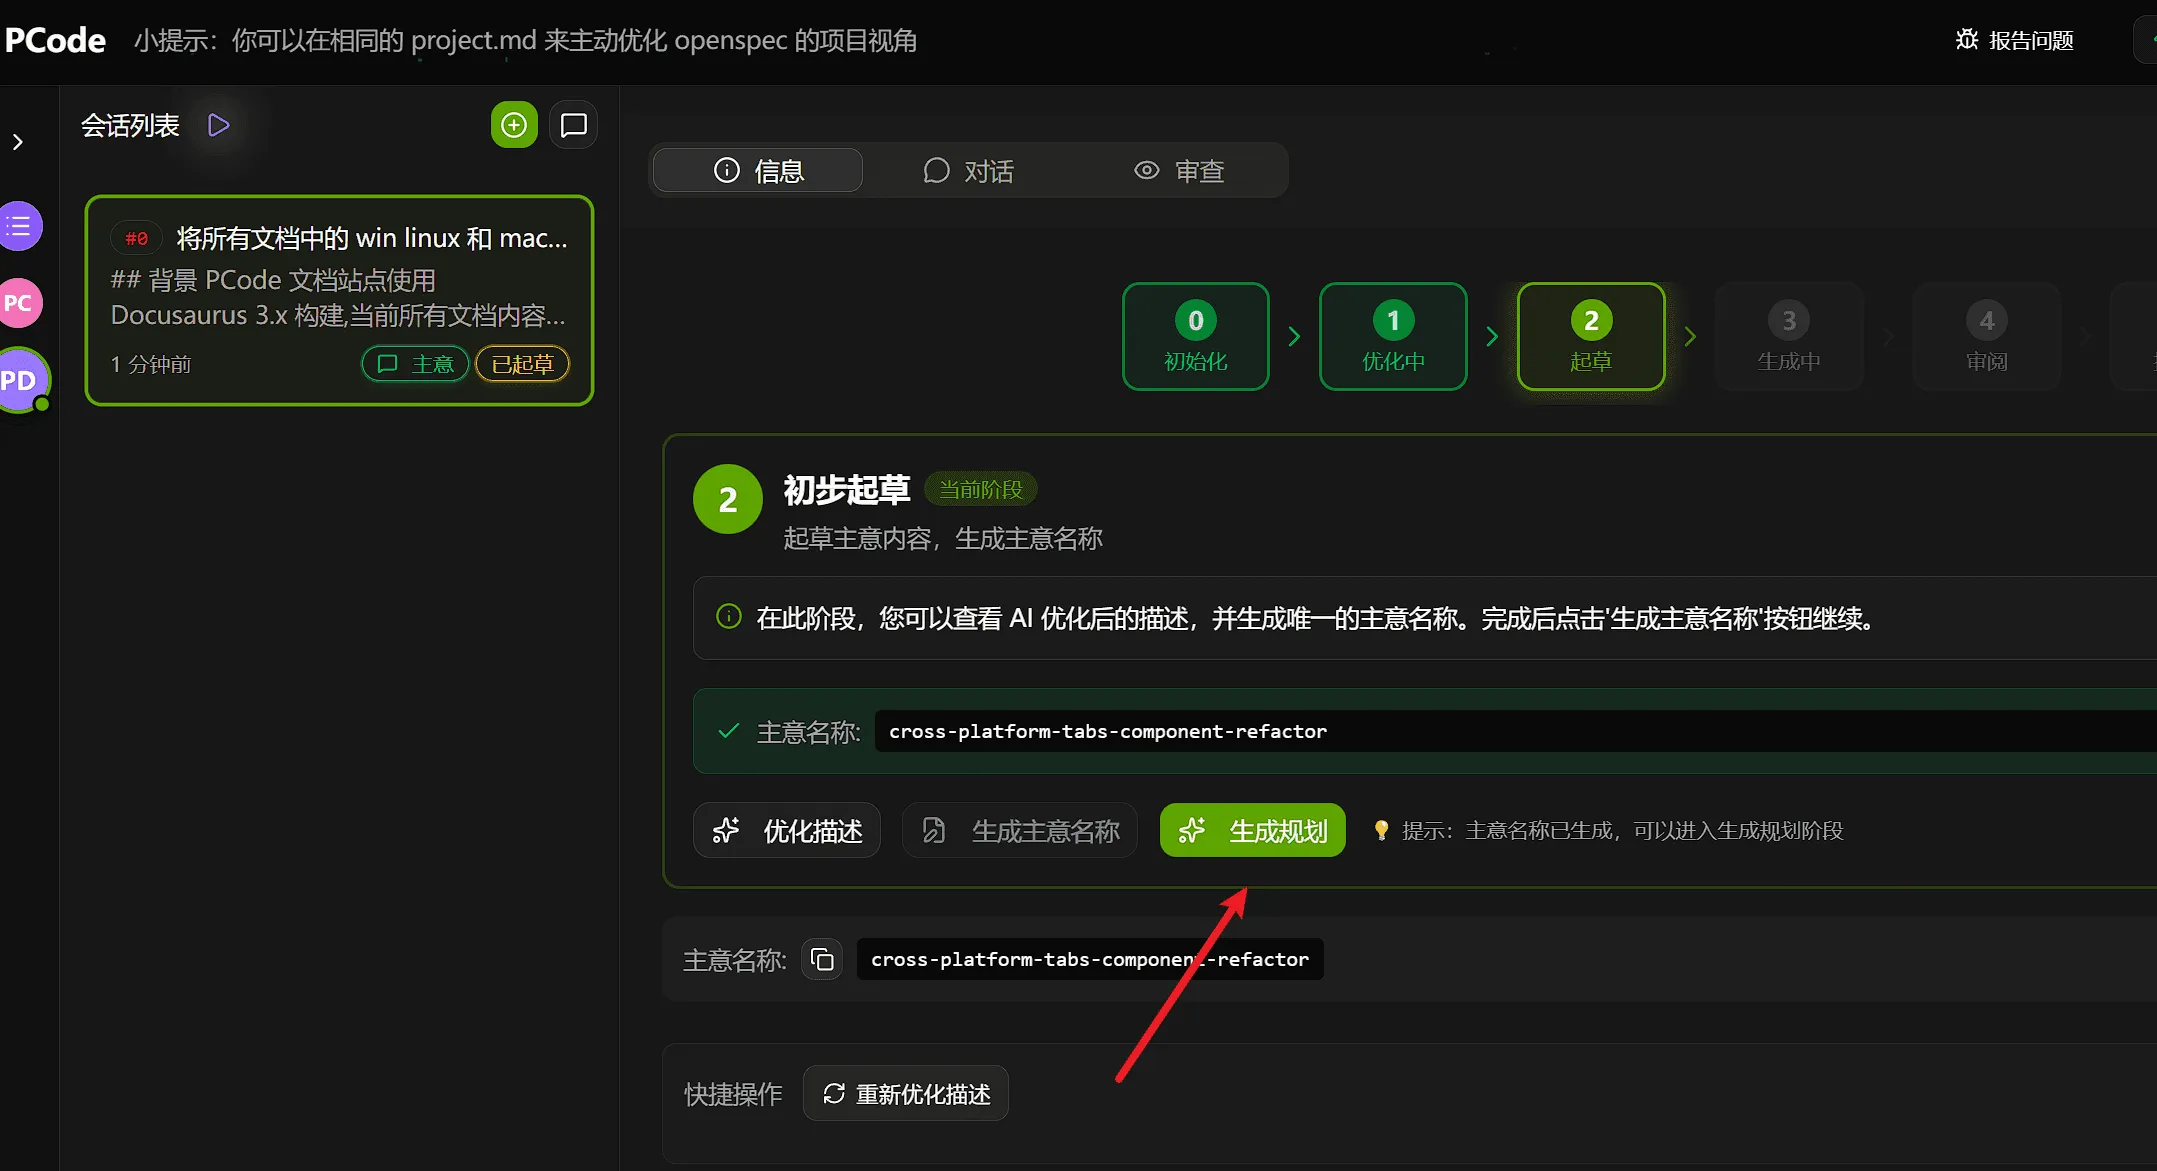
Stage 2: Draft (User Manual)
Section titled “Stage 2: Draft (User Manual)”Now you have the opportunity to review the proposal before planning begins.
You can click on the description content to edit, or directly click “Generate Plan” to continue to the next step.
Stage 3: Generating (AI Automatic)
Section titled “Stage 3: Generating (AI Automatic)”After approving the draft, AI will automatically generate detailed implementation planning.
Plan Generation Process
Section titled “Plan Generation Process”After clicking the Generate Plan button, the system will show the automatically generated status:
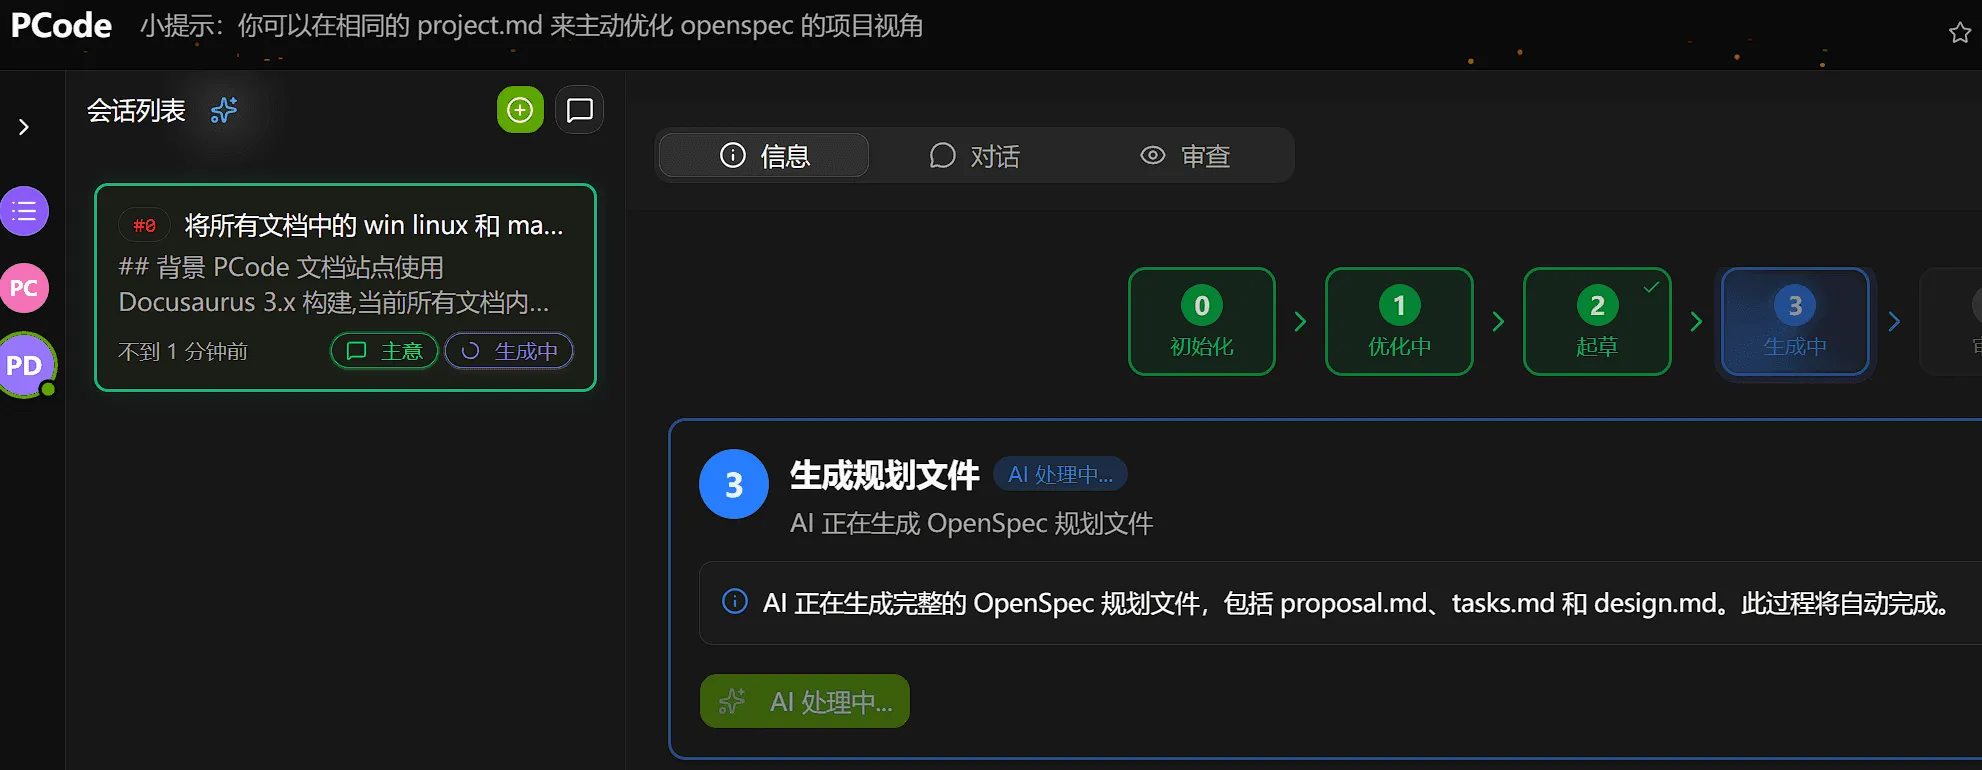
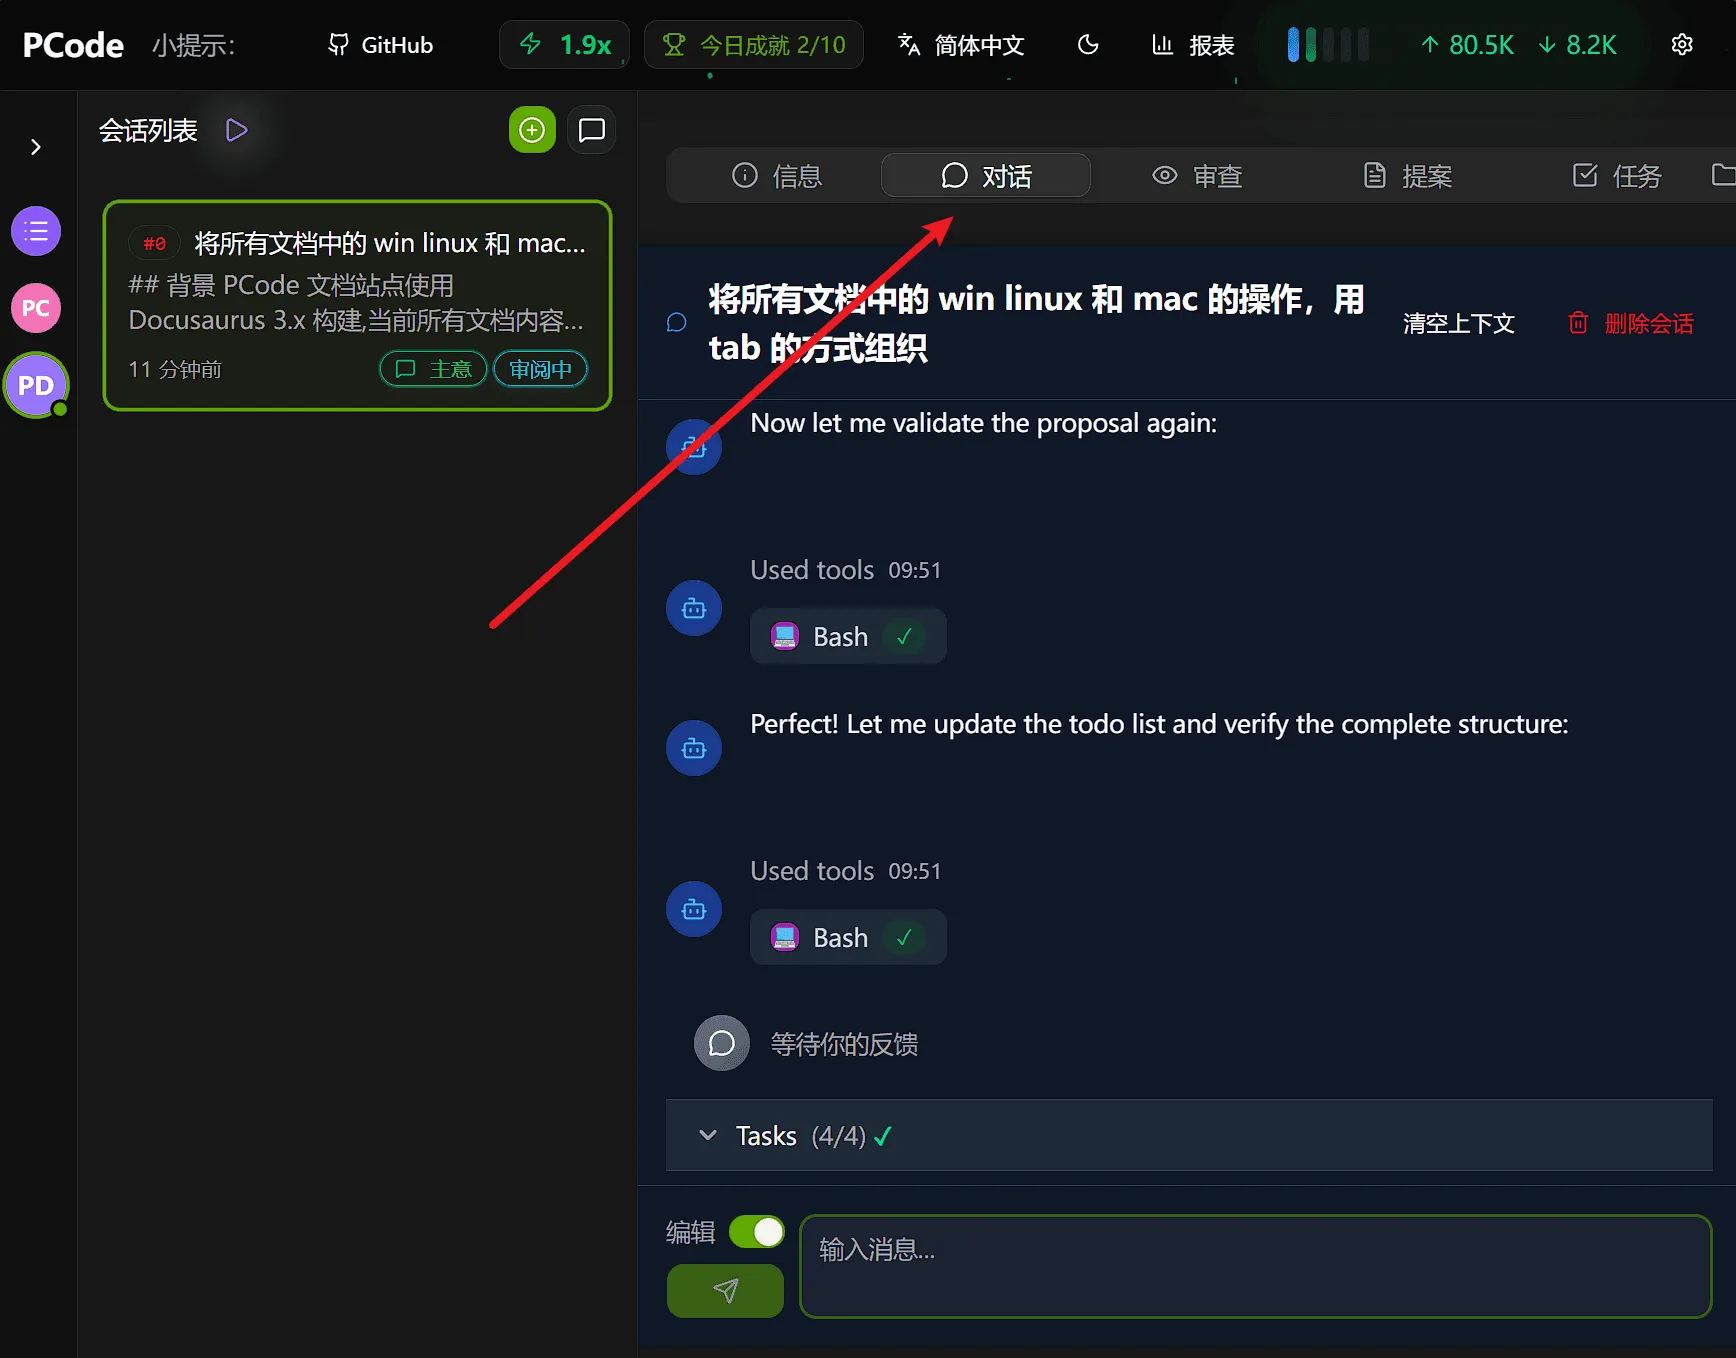
You can view the generation progress in real-time in the conversation tab:
Generated Document Types
Section titled “Generated Document Types”AI creates multiple documents:
| Document | Type | Description |
|---|---|---|
| Proposal | Main | Describes the functionality and goals to be implemented |
| Tasks | Main | Specific implementation task list |
| Design | Optional | Architecture design document (if needed) |
| Specification | Reference | OpenSpec-related specification files, saved as memory fragments |
Annotation focus: You usually only need to annotate the Proposal, Tasks, and Design sections. The specification files (specs) section usually doesn’t need attention.
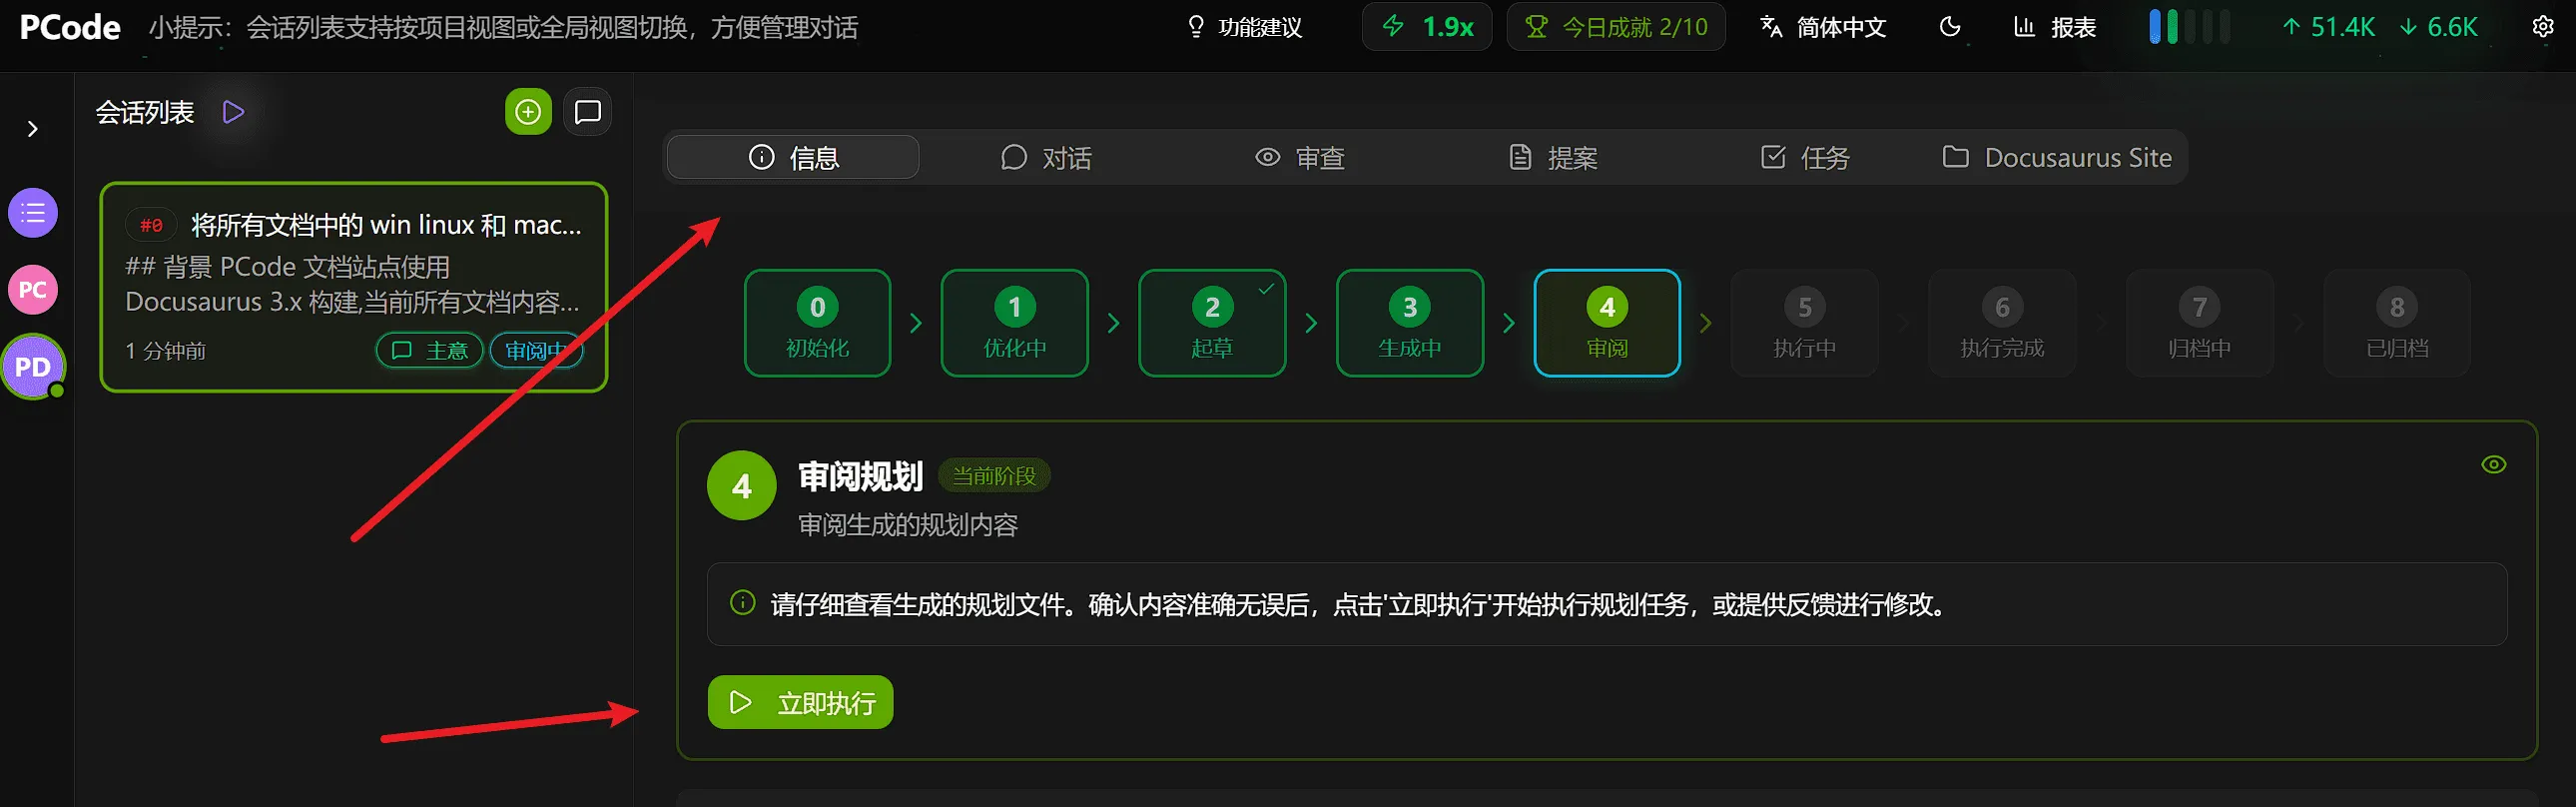
Stage 4: Reviewing (User Manual)
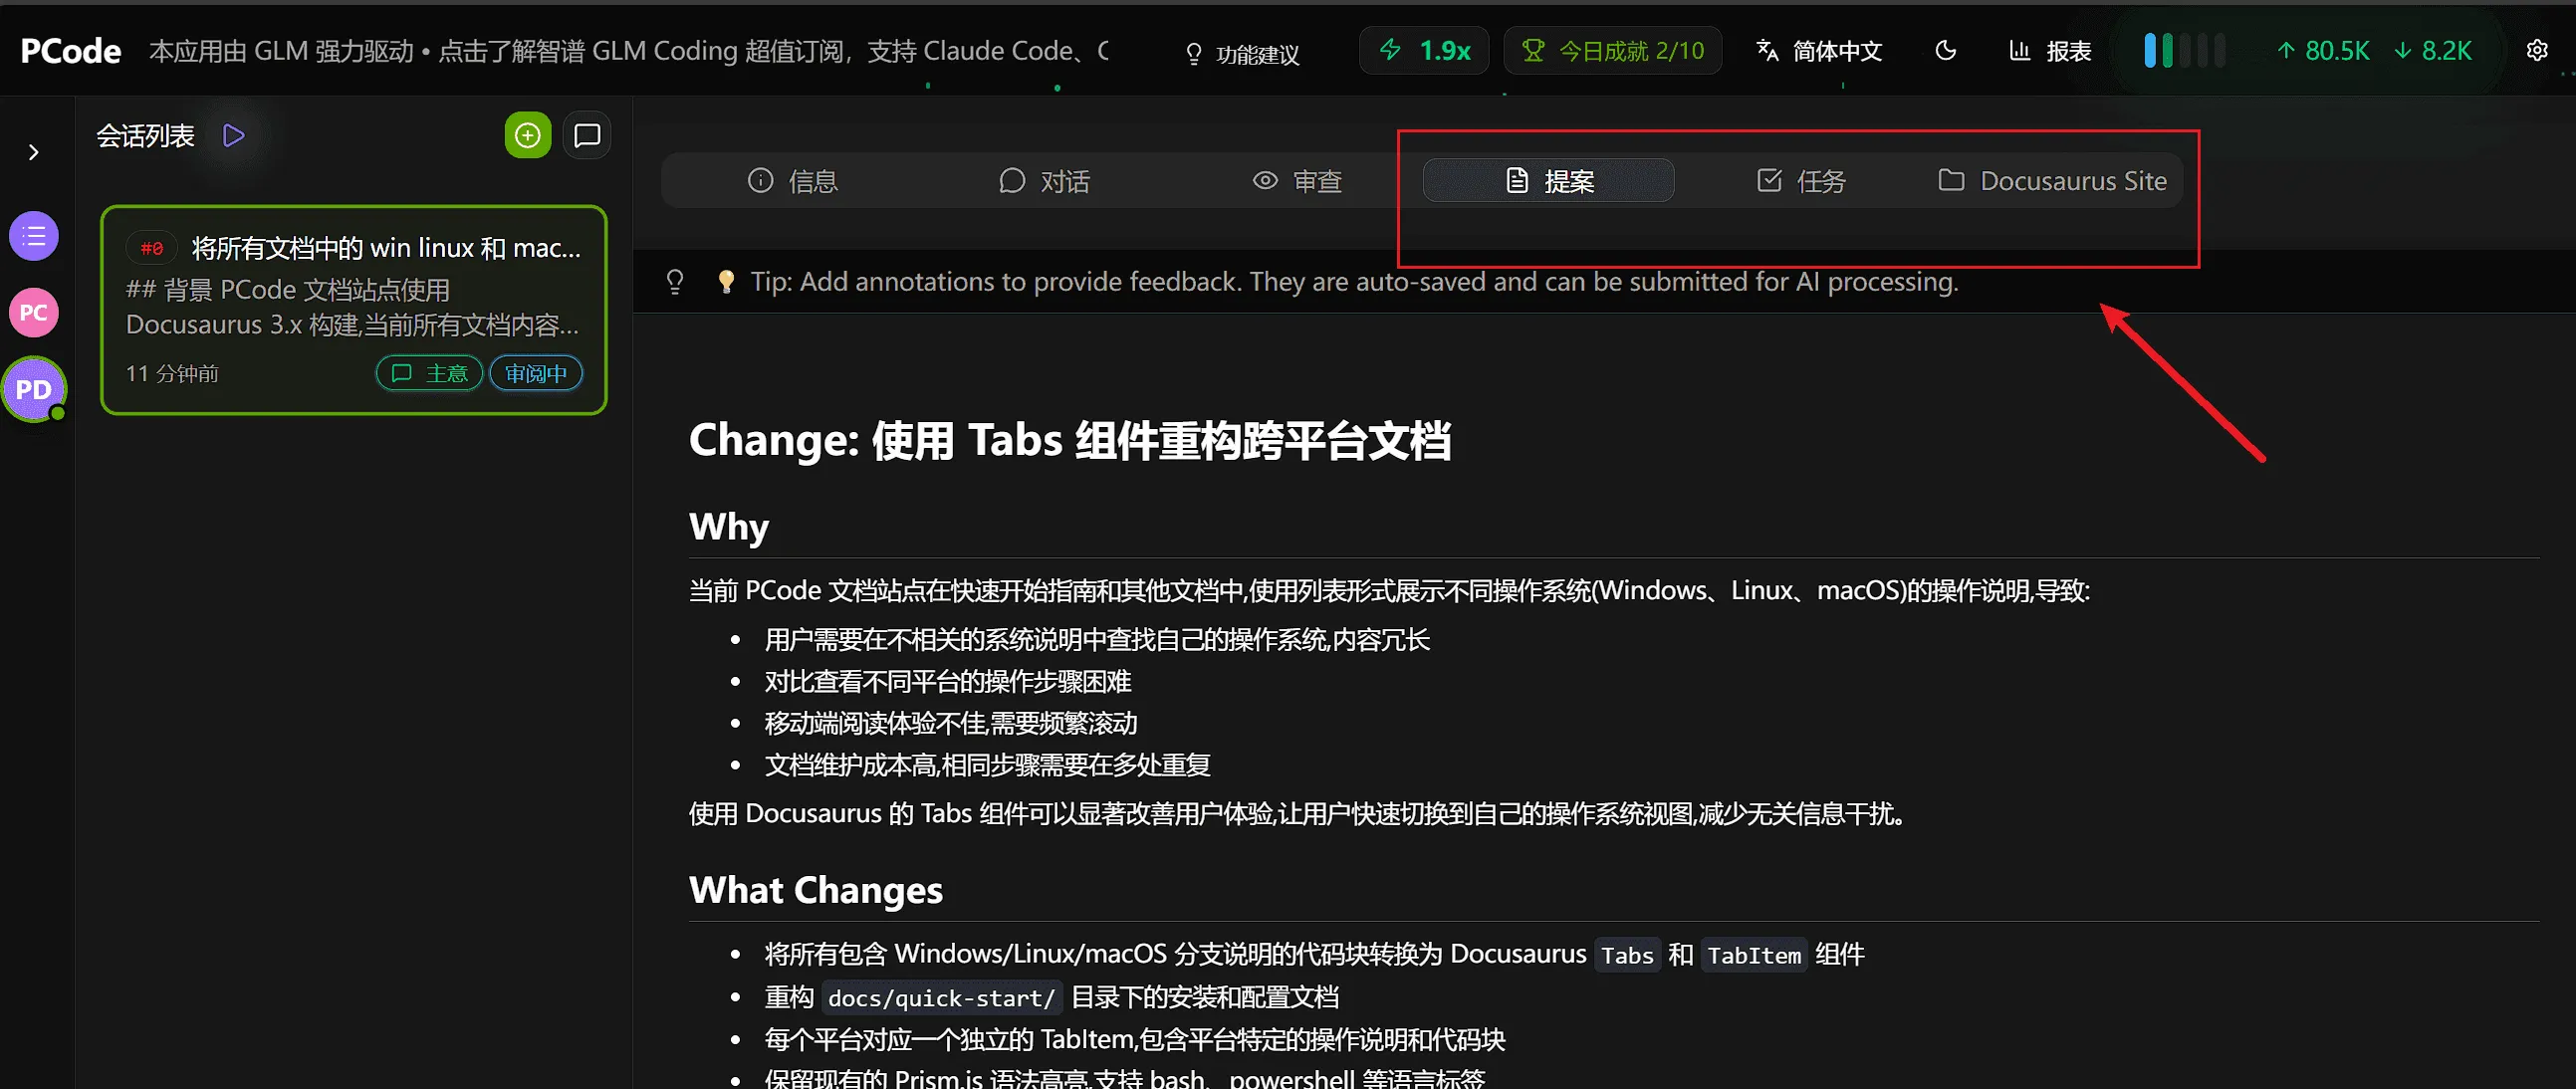
Section titled “Stage 4: Reviewing (User Manual)”This is the most critical stage, where you review, annotate, and approve the implementation plan.
Current Stage Display:
Section titled “Current Stage Display:”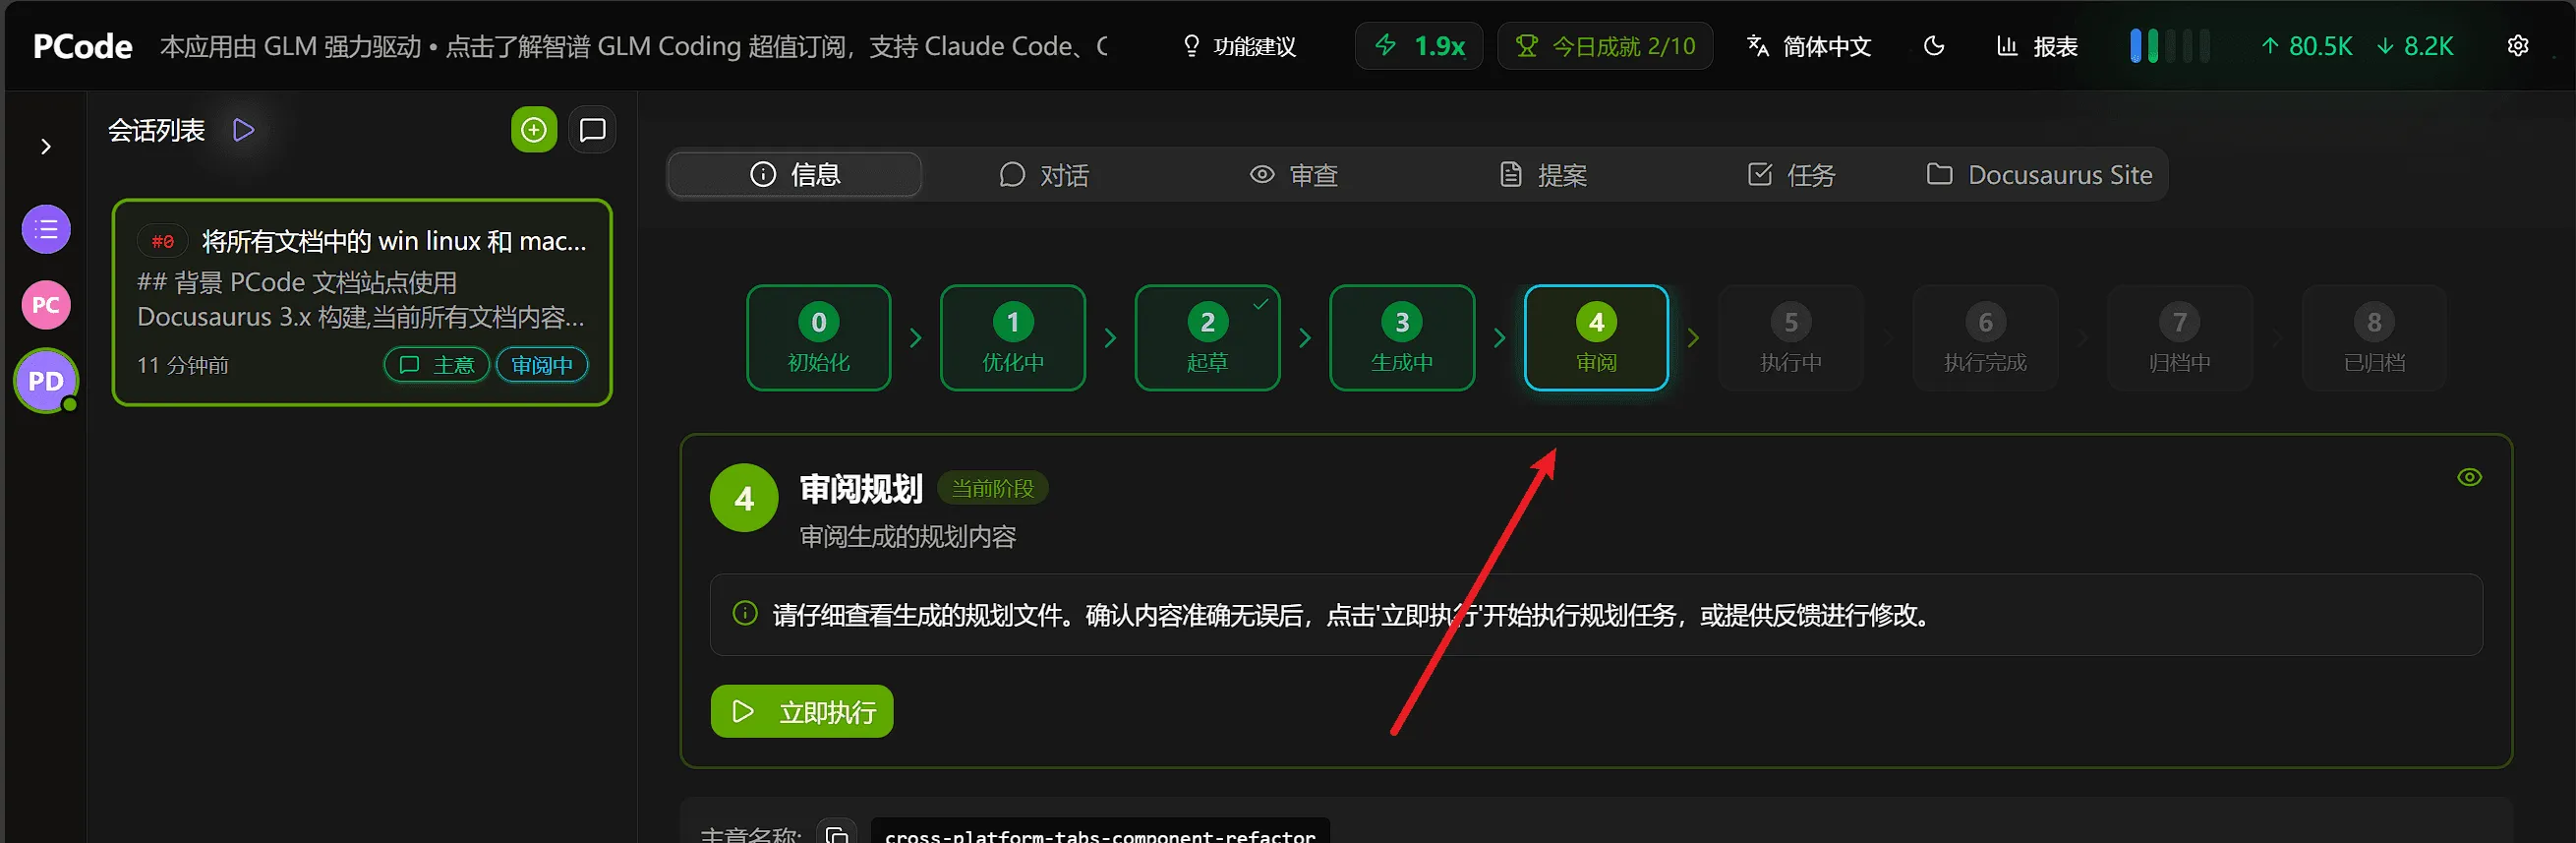
You can click on the tabs to view the generated files and make annotations:
Three-tier Annotation System
Section titled “Three-tier Annotation System”Hagicode provides three levels of annotations to provide feedback.
1. Inline Annotations
Section titled “1. Inline Annotations”Highlight specific text and add comments:
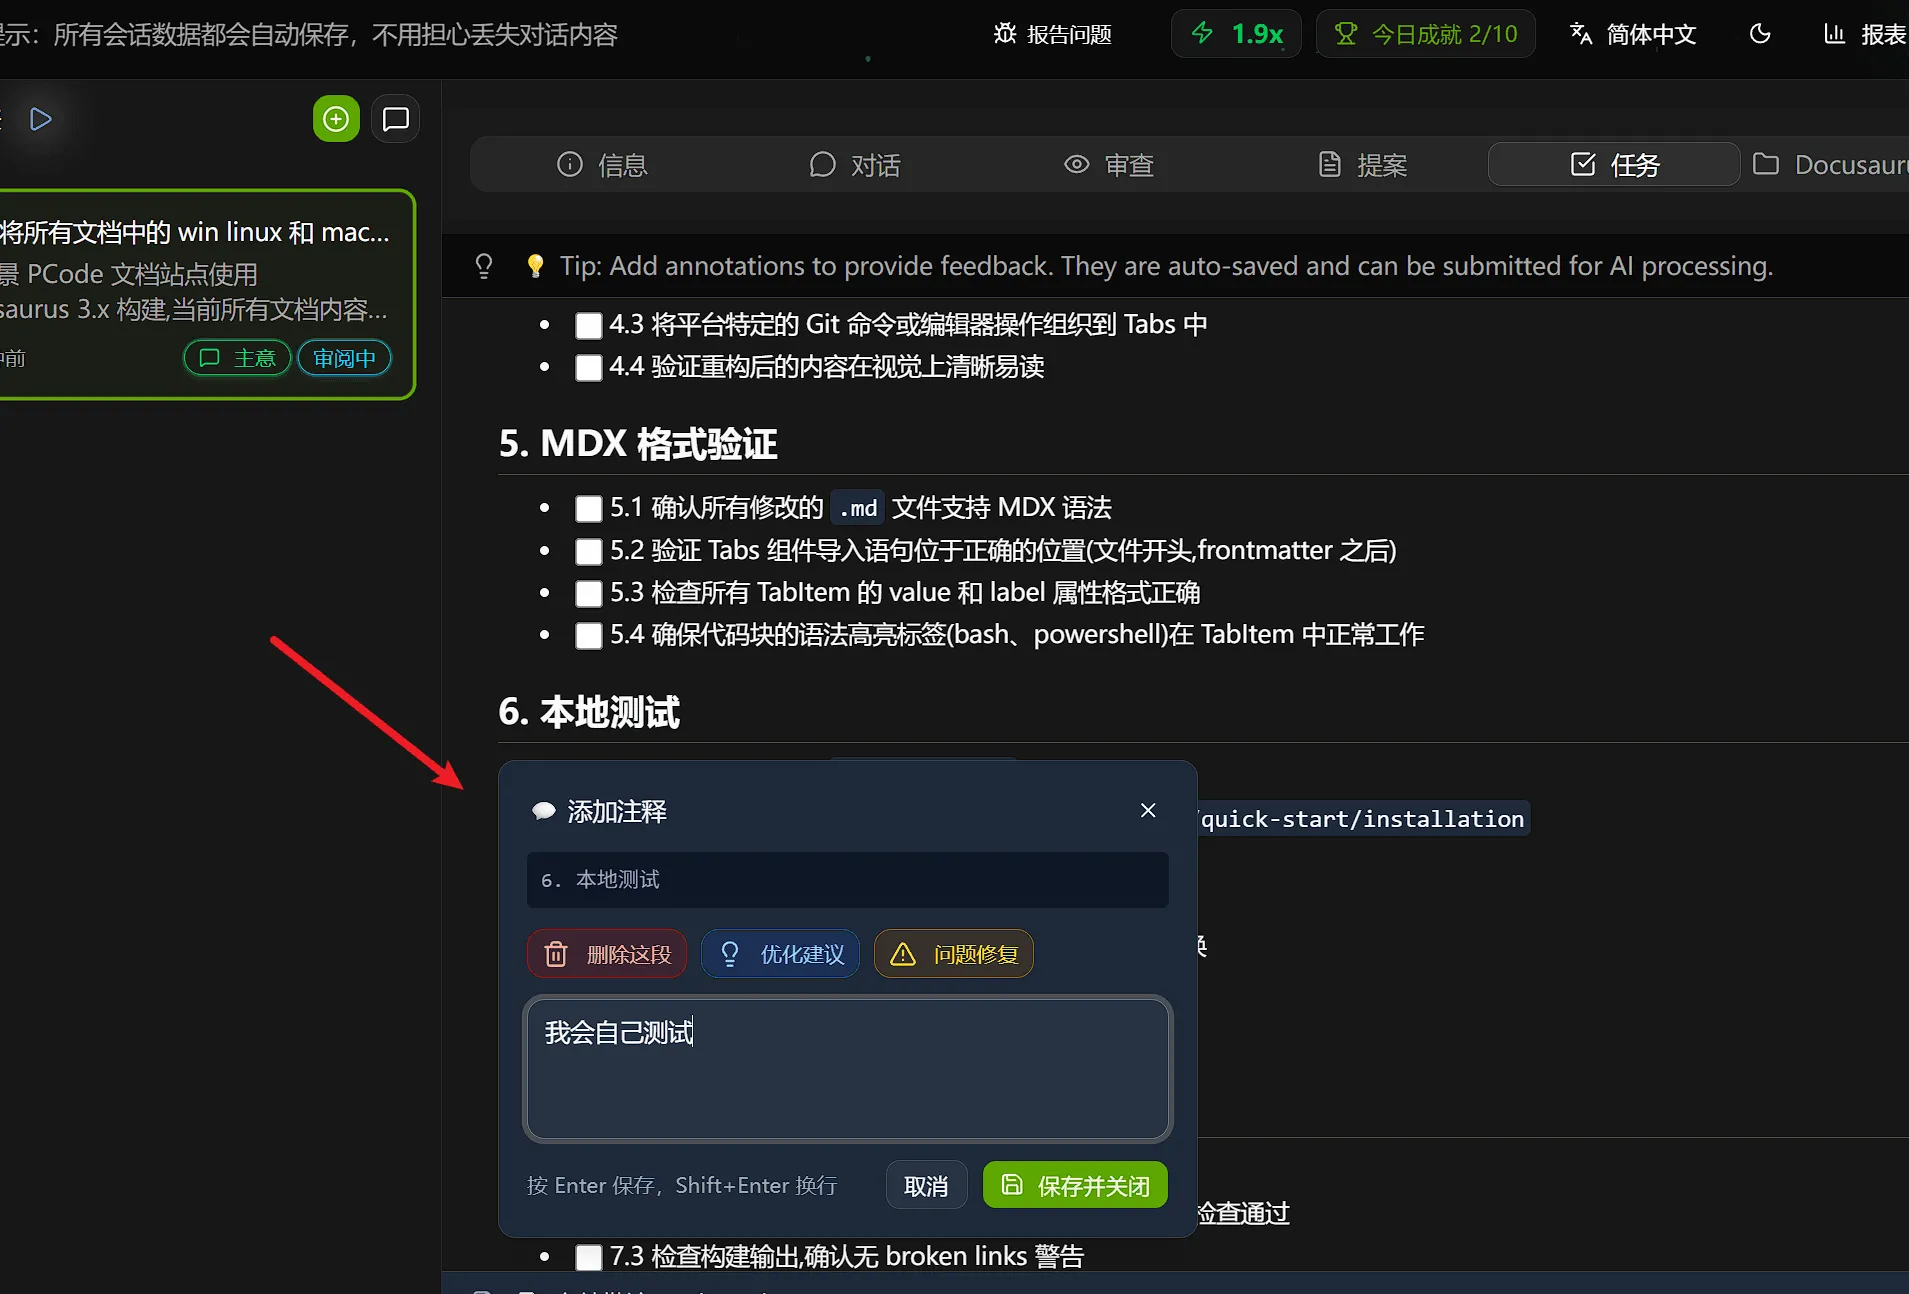
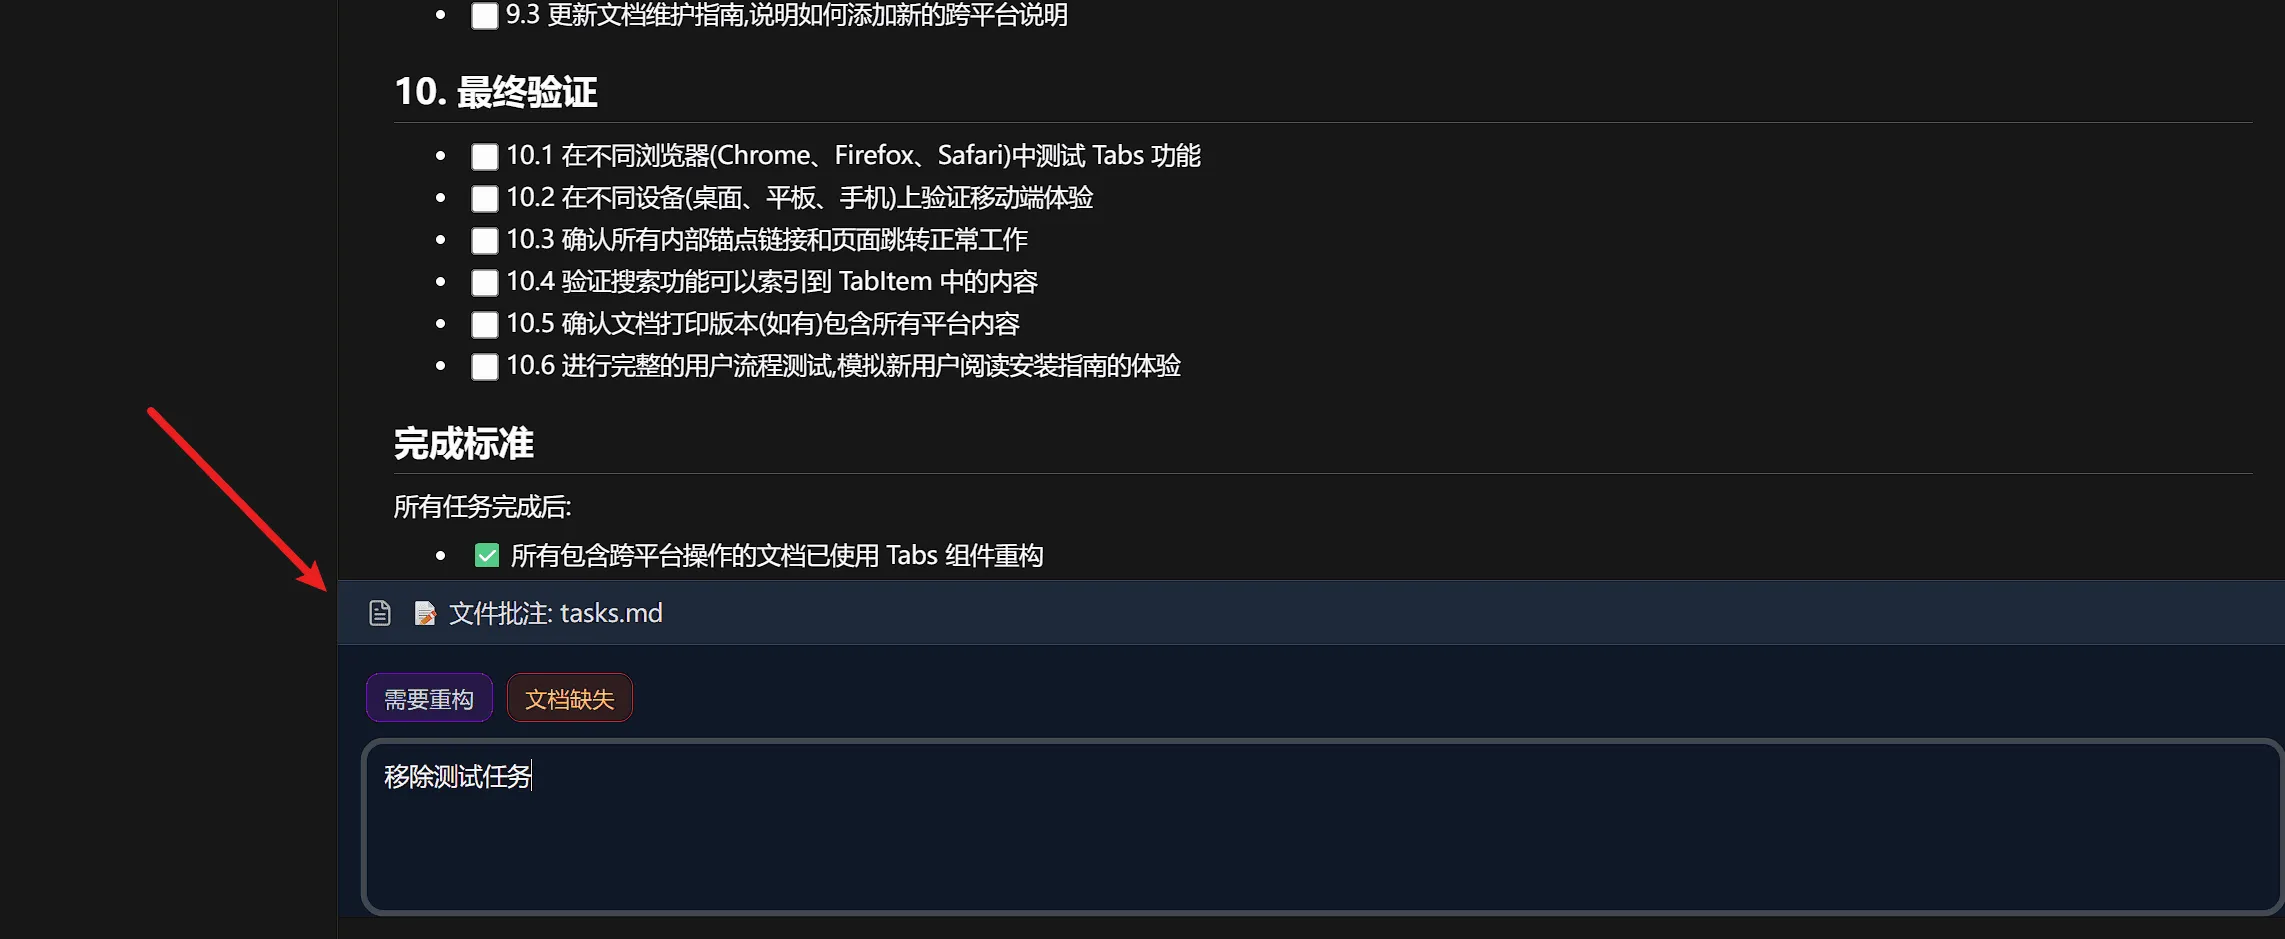
2. File Annotations
Section titled “2. File Annotations”Add feedback at the document level:
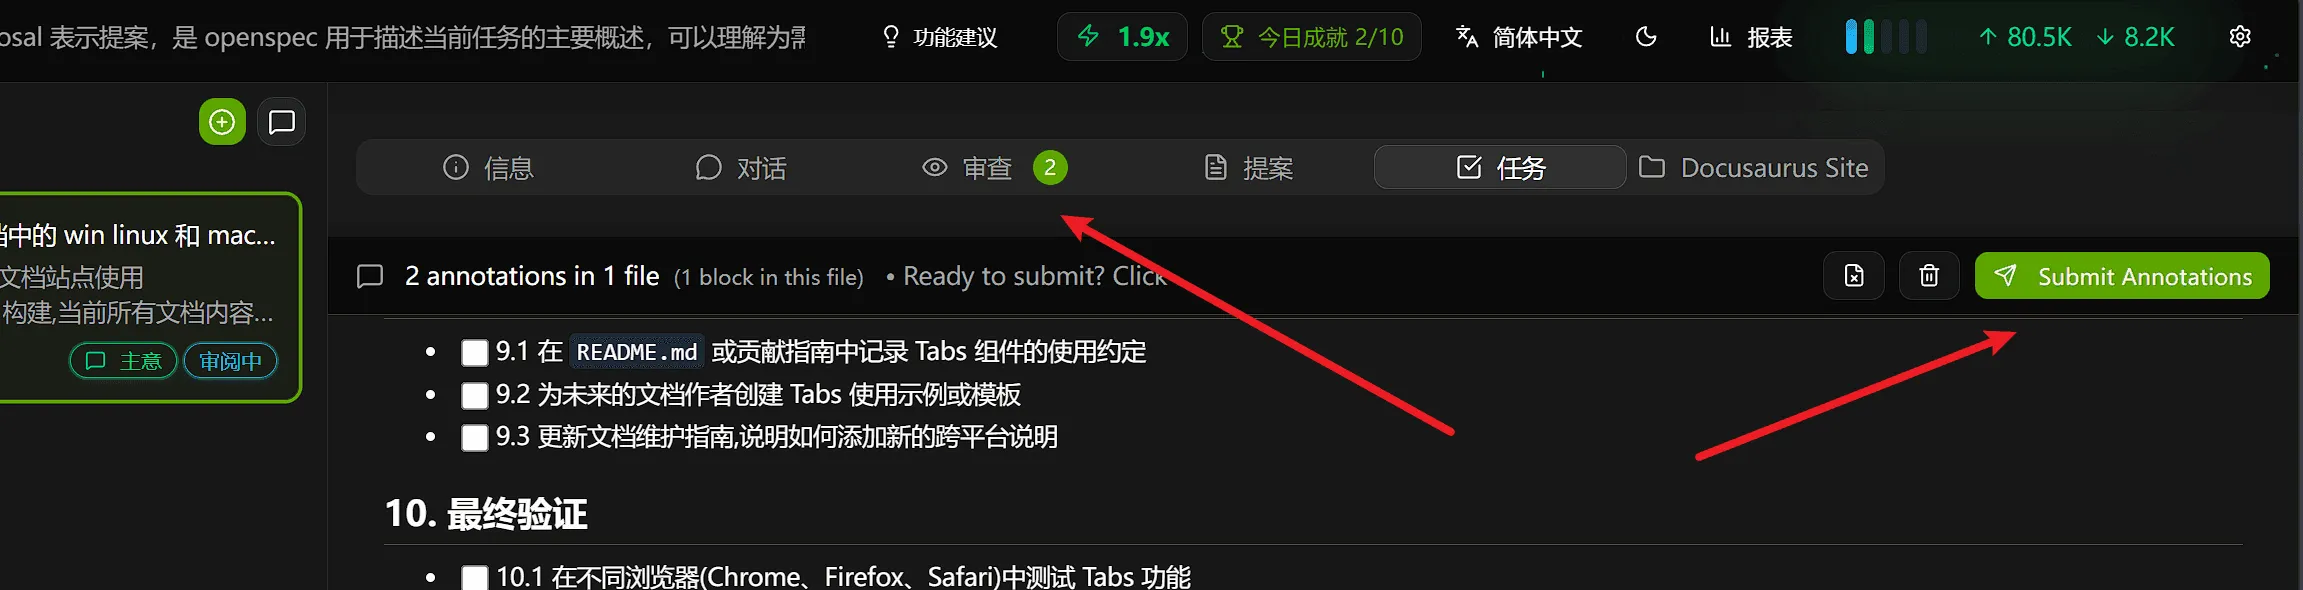
After adding annotations, you can click the button in the upper right corner or directly click the “Review” tab to view and submit all annotations:
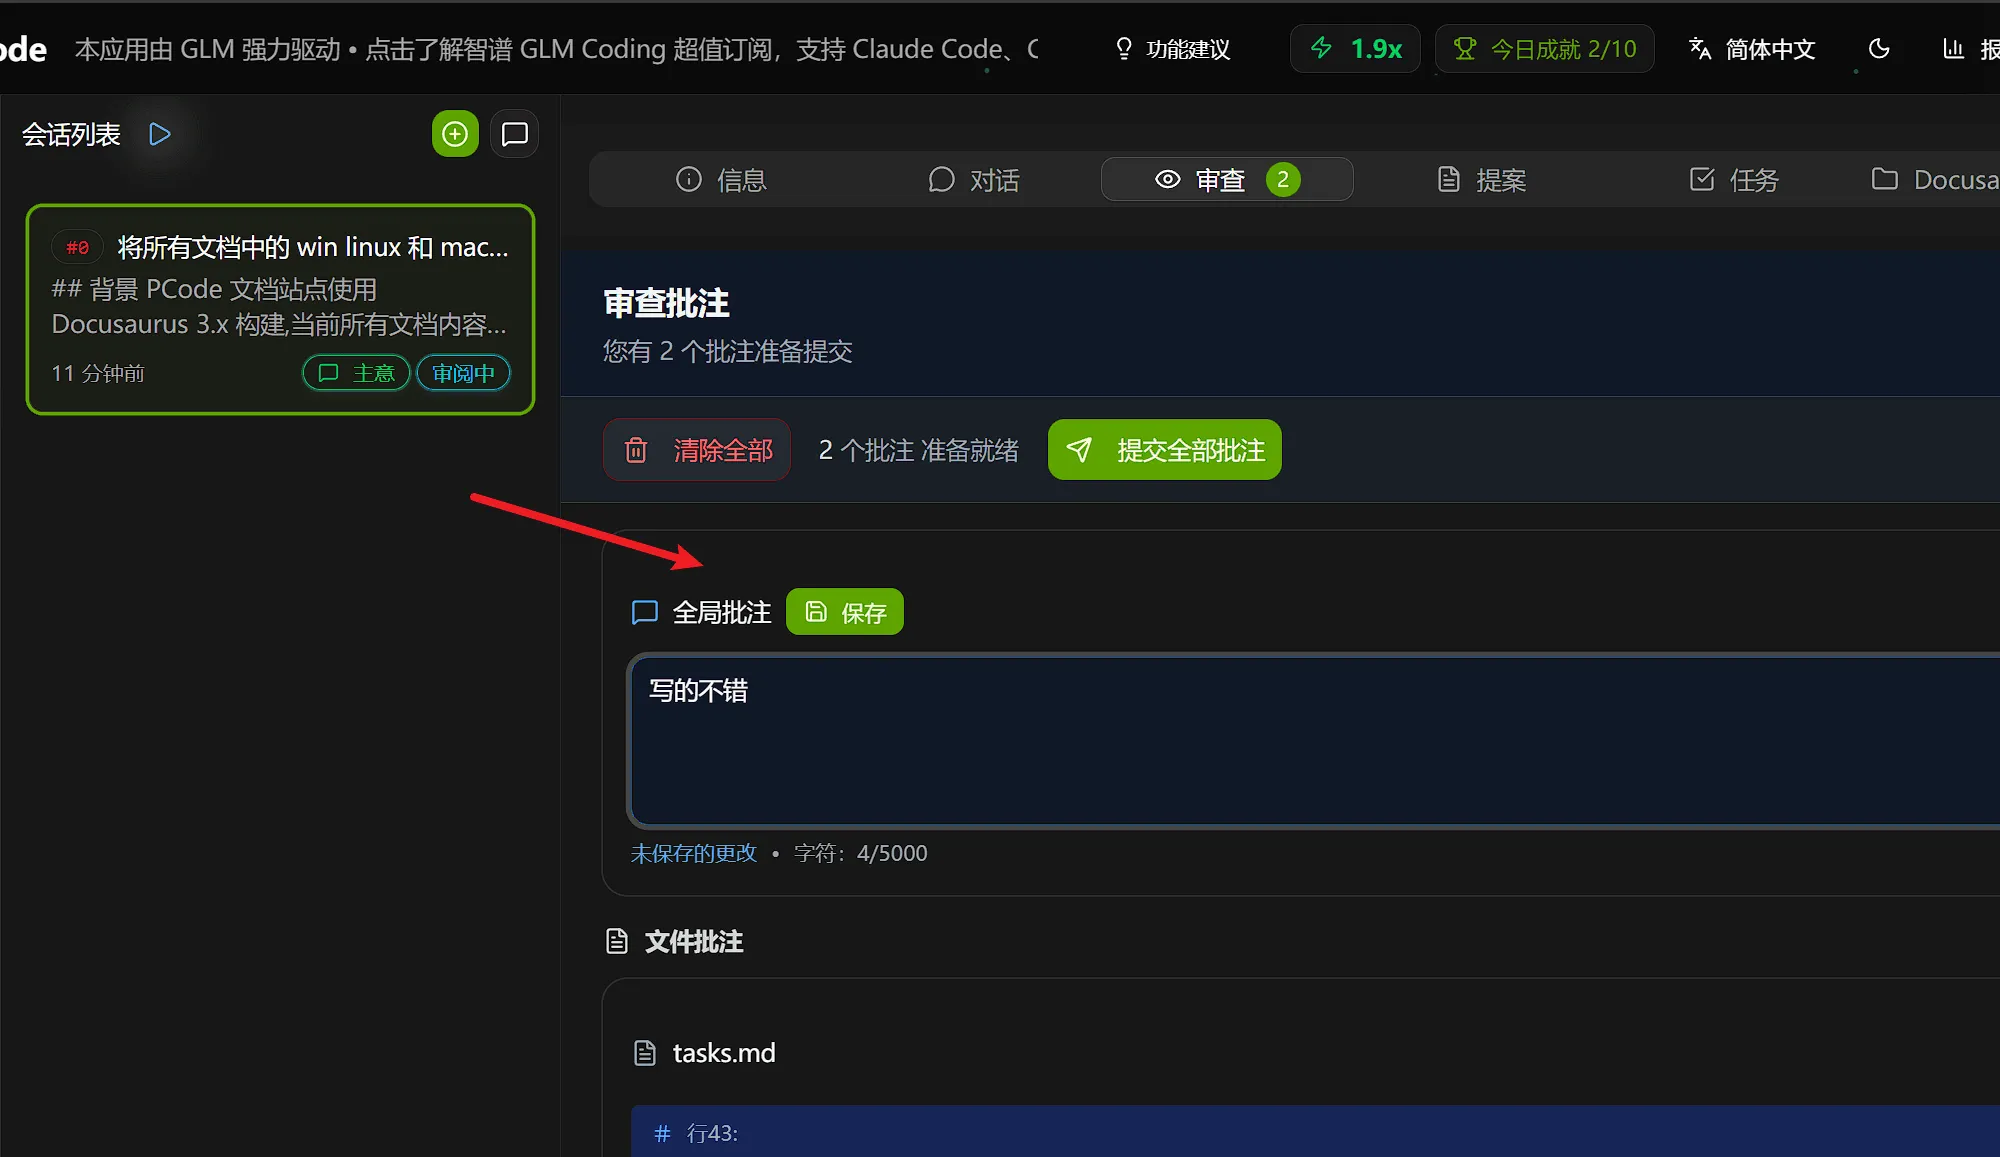
3. Global Annotations
Section titled “3. Global Annotations”Provide overall feedback for the proposal:
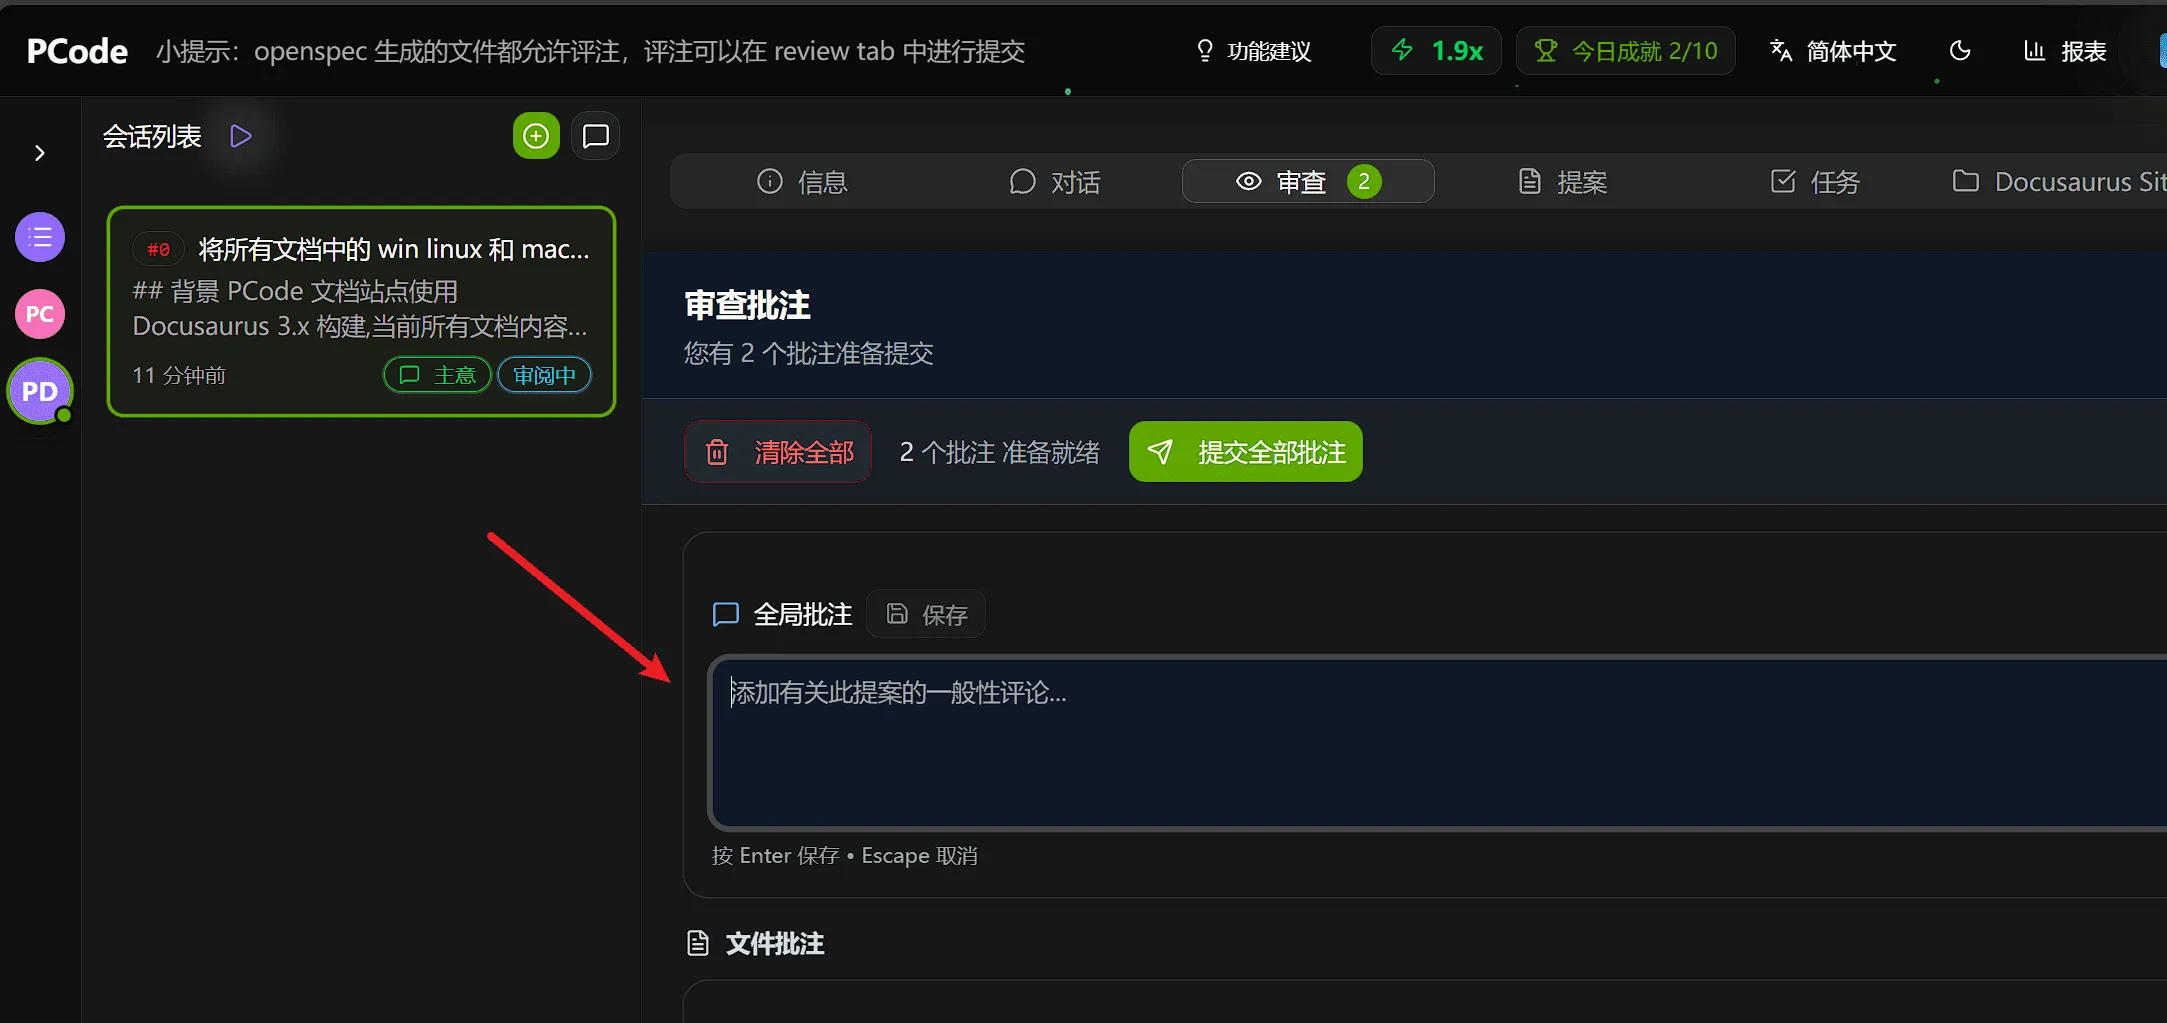
Note: Global annotations need to click the “Save” button to take effect.
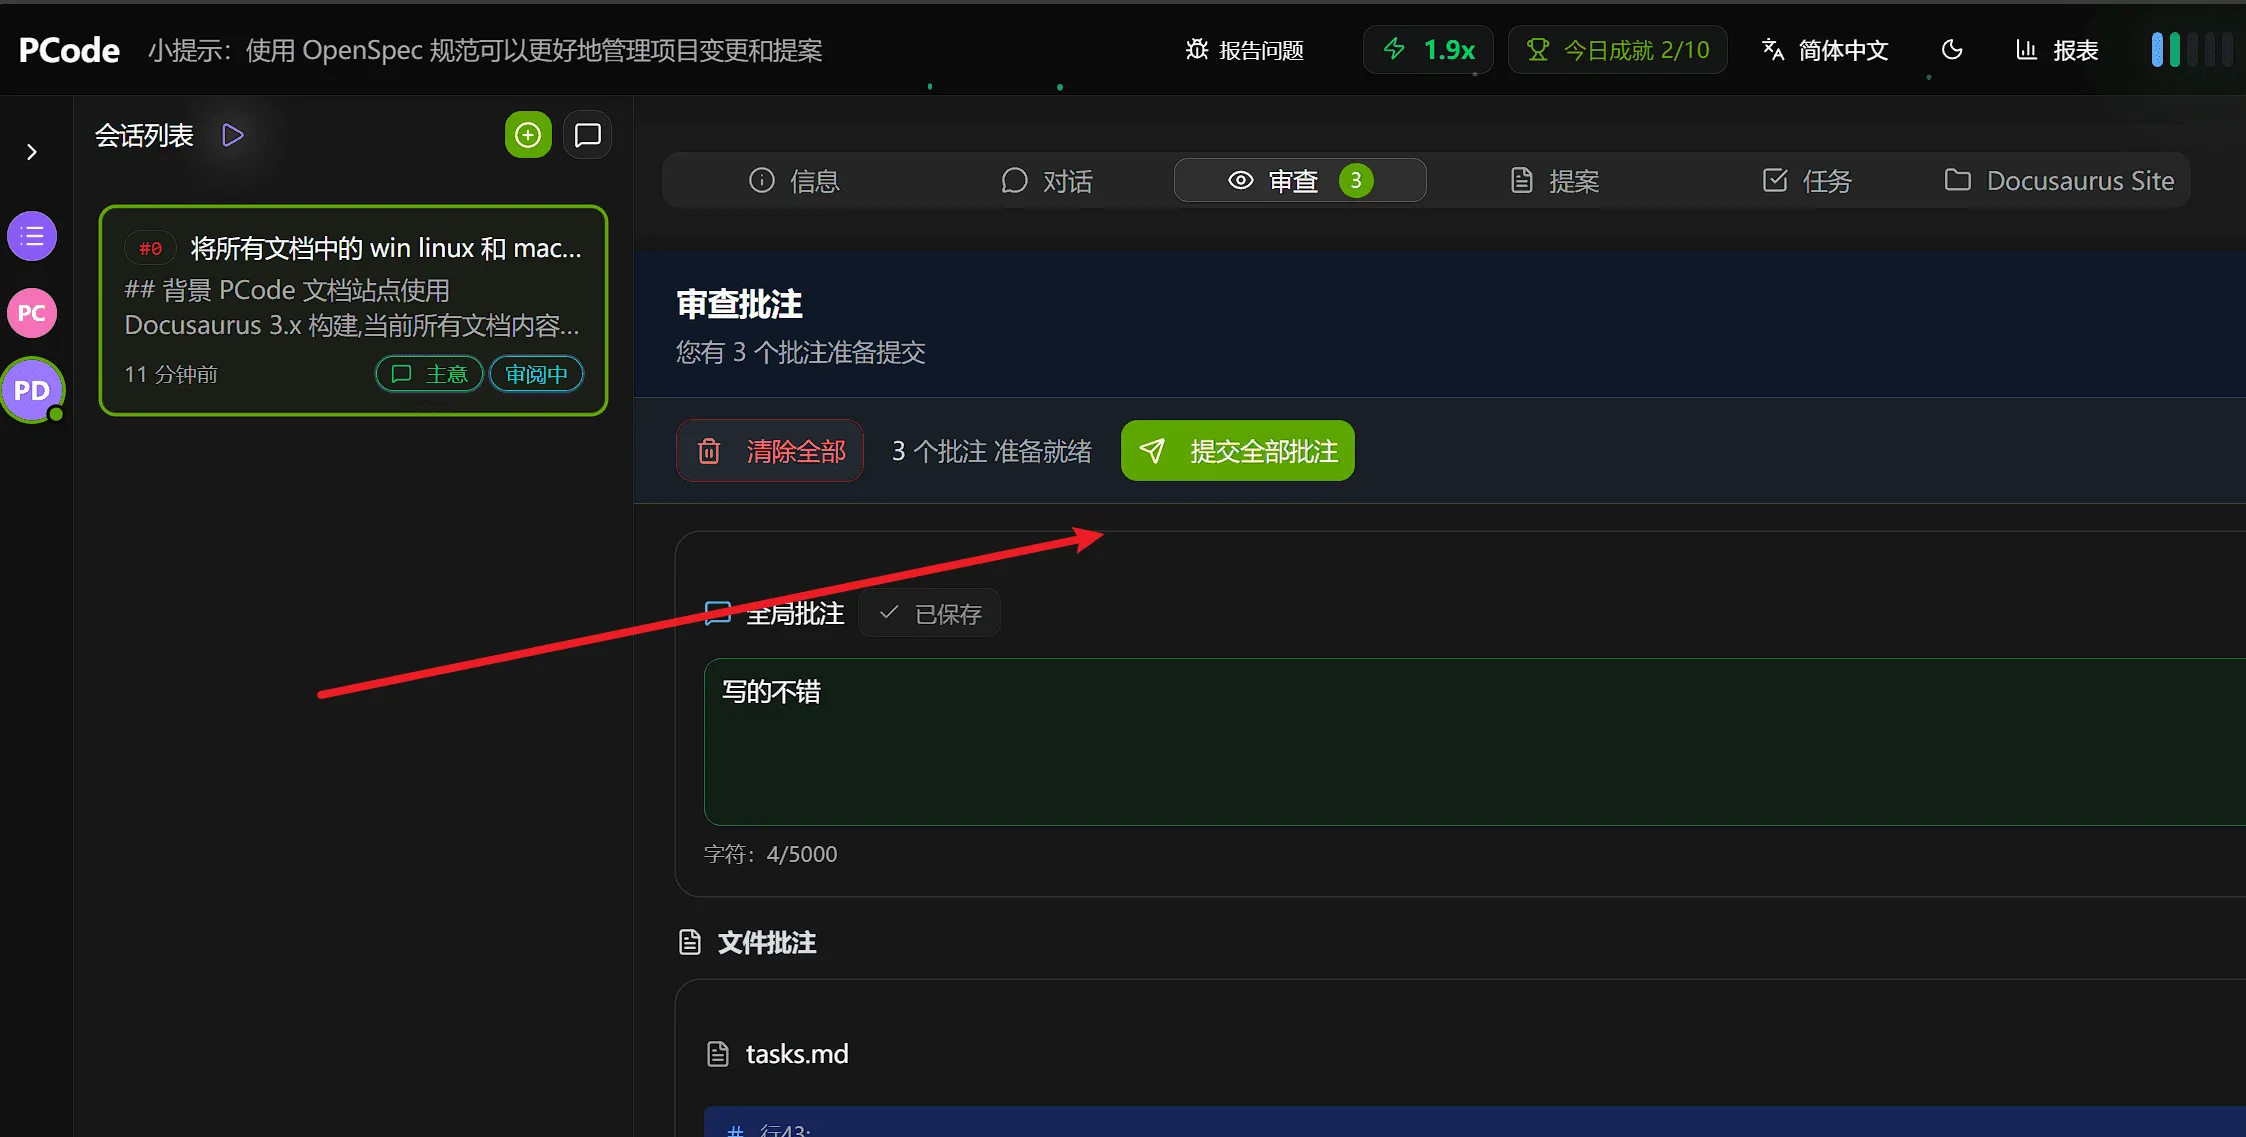
Submit Annotations
Section titled “Submit Annotations”After confirming annotations, you can click the submit all annotations button, and AI will modify the plan based on your annotations:
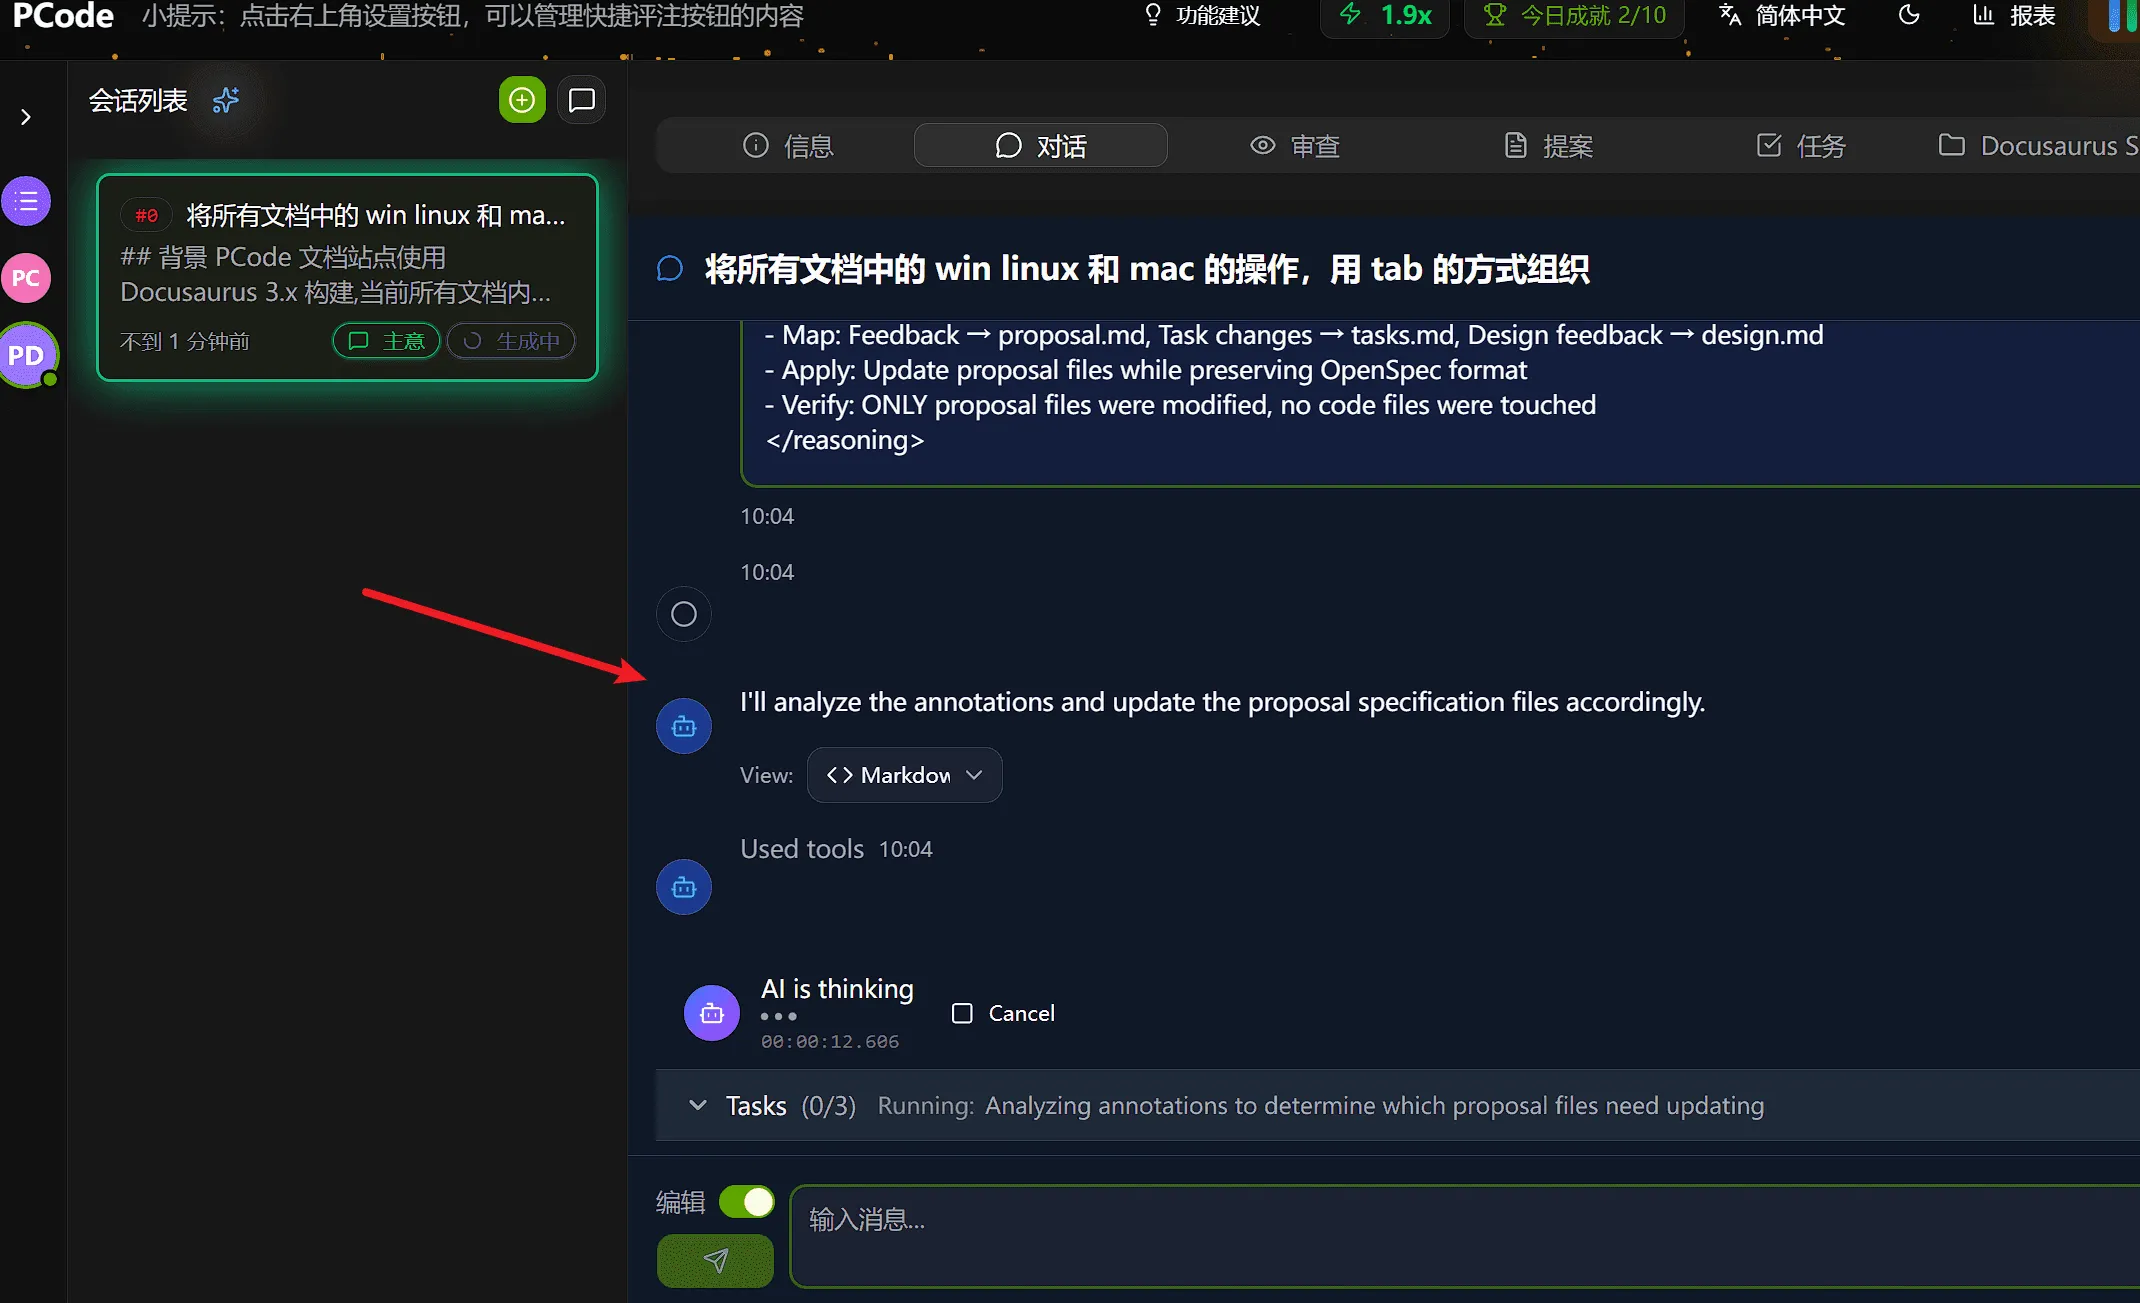
You can view the process of AI processing annotations in the conversation tab:
Annotation Loop
Section titled “Annotation Loop”Annotation is an iterative process. You can continuously add annotations, submit, wait for AI to process, and then review the updated plan until satisfied:
Approve Execution
Section titled “Approve Execution”When satisfied with the plan:
- Ensure all key feedback has been addressed
- Click Approve and Execute
- Proposal enters execution stage
Stage 5: Executing (AI Automatic)
Section titled “Stage 5: Executing (AI Automatic)”AI is now automatically implementing the approved plan.
Execution Status
Section titled “Execution Status”Execution panel display effect:
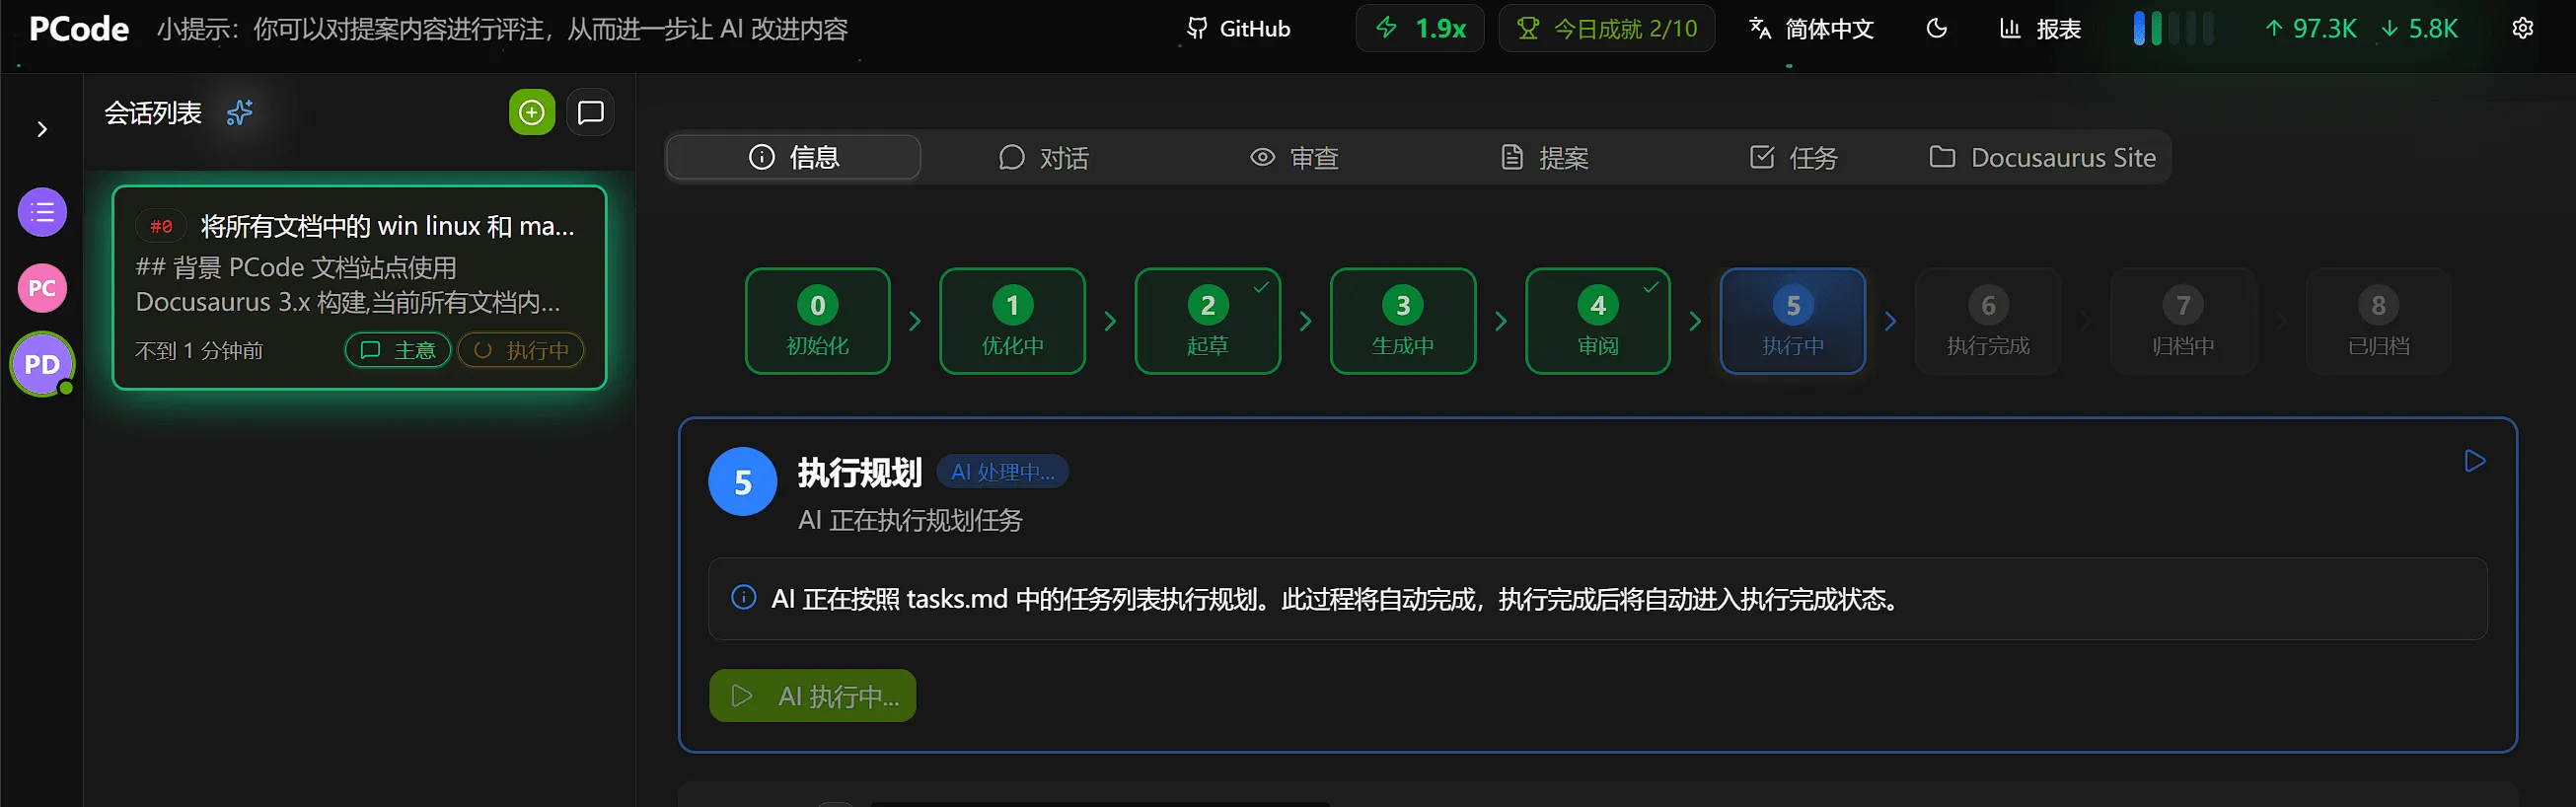
What Happens During Execution
Section titled “What Happens During Execution”AI:
- Creates new files according to specifications
- Modifies existing files to make changes
- Follows implementation plan step by step
- Shows progress for each operation
Execution Complete
Section titled “Execution Complete”After execution is complete, you will see:
- Summary of created/modified files
- Any warnings or issues encountered
- Links to view changes
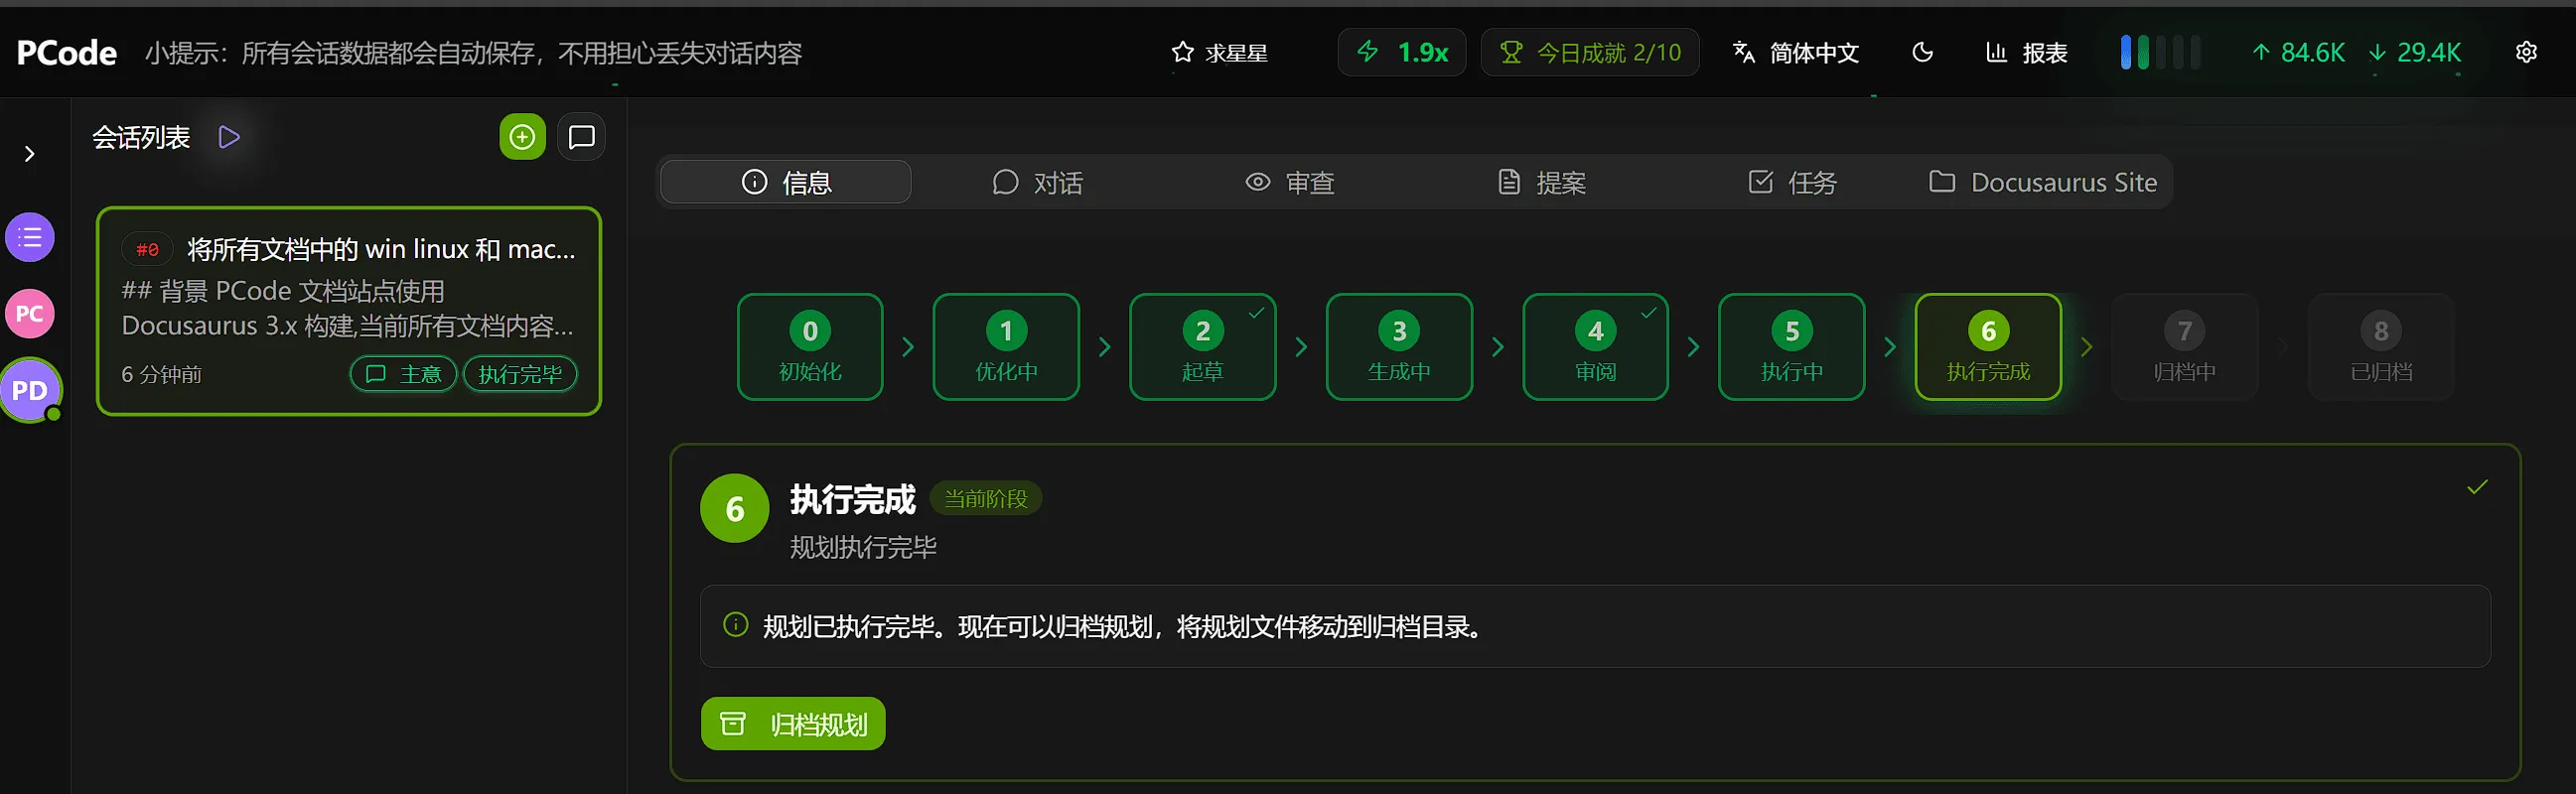
Stage 6: Execution Complete
Section titled “Stage 6: Execution Complete”AI has completed implementation. Now it’s time to verify the changes.
Review in IDE
Section titled “Review in IDE”Open the project in your preferred IDE for review.
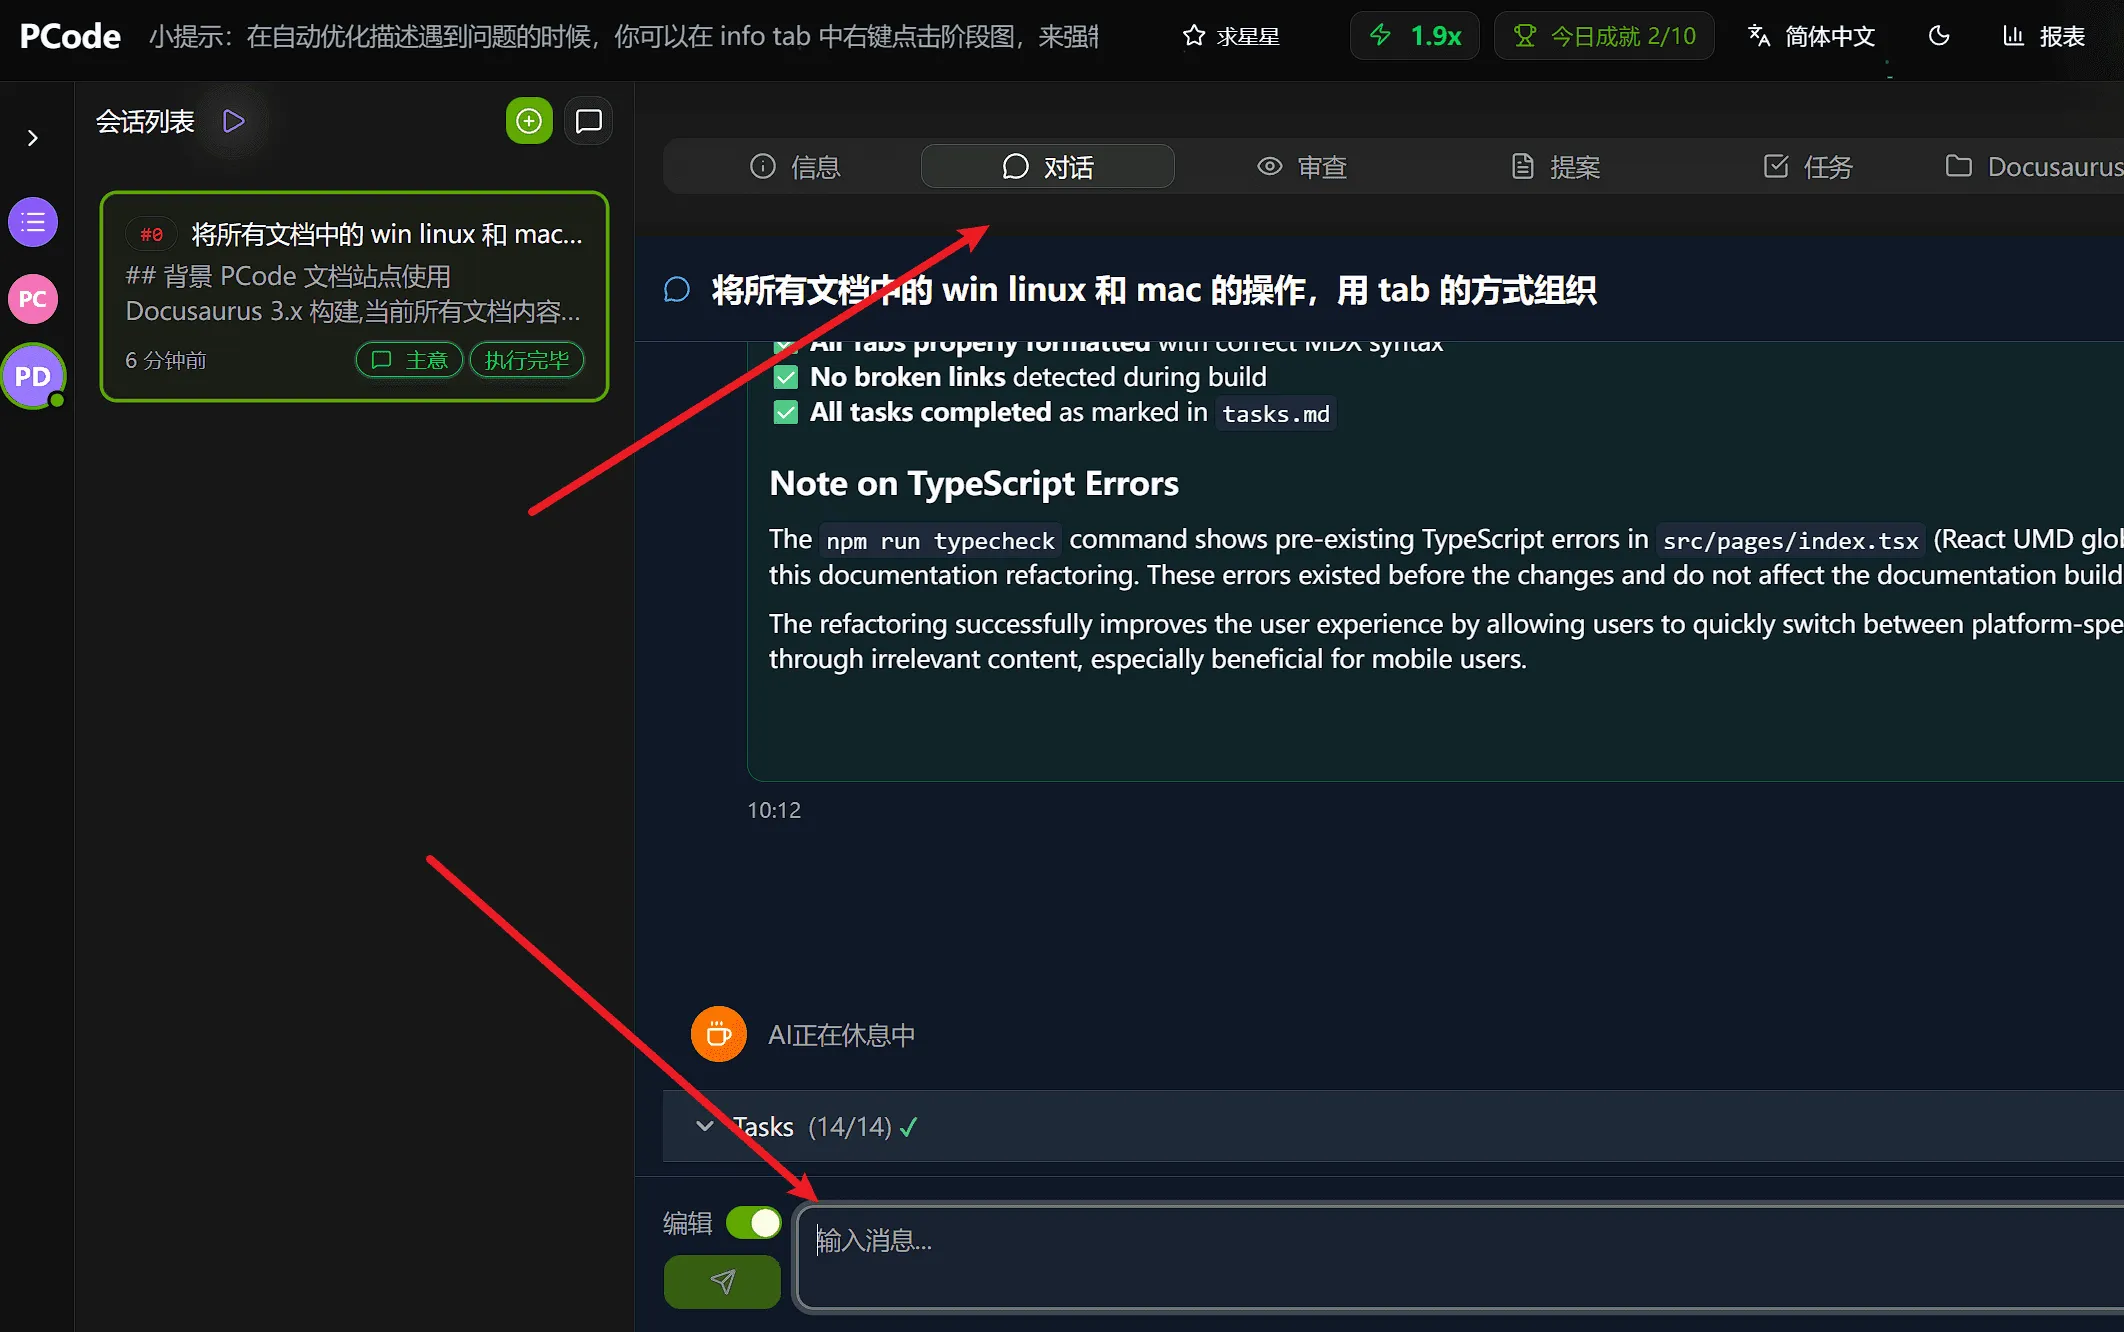
Edit Mode Conversation
Section titled “Edit Mode Conversation”Stage 6 enables a special edit mode conversation for post-execution adjustments.
If you are not satisfied with the execution results, you can explain to AI in the conversation in edit mode what needs to be adjusted. AI will continue to complete edits until the adjustment results meet your requirements. You can perform multiple rounds of adjustments until completely satisfied:
Verification Checklist
Section titled “Verification Checklist”Before continuing:
- Review all file changes in IDE
- Test new functionality locally
- Run any existing tests
- Request any final adjustments through edit mode
- Ensure compliance with code quality standards
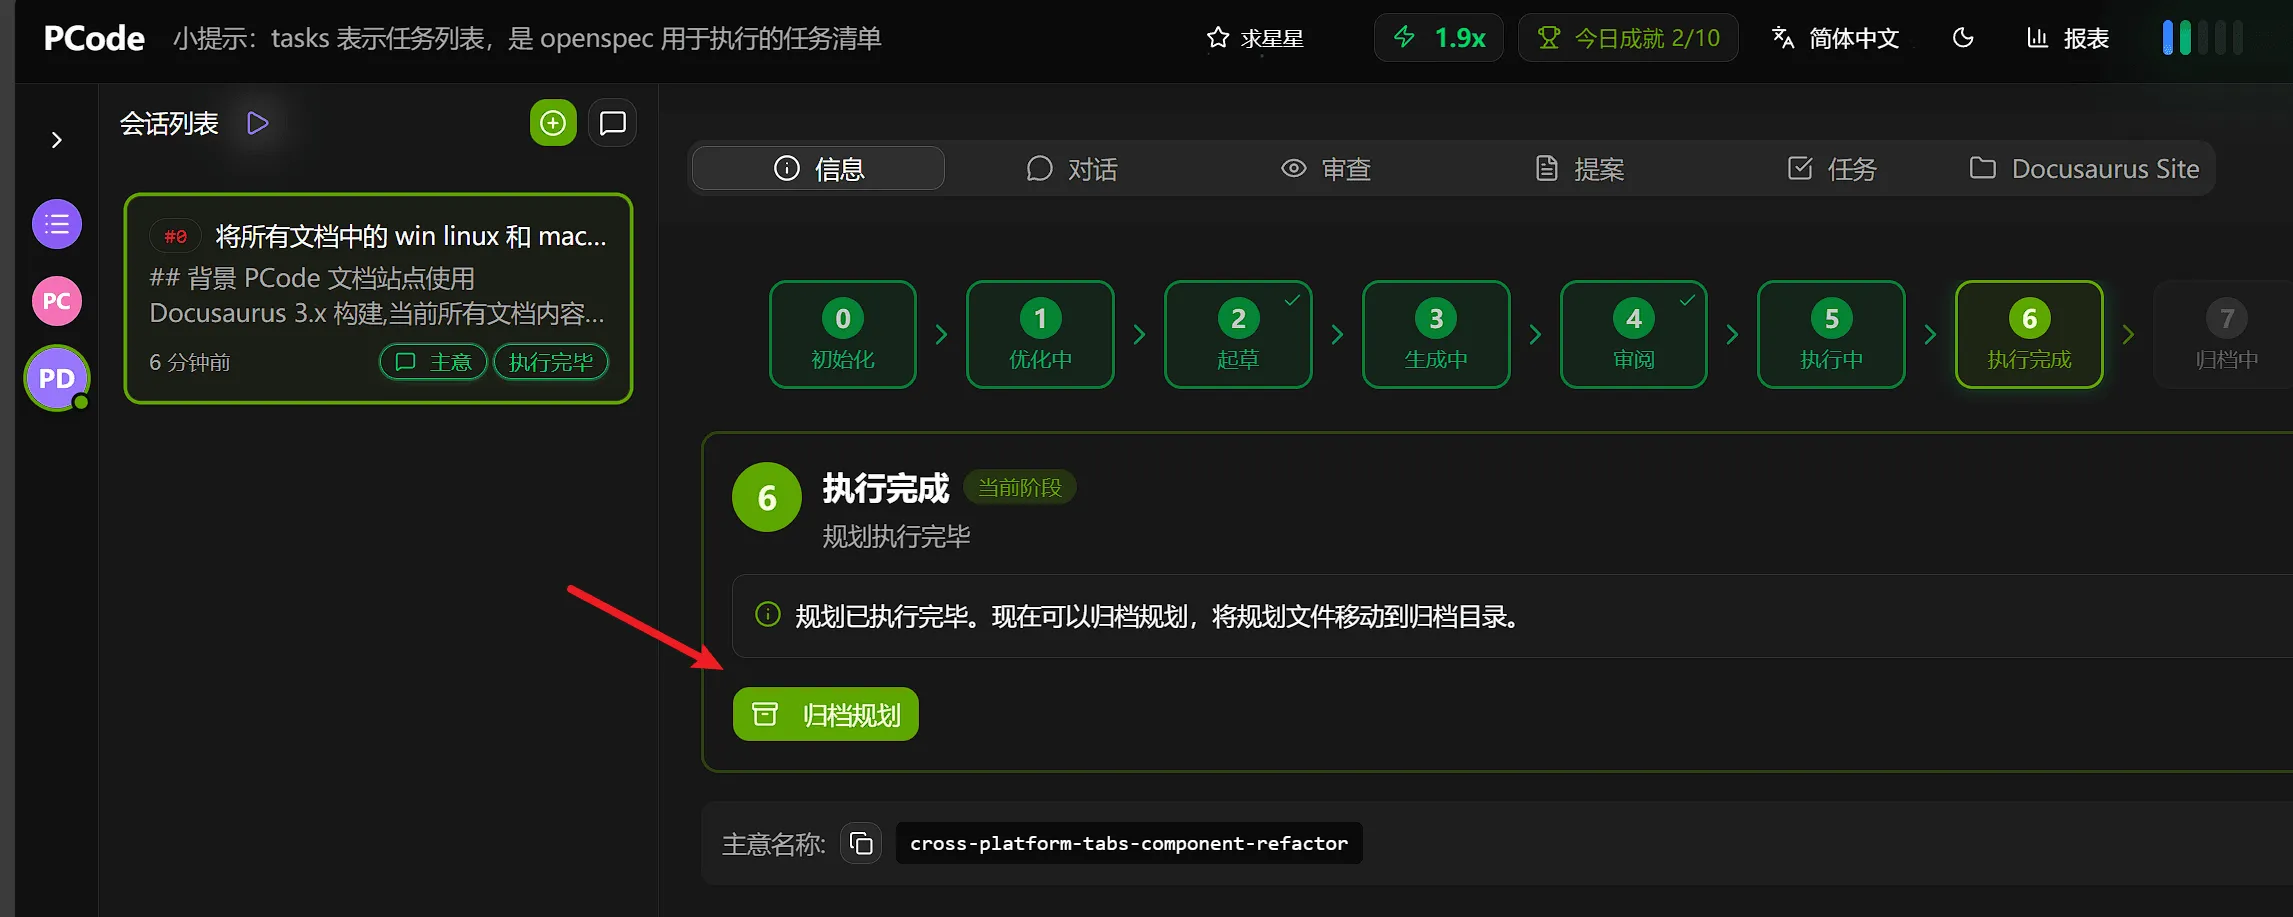
Stage 7: Archiving (AI Automatic)
Section titled “Stage 7: Archiving (AI Automatic)”After being satisfied with the implementation, AI will archive the proposal.
Click “Archive Plan”
Section titled “Click “Archive Plan””Clicking the Archive Plan button completes:
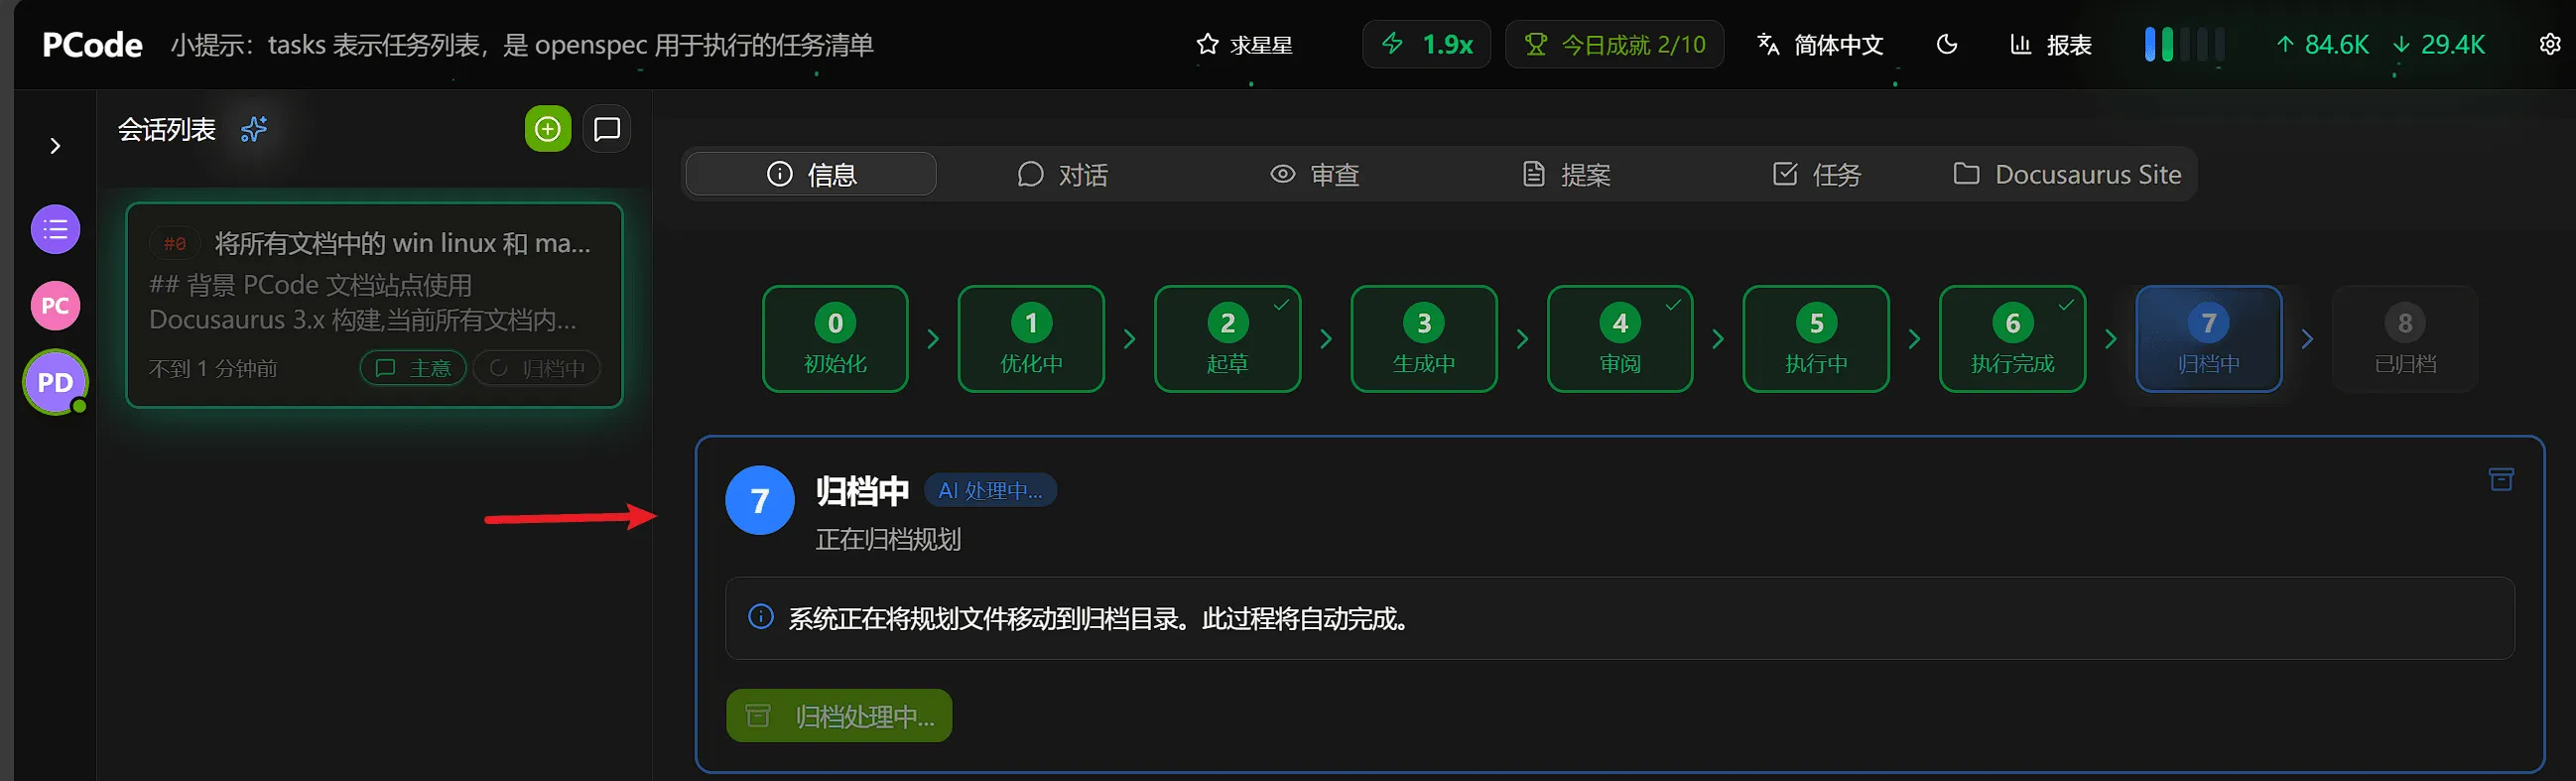
What Happens During Archiving
Section titled “What Happens During Archiving”AI:
- Marks the proposal as complete
- Creates change summary
- Generates commit message suggestions
- Moves proposal to archive
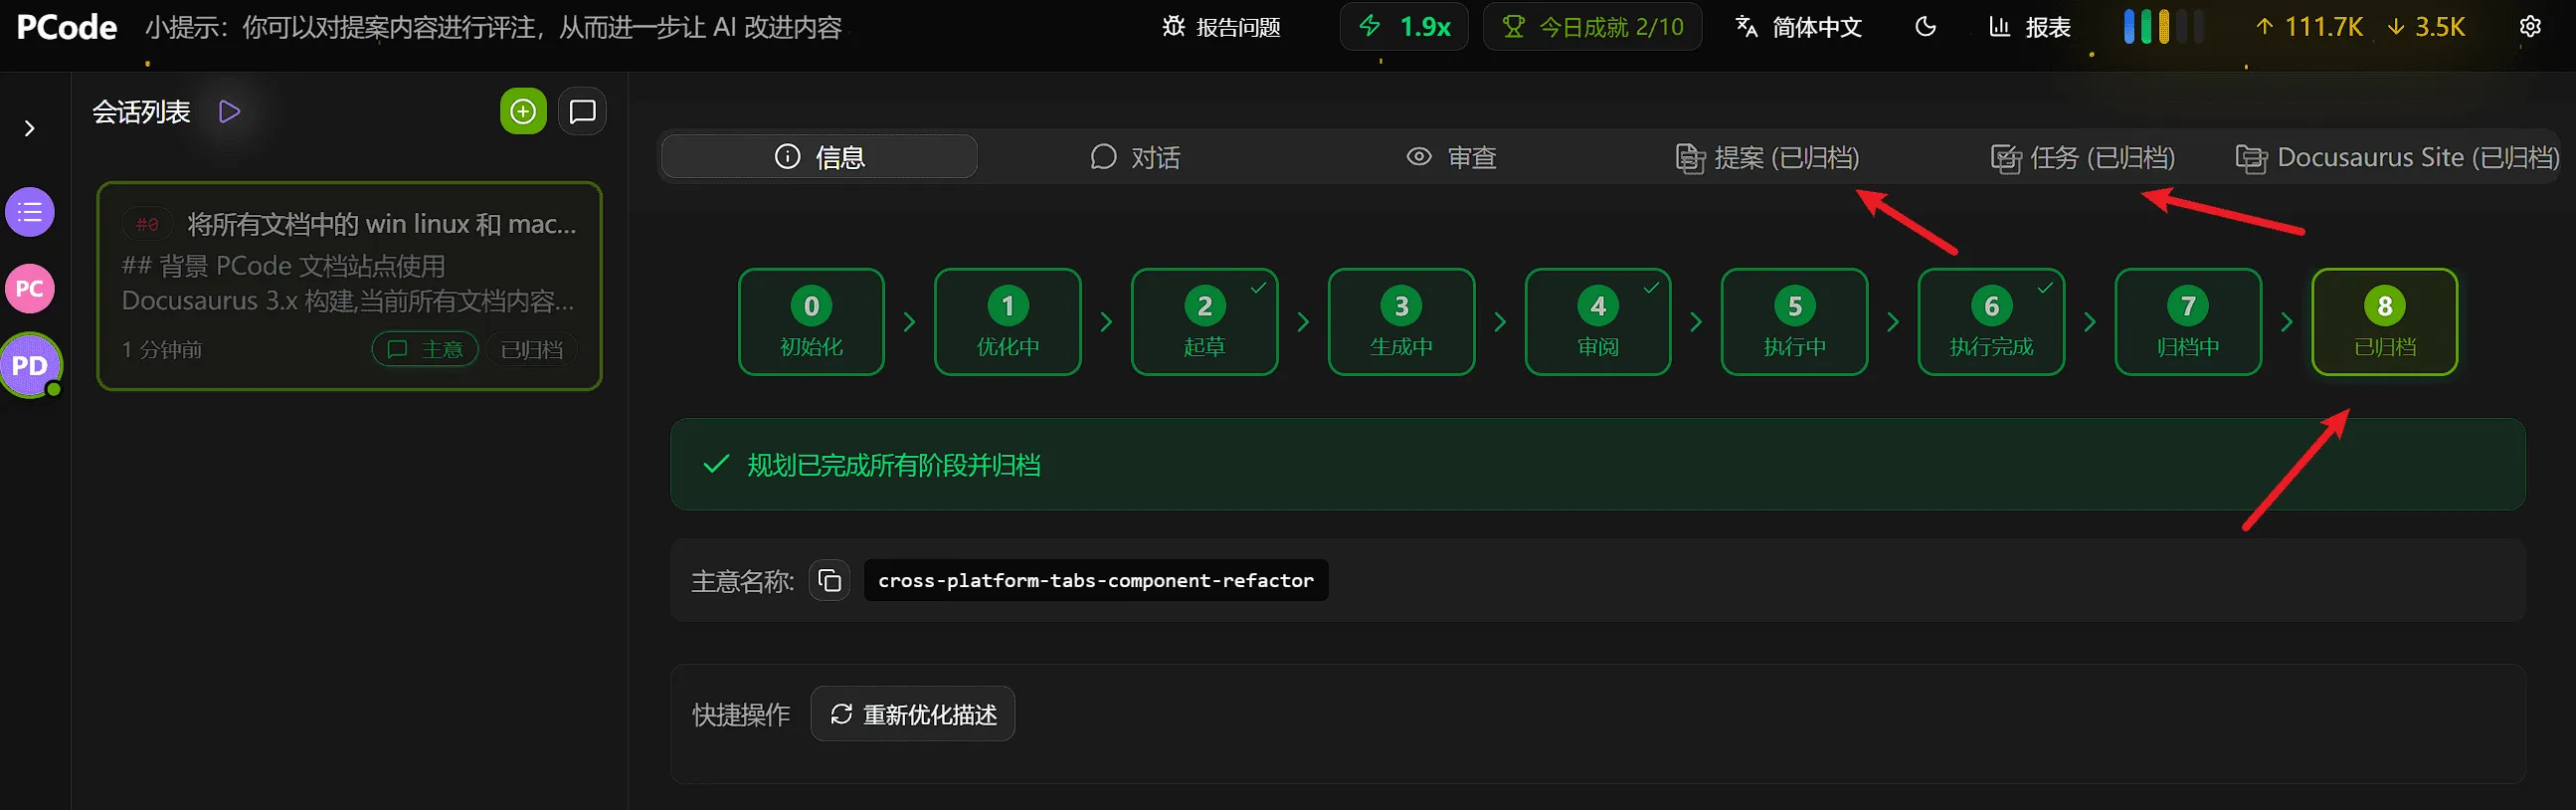
Stage 8: Archived
Section titled “Stage 8: Archived”The proposal lifecycle is complete. The proposal is now in the archive.
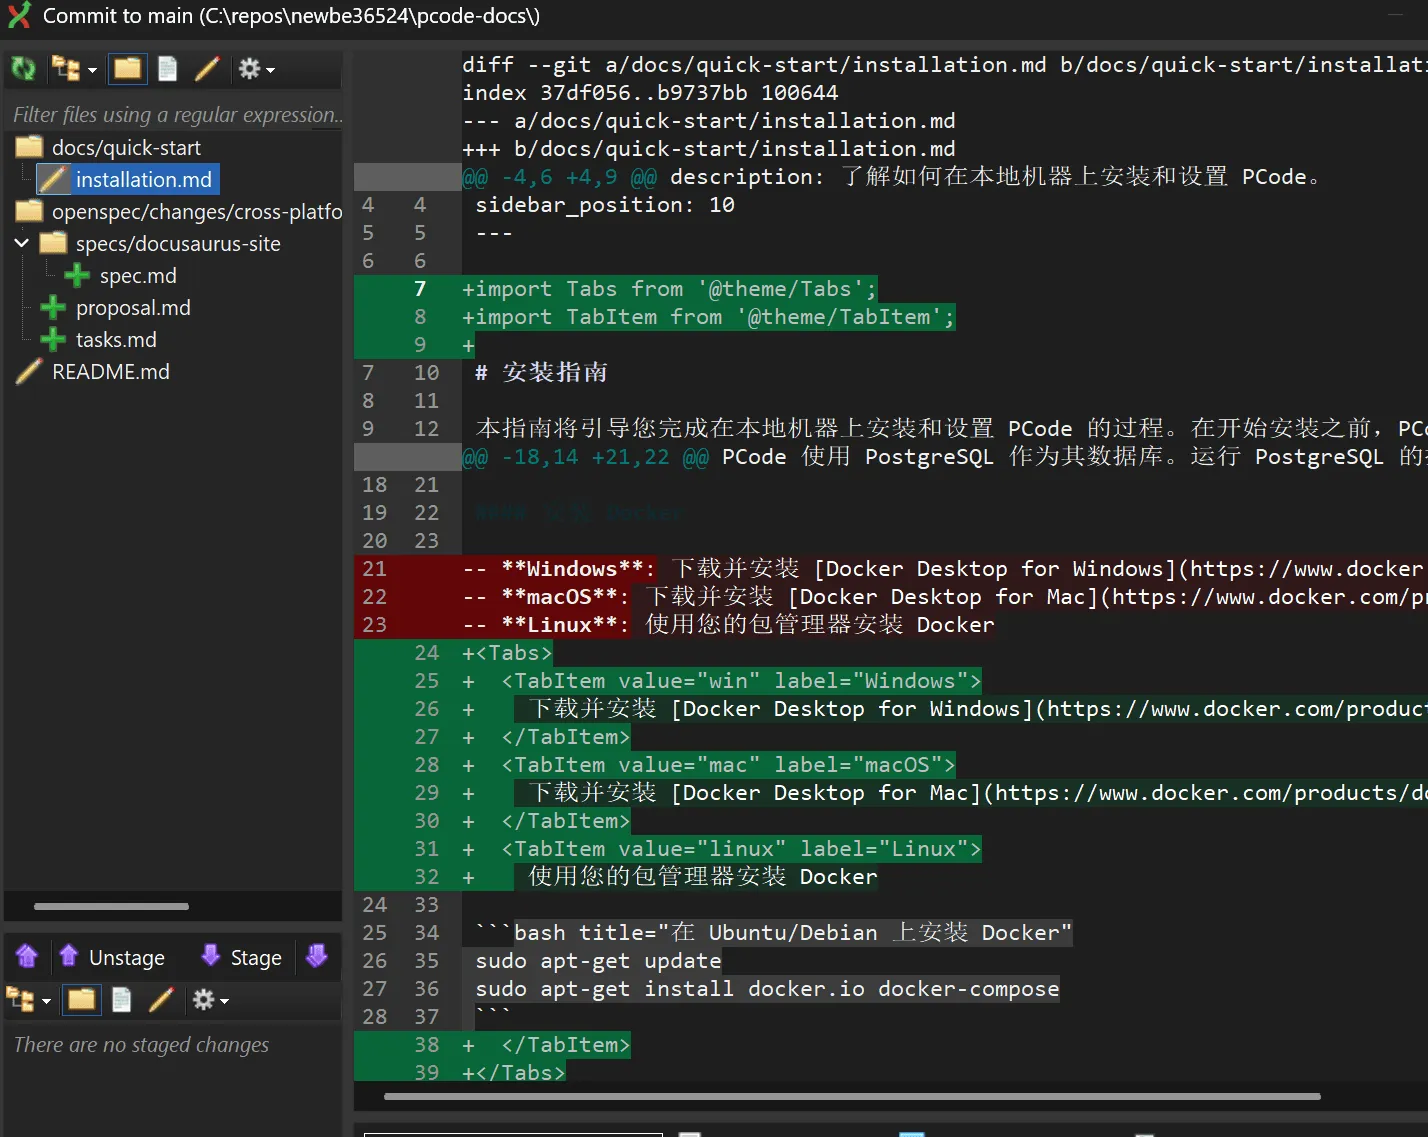
Commit Your Changes
Section titled “Commit Your Changes”Remember to commit the implemented changes and archived planning files:
:::重要提示 Commit Archived Planning Files
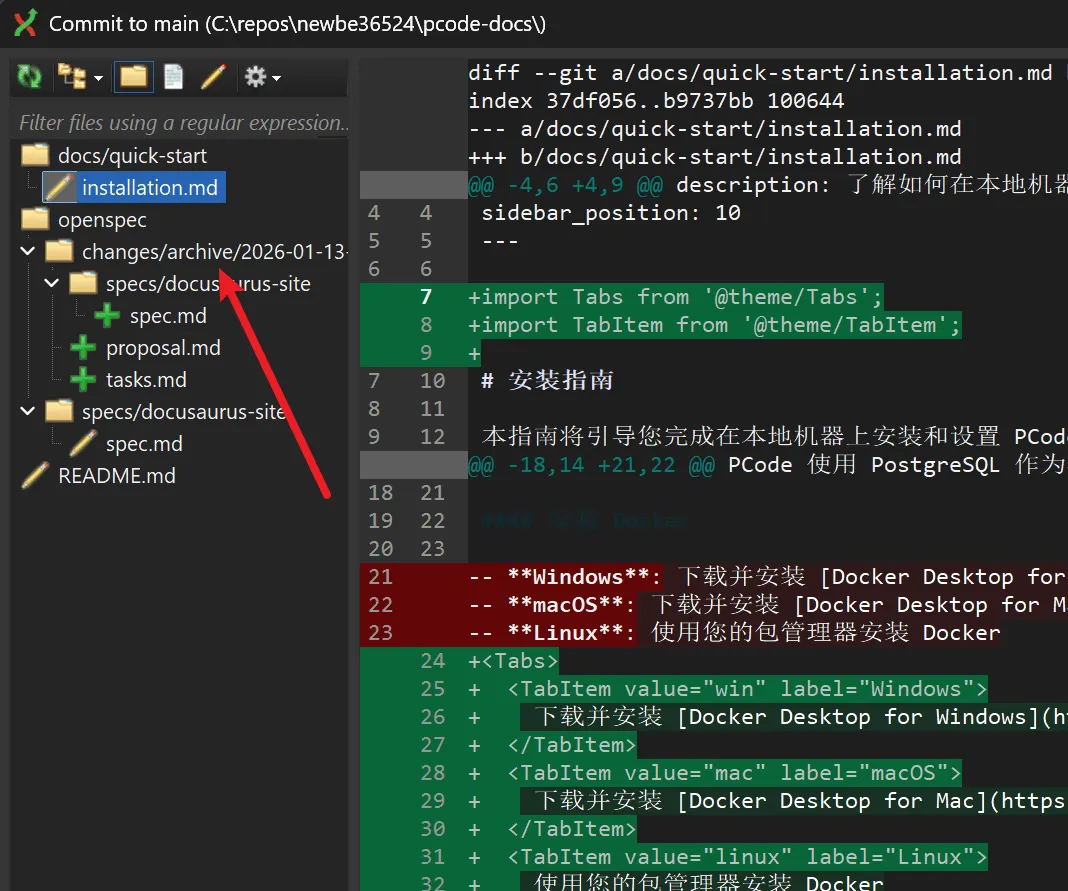
Besides code changes, you should also commit the archived planning files to your Git repository. These files include:
- Proposal (proposal.md)
- Tasks (tasks.md)
- Design (design.md, if any)
- Specification files (specs/)
Why commit planning files?
OpenSpec uses archived proposals and specification files as “memory fragments” to reference these historical records in subsequent proposals and implementations. This way:
- ✅ AI can understand the project’s architecture decisions and historical changes
- ✅ Maintain consistency in code style and patterns
- ✅ Avoid re-implementing existing functionality
- ✅ Each proposal’s results will get better and better
Even if not committing to a central repository, at least ensure these files are kept locally so OpenSpec can continuously learn and improve. :::
cd /path/to/your/project# Add code changes and planning filesgit add .git commit -m "Add JWT authentication system"
- Implemented AuthService with JWT token generation- Added JWT middleware for route protection- Created authentication endpoints (register, login, logout)- Integrated bcrypt for password hashing- Archived proposal planning: openspec/changes/add-jwt-auth/"
Status Reference
Section titled “Status Reference”| Stage | Name | Type | Description |
|---|---|---|---|
| 0 | Initialization | User | Create new idea with title and description |
| 1 | Optimizing | AI | AI refines description and generates name |
| 2 | Draft | User | Review and manually edit proposal |
| 3 | Generating | AI | AI creates detailed implementation planning |
| 4 | Reviewing | User | Annotate plan and approve execution |
| 5 | Executing | AI | AI implements approved changes |
| 6 | Execution Complete | User | Verify changes and make adjustments |
| 7 | Archiving | AI | AI completes and archives proposal |
| 8 | Archived | - | Proposal lifecycle complete |
Reference Resources
Section titled “Reference Resources”Learn more about OpenSpec:
- OpenSpec Specifications: Understand how OpenSpec works and best practices
- OpenSpec Document Structure: Learn how to organize and manage proposal, task, and specification files
- OpenSpec Memory Fragments System: Deep dive into how to use historical proposals to improve future development