Desktop Installation
Edit pageThis guide covers installing and using Hagicode Desktop. It is the official desktop client and keeps the default local setup path plus daily controls in one place.
What is Hagicode Desktop?
Section titled “What is Hagicode Desktop?”Hagicode Desktop is Hagicode’s official desktop application, designed for Windows, macOS, and Linux systems. It bundles Hagicode’s core features, and the installer keeps the default setup path in one guided flow.
Main Advantages
Section titled “Main Advantages”- One-click Installation: Complete all configuration steps automatically through the installation wizard
- Automatic Runtime Preparation: The default installer already includes the runtime it needs, so you do not need to install a separate
.NETruntime first - Service Management: Built-in Hagicode Server management, easily start and stop services
- Version Switching: Support for multi-version management, freely switch between different versions
- Local Operation: All data is stored locally, protecting your privacy
- Automatic Updates: Automatically detects and downloads the latest version
Applicable Scenarios
Section titled “Applicable Scenarios”Desktop is a good fit when:
- Individual developers who want to use Hagicode locally
- Users who need to use Hagicode offline
- Non-technical users who want to simplify the installation process
- Developers who need to frequently switch between different versions
Download Desktop
Section titled “Download Desktop”Quick Download
Section titled “Quick Download”Select the version suitable for your operating system and download the installer directly:
Other Download Methods
Section titled “Other Download Methods”You can also get the Hagicode Desktop installer from the following channels:
- Official Release Page: Visit Hagicode GitHub Releases to download the latest version
- Official Website: Visit Hagicode Website to get download links
Choose the Correct Version
Section titled “Choose the Correct Version”Select the corresponding installer for your operating system:
- Windows: Download the
.exeinstaller - macOS: Download the
.dmginstaller - Linux: Download the
.AppImageor.tar.gzinstaller package
Installation and Launch Notes
Section titled “Installation and Launch Notes”Run Desktop
Section titled “Run Desktop”After downloading, open the installer or application package and follow the on-screen instructions. Desktop prepares the runtime in the currently supported local path, manages Hagicode Server, and shows progress and status when network downloads are required.
First Use
Section titled “First Use”After you first enter Hagicode, the current initialization wizard starts immediately. Follow the on-screen instructions; detailed first-run setup, project creation, and session creation guidance now lives in the quick-start pages.
If you want the up-to-date screen-by-screen guide for first-run setup, continue with the quick-start page below:
Version Management
Section titled “Version Management”Hagicode Desktop supports multi-version management, allowing you to freely switch between different versions.
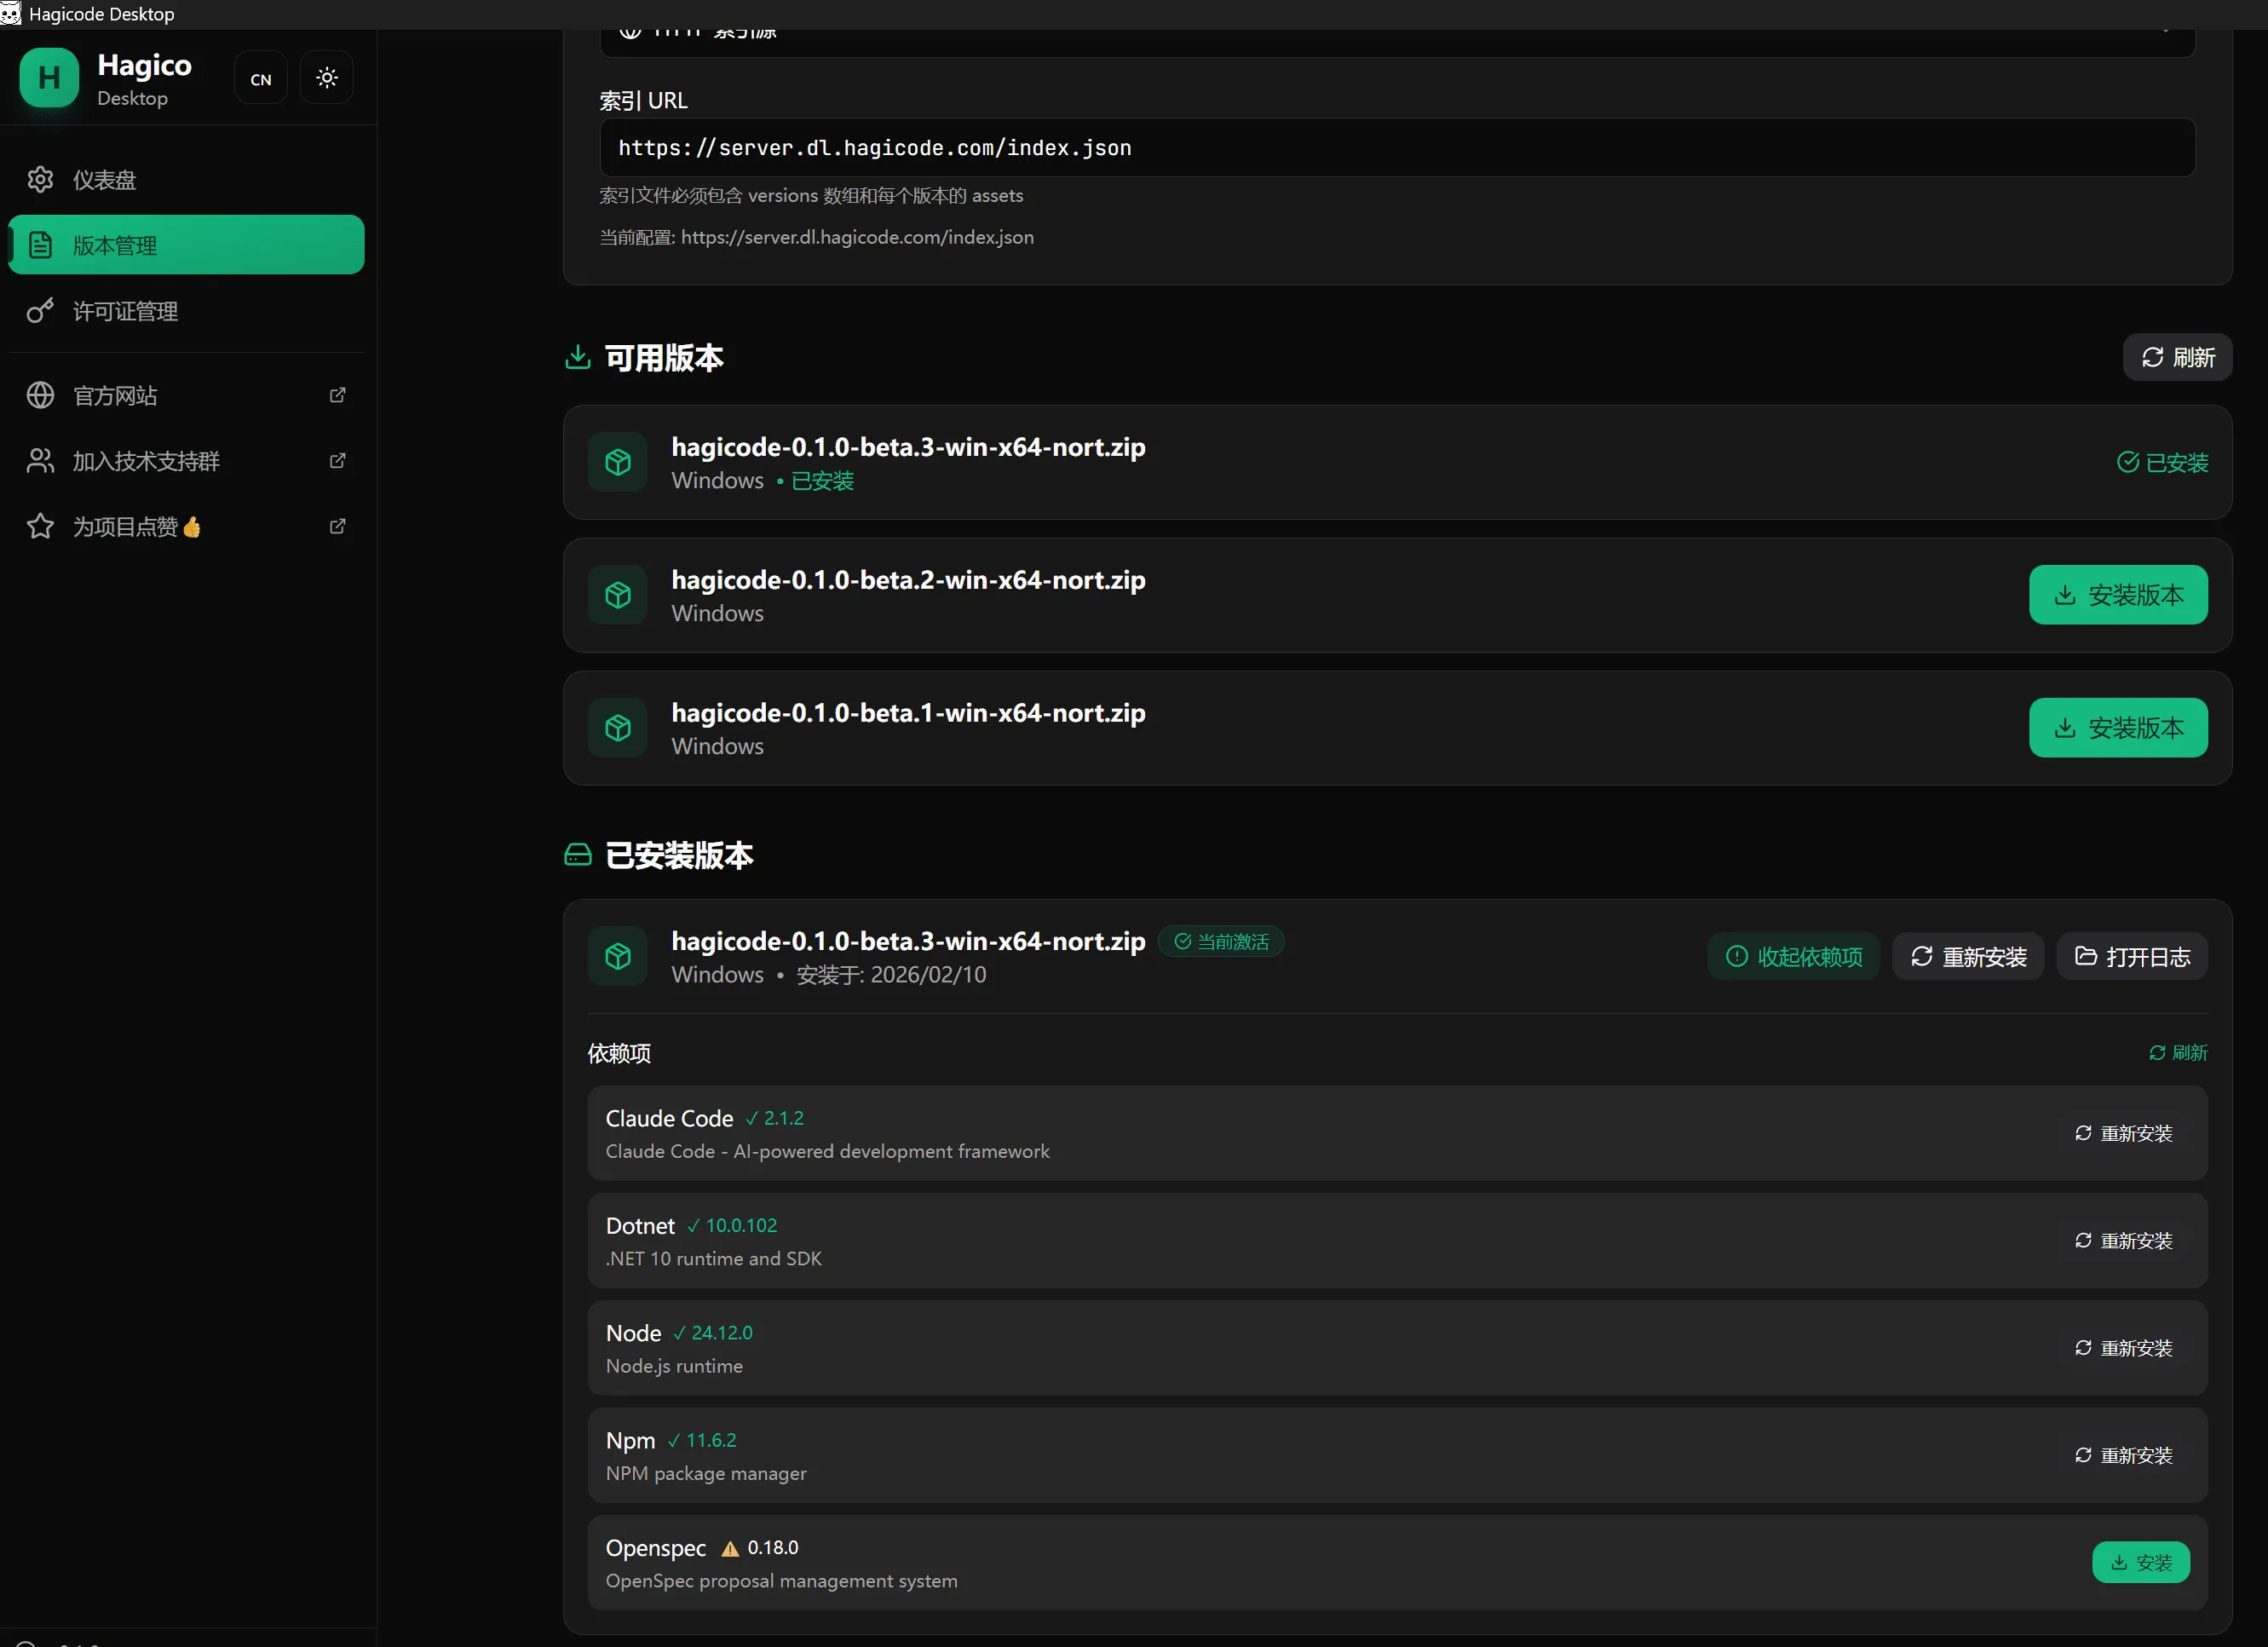
Switch Version
Section titled “Switch Version”- Open Hagicode Desktop
- Go to “Version Management” page
- Select the version you want to switch
- Click “Switch Version” button
- Wait for switch to complete
Start and Stop Service
Section titled “Start and Stop Service”Hagicode Desktop provides a simple way to manage Hagicode Server service.
Start Service
Section titled “Start Service”On the home page of the Desktop application, click the “Start Service” button to start Hagicode Server.
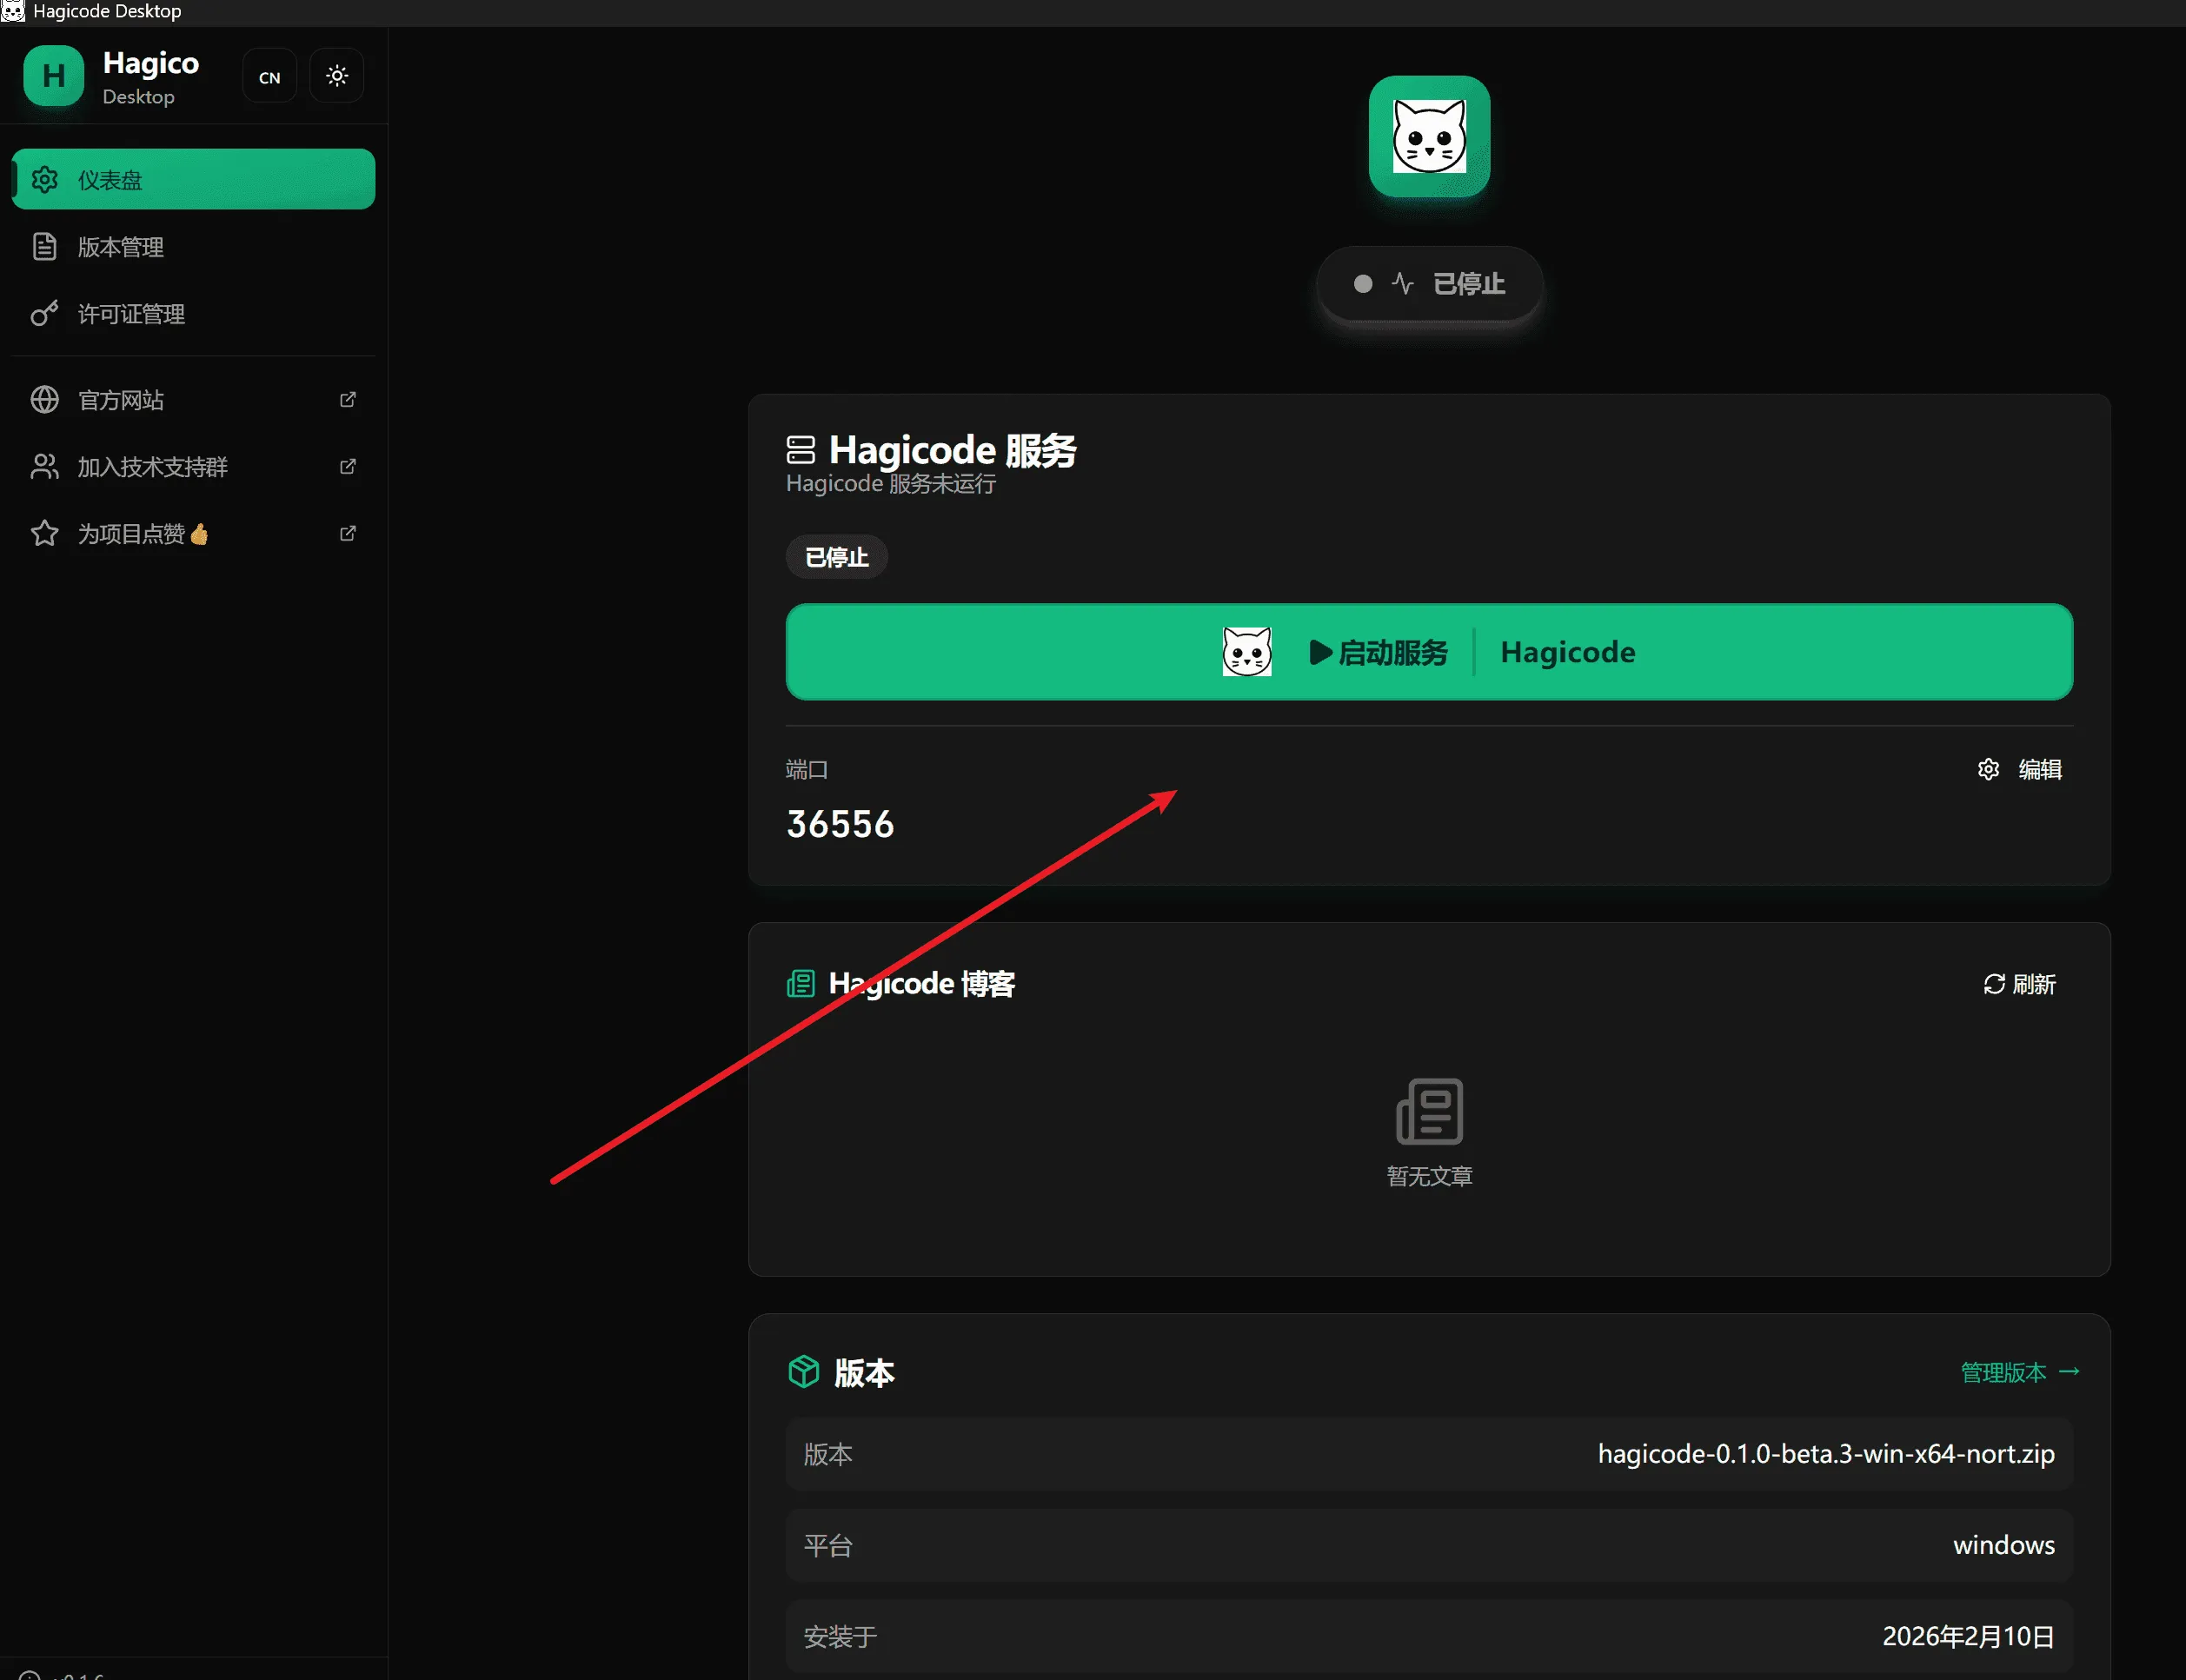
Stop Service
Section titled “Stop Service”To stop Hagicode Server, click the “Stop Service” button on the home page.
Next Steps
Section titled “Next Steps”After installation is complete, you can continue with the following steps:
Troubleshooting
Section titled “Troubleshooting”Installation Failure
Section titled “Installation Failure”If you encounter issues during installation:
- Check Network Connection: Ensure you can access the internet
- Check Disk Space: Ensure you have sufficient disk space
- Run as Administrator: On Windows, right-click the installer and select “Run as administrator”
- View Log Files: The installer generates detailed log files that can help diagnose issues
Dependency Installation Failure
Section titled “Dependency Installation Failure”If dependency installation fails:
- Check System Compatibility: Ensure your operating system meets minimum requirements
- Check Network and Firewall Settings: Ensure the installer can reach required downloads and is not blocked by your firewall
- Confirm Installer Permissions: On Windows, try running the installer as administrator so it has sufficient permissions
- Restart the App and Retry: Close and reopen Hagicode Desktop, then retry the installation step
- View Logs: Review detailed error logs in the Desktop application
Service Startup Failure
Section titled “Service Startup Failure”If Hagicode Server fails to start:
- Check Port Occupancy: Ensure port 45000 is not occupied by other programs
- Check Firewall Settings: Ensure firewall allows Hagicode Server network access
- Restart Application: Try restarting Hagicode Desktop
- View Logs: View detailed error logs in the Desktop application
Need More Help?
Section titled “Need More Help?”If you encounter issues not covered here:
- Check GitHub Issues for similar problems
- Visit our Community Forum for help
- Submit a new Issue, describing your problem in detail