Desktop Installation
This guide explains how to install and use the Hagicode Desktop application. Hagicode Desktop is a powerful and easy-to-use desktop application that provides you with a complete Hagicode experience.
What is Hagicode Desktop?
Section titled “What is Hagicode Desktop?”Hagicode Desktop is Hagicode’s official desktop application, designed for Windows, macOS, and Linux systems. It integrates all of Hagicode’s core features and makes the installation process simple and fast through an installation wizard.
Main Advantages
Section titled “Main Advantages”- One-click Installation: Complete all configuration steps automatically through the installation wizard
- Automatic Dependency Management: Automatically detects and installs required runtime environments (like .NET runtime)
- Service Management: Built-in Hagicode Server management, easily start and stop services
- Version Switching: Support for multi-version management, freely switch between different versions
- Local Operation: All data is stored locally, protecting your privacy
- Automatic Updates: Automatically detects and downloads the latest version
Applicable Scenarios
Section titled “Applicable Scenarios”Hagicode Desktop is suitable for the following scenarios:
- Individual developers who want to use Hagicode locally
- Users who need to use Hagicode offline
- Non-technical users who want to simplify the installation process
- Developers who need to frequently switch between different versions
Download Desktop
Section titled “Download Desktop”Quick Download
Section titled “Quick Download”Select the version suitable for your operating system and download the installer directly:
Other Download Methods
Section titled “Other Download Methods”You can also get the Hagicode Desktop installer from the following channels:
- Official Release Page: Visit Hagicode GitHub Releases to download the latest version
- Official Website: Visit Hagicode Website to get download links
Choose the Correct Version
Section titled “Choose the Correct Version”Select the corresponding installer for your operating system:
- Windows: Download the
.exeinstaller - macOS: Recommended: install the Docker version (Go to Container page)
- Linux: Download the
.AppImageor.debinstaller package
Run the Installer
Section titled “Run the Installer”After downloading, run the installer. You will see the Hagicode Desktop installer welcome screen.
Installation Wizard Steps
Section titled “Installation Wizard Steps”Hagicode Desktop provides a four-step installation wizard to guide you through the complete installation process. Here are detailed instructions for each step:
Step 1: Select Pre-configured AgentCLI
Section titled “Step 1: Select Pre-configured AgentCLI”The installation wizard will guide you to select a pre-configured AgentCLI for installation.
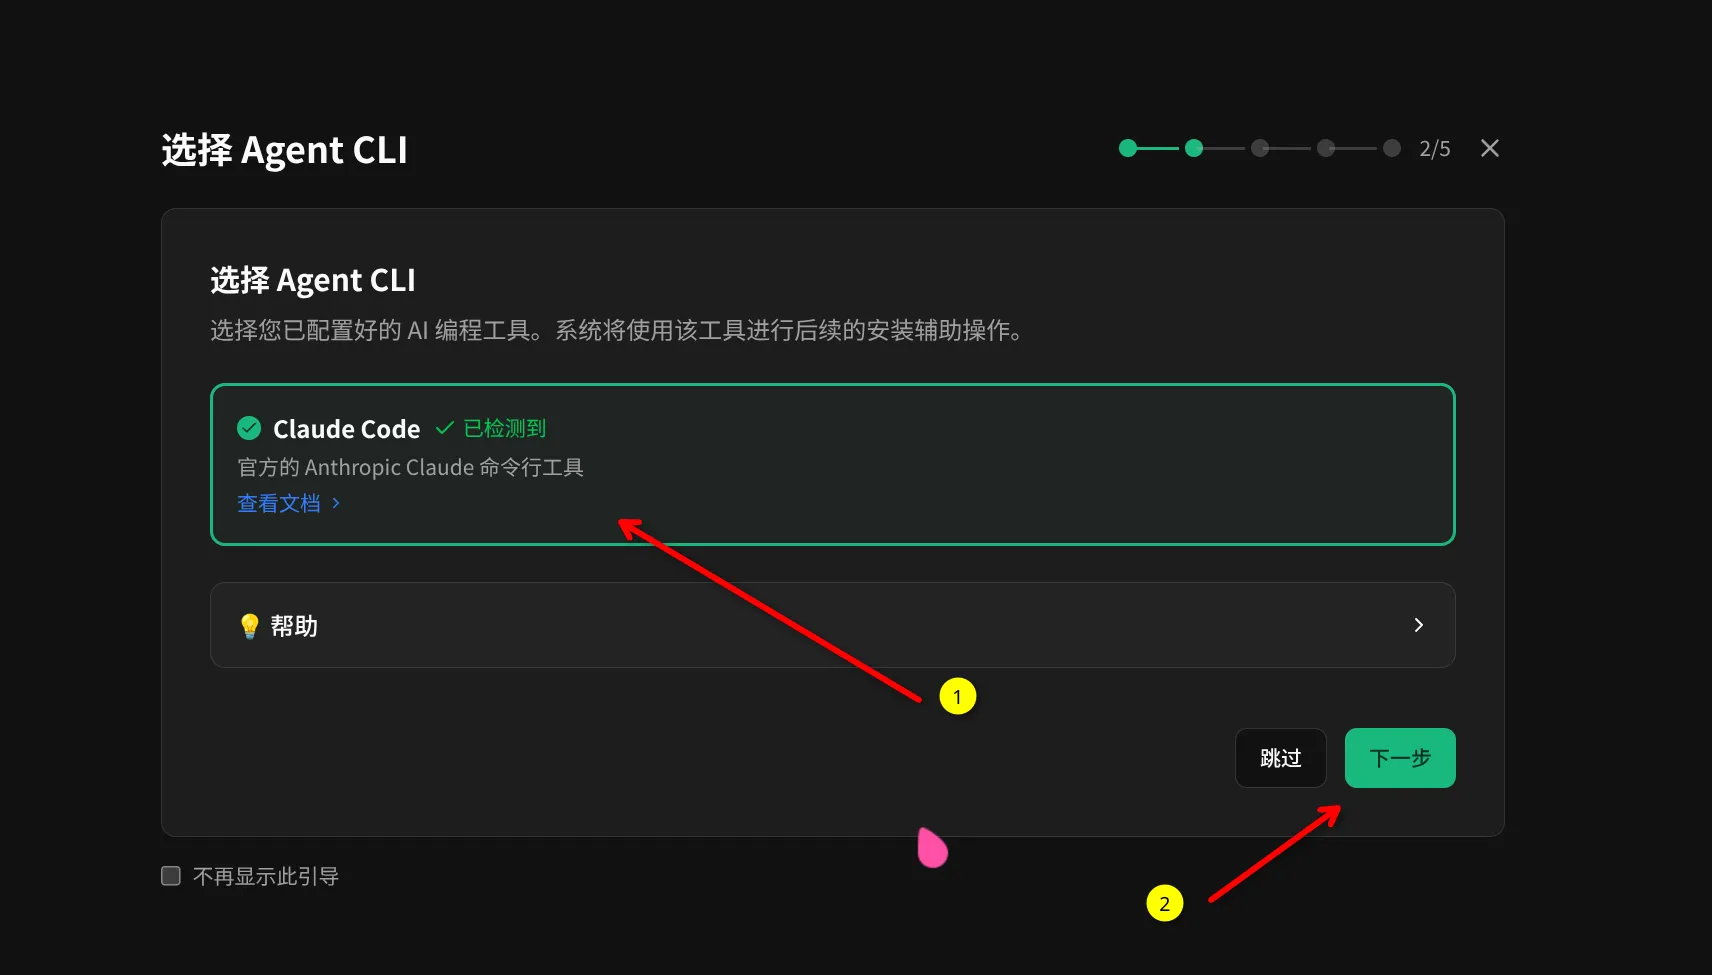
This Step Explains:
- View the list of available AgentCLI options
- Select your pre-configured AgentCLI
- Confirm selection and continue to next step
Step 2: Download Hagicode
Section titled “Step 2: Download Hagicode”After configuration is complete, the wizard will automatically download the latest version of Hagicode.

This Step Explains:
- Wizard automatically detects and downloads the latest stable version
- Download progress is displayed in real-time
- Automatically proceeds to next step after download completes
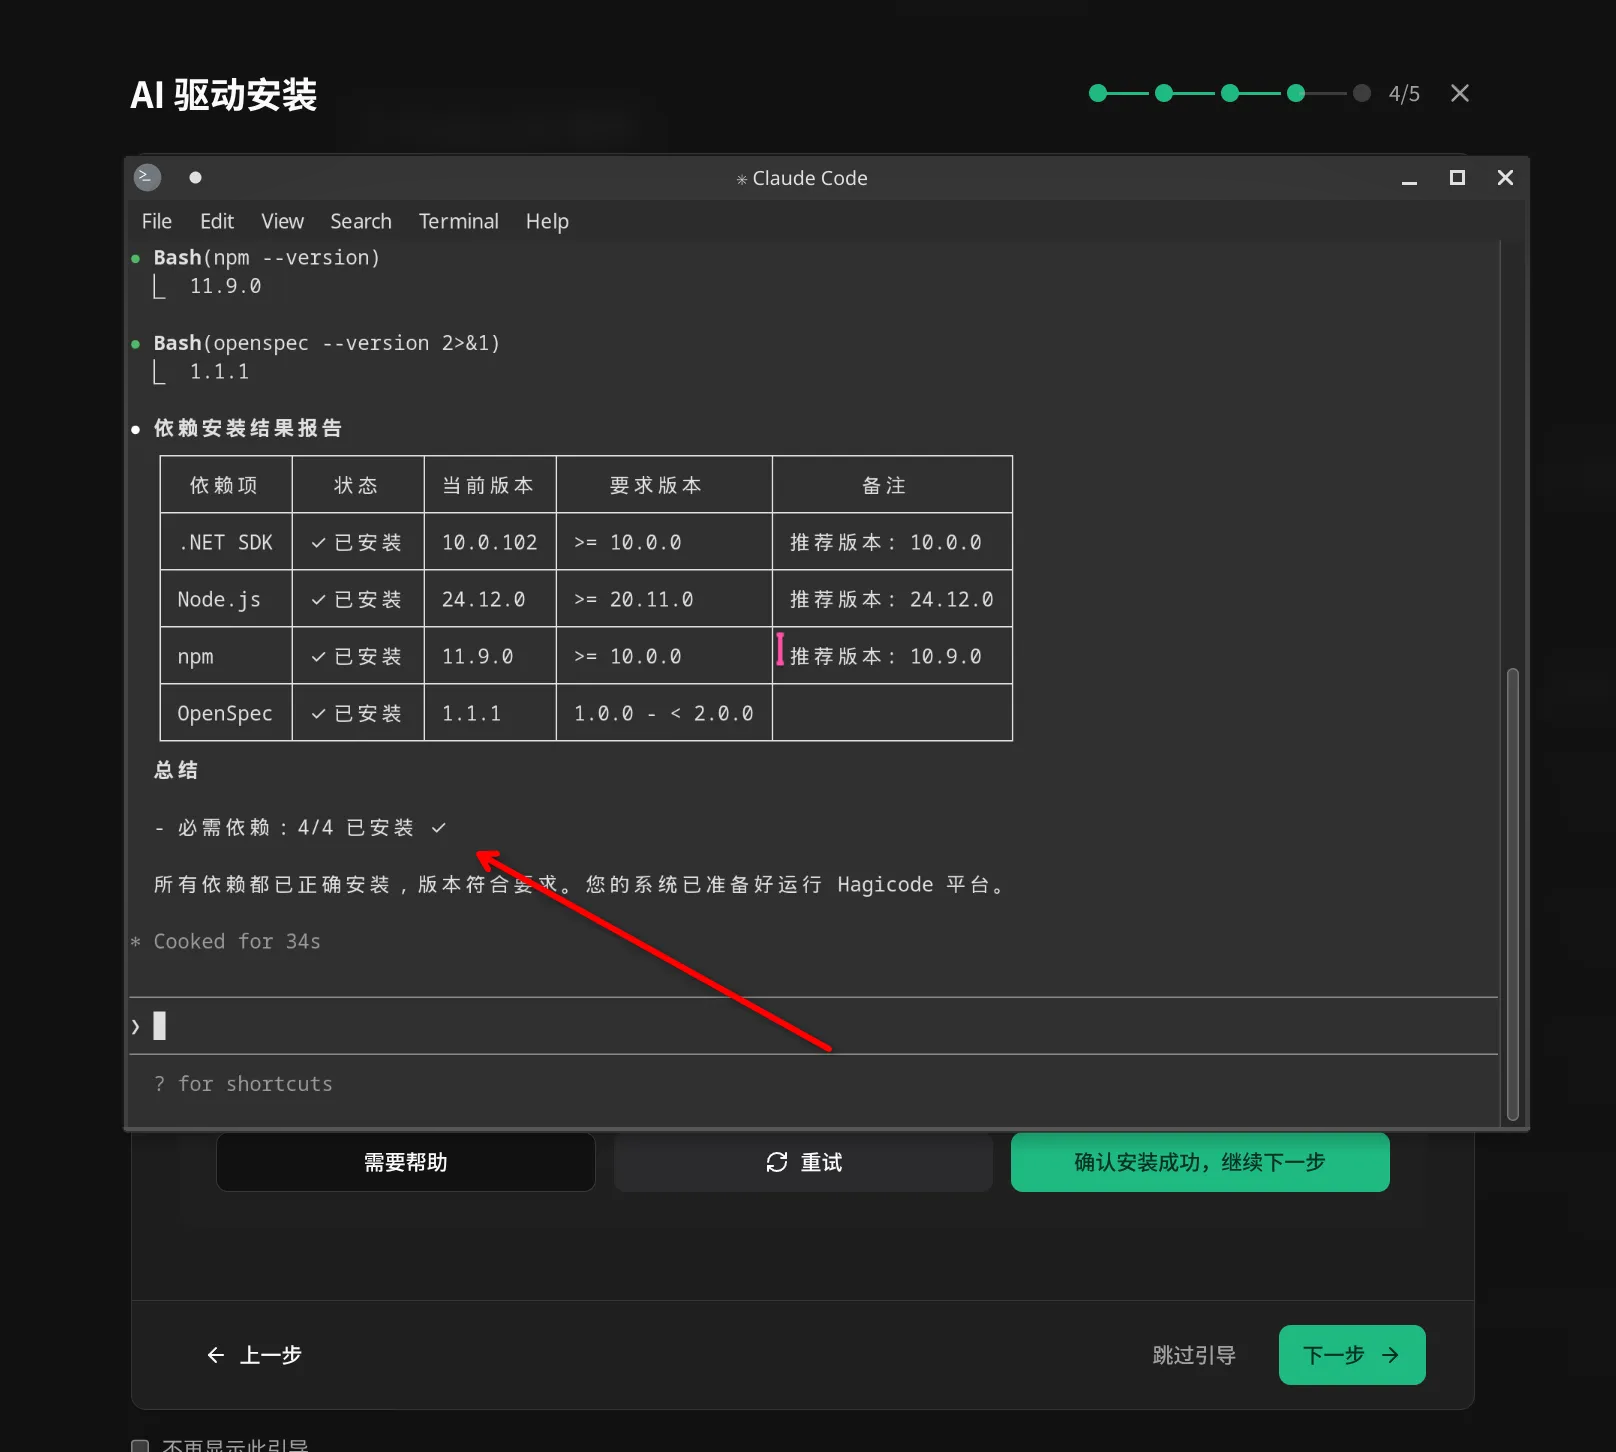
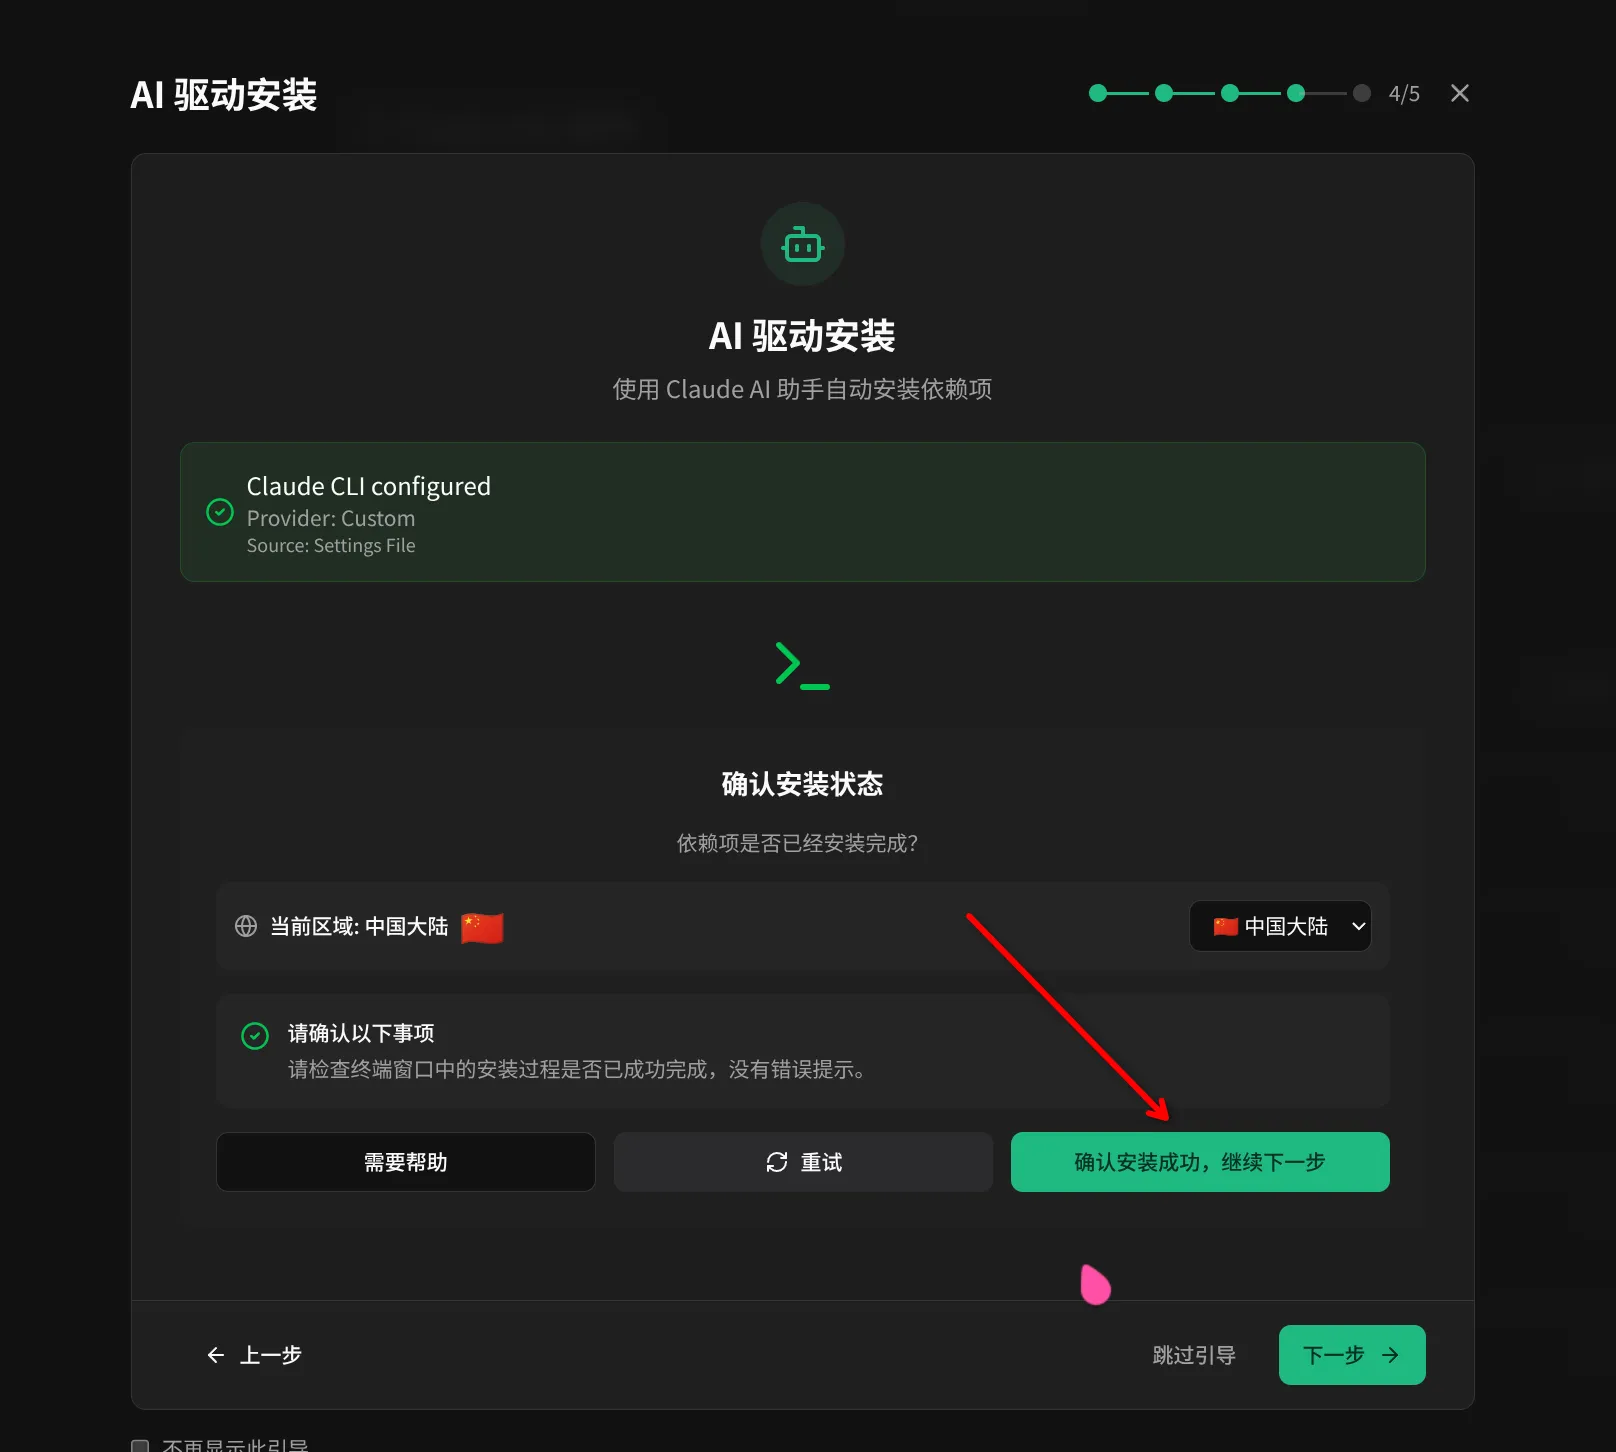
Step 3: Select Region and Install AI
Section titled “Step 3: Select Region and Install AI”Hagicode supports different AI models for different regions. You can choose the appropriate region based on your location.
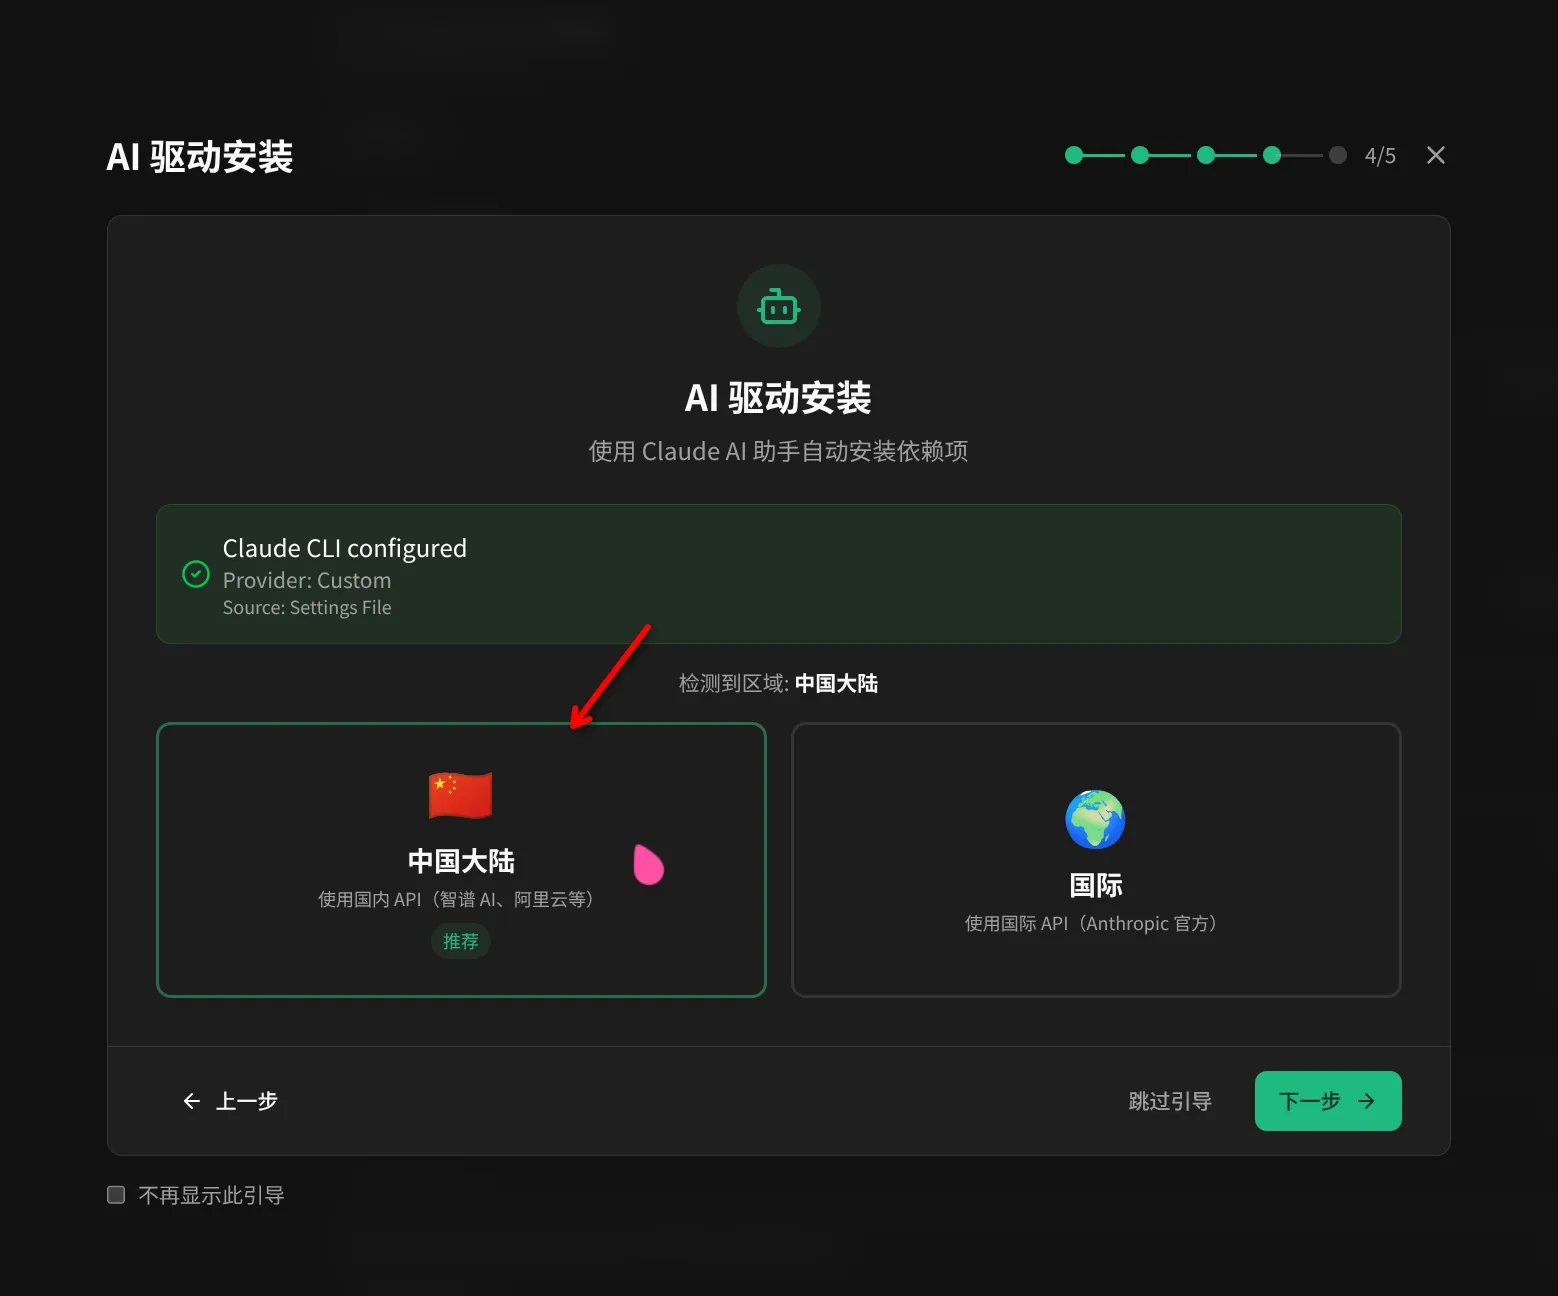
Region Selection Explains:
- Mainland China: Optimized network connection, suitable for users in China
- International Region: Suitable for overseas users or users with special network requirements
The wizard will automatically configure and launch the AI installation process based on your selected region.
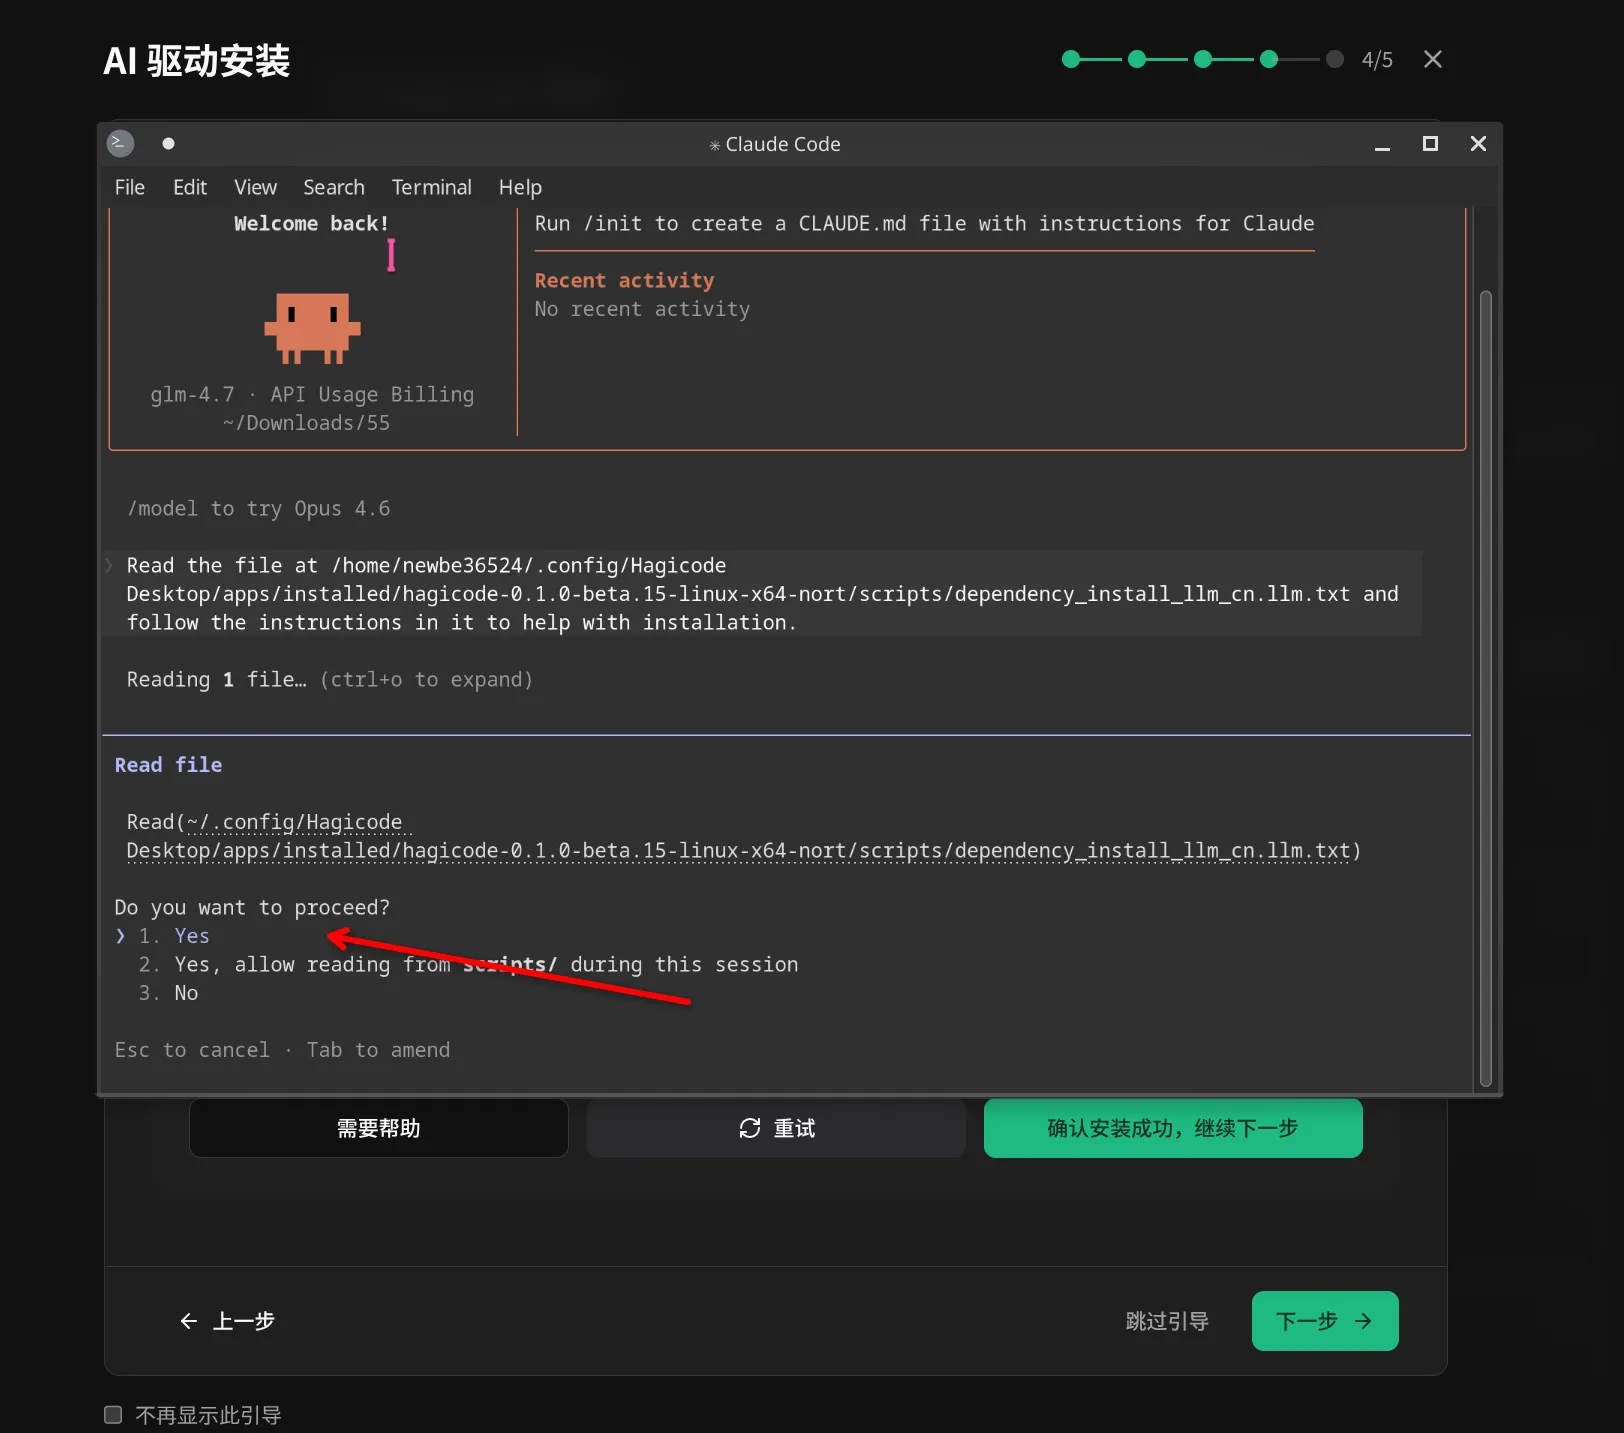
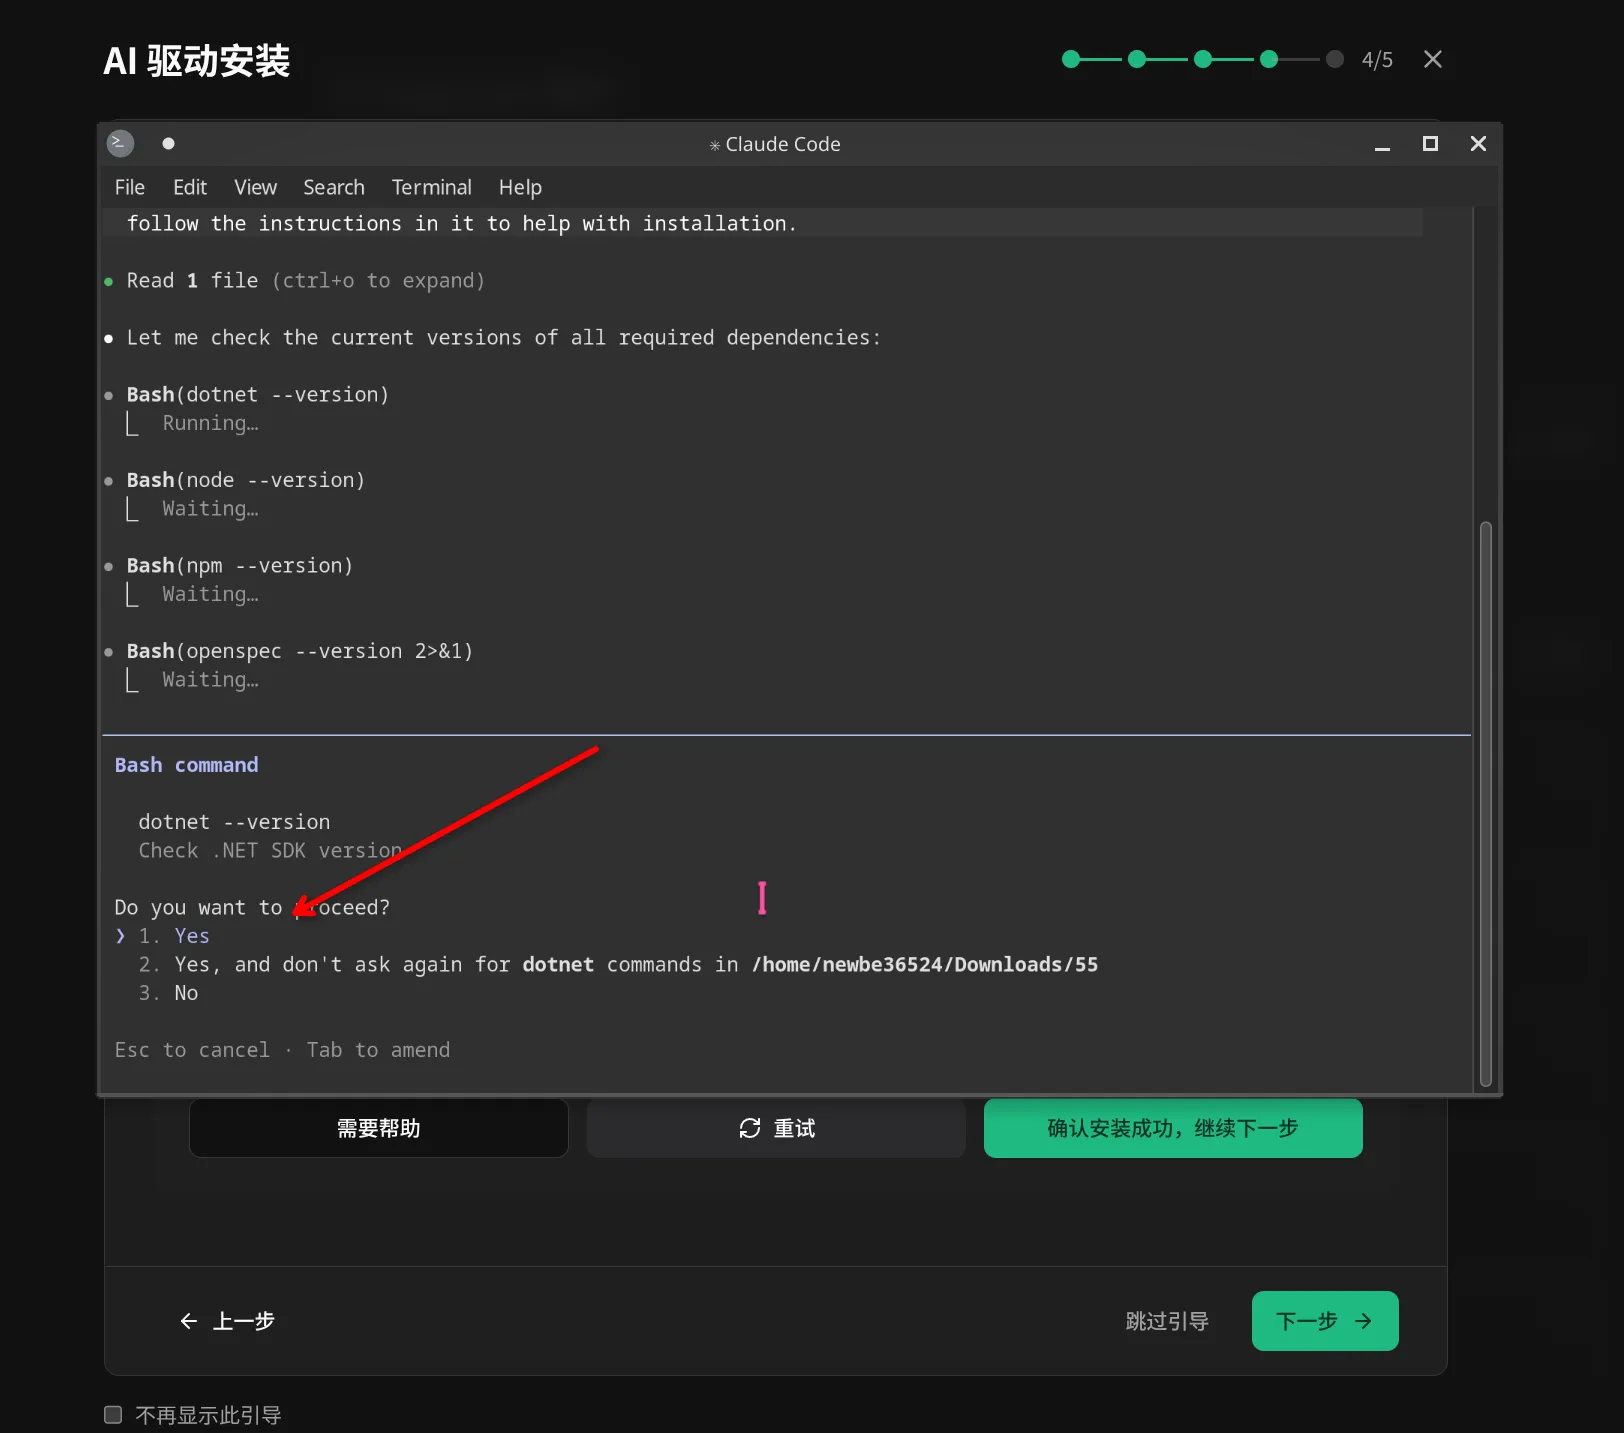
This Step Explains:
- AI assistant guides you through the installation process
- Please follow the on-screen prompts
- If you encounter issues, click “Need Help” for support
Step 4: Start Service
Section titled “Step 4: Start Service”After AI installation is complete, the wizard will launch the Hagicode Server service.
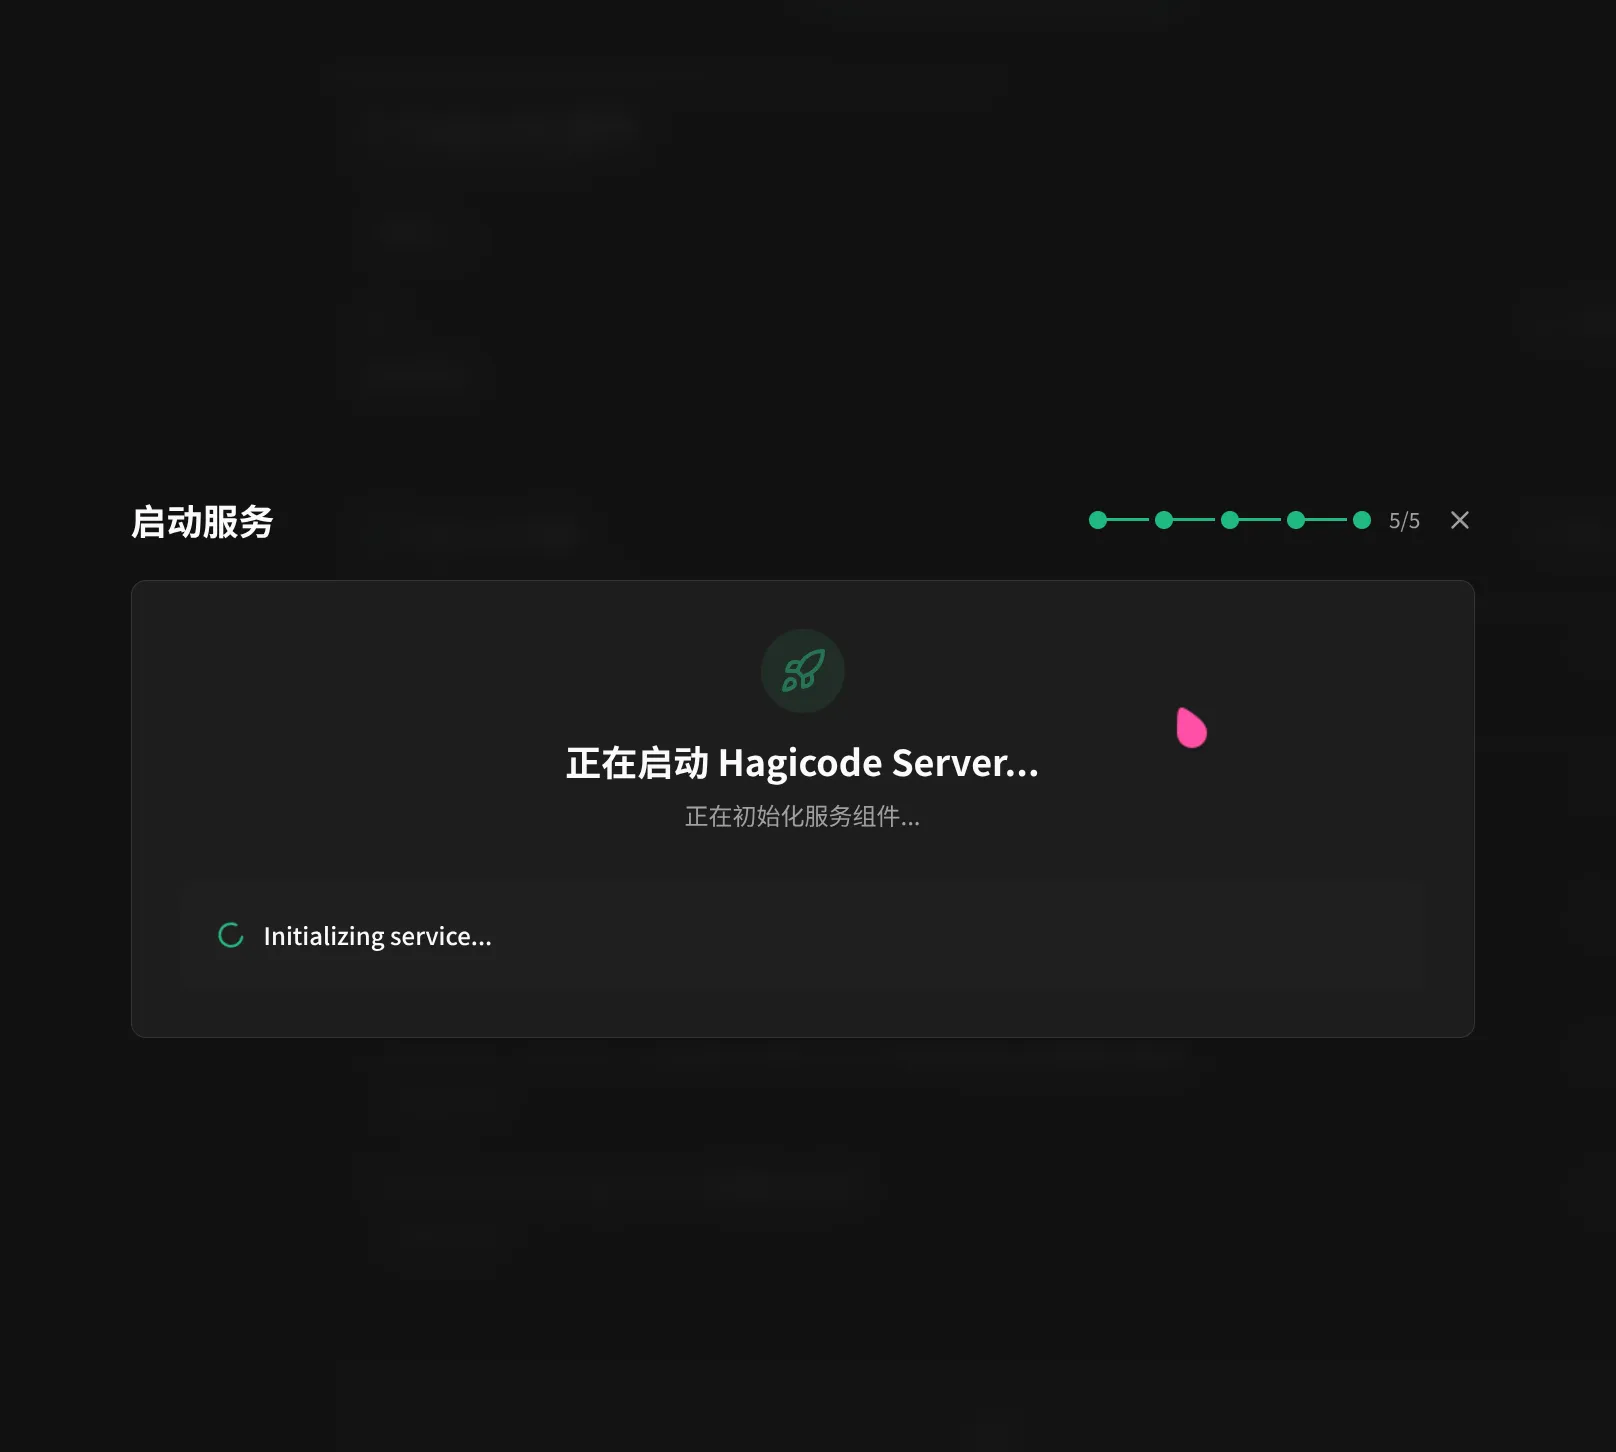
This Step Explains:
- Hagicode Server starts automatically in the background
- Startup usually takes only a few seconds
- After startup completes, you can start using Hagicode
Service Startup Complete
Section titled “Service Startup Complete”When Hagicode Server successfully starts, you will see the following interface.
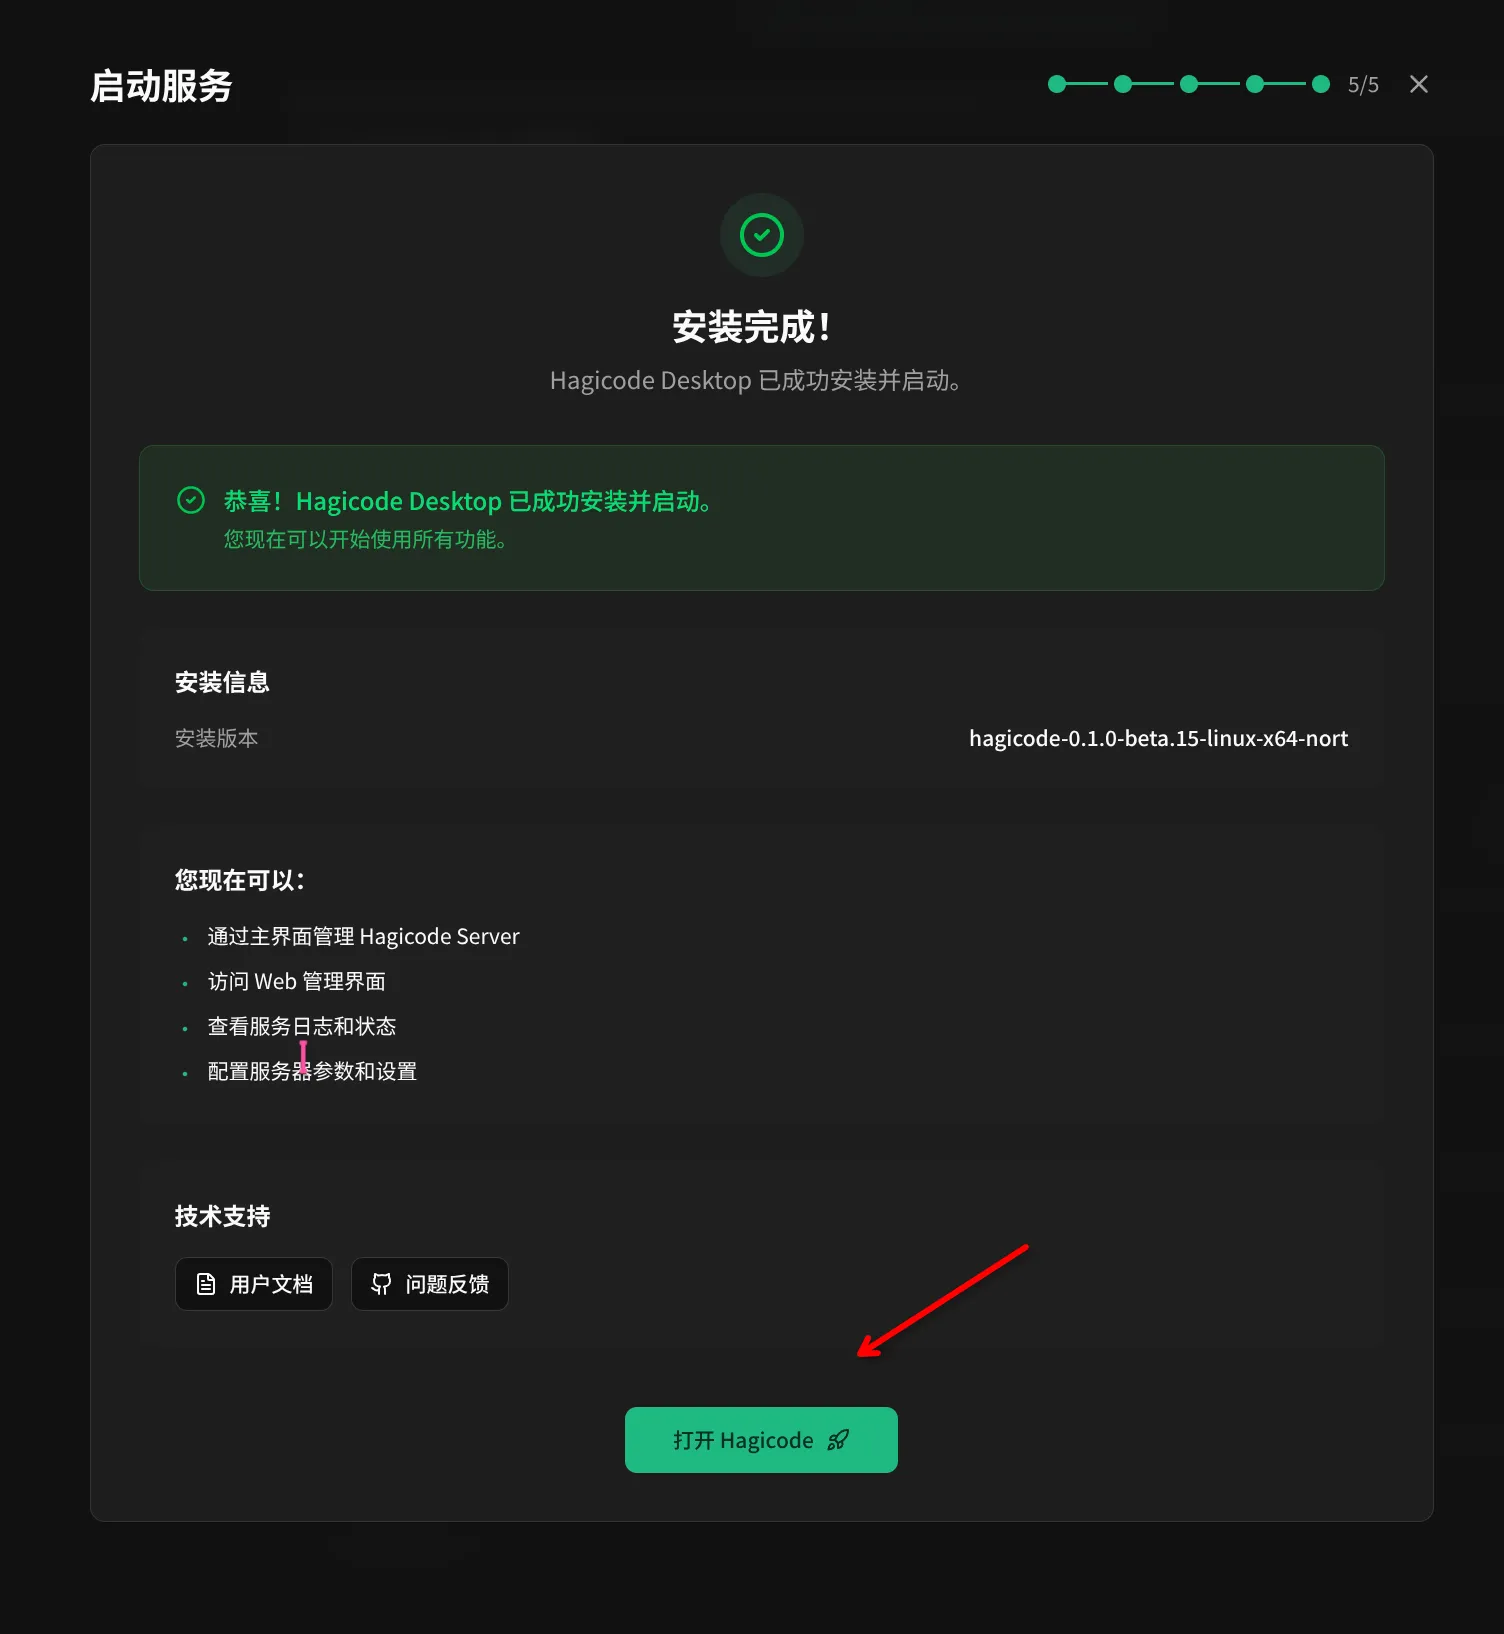
Click the “Open Hagicode” button to start using.
First Use
Section titled “First Use”Create Project
Section titled “Create Project”When you first enter Hagicode, you can create your first project through the built-in import wizard.

Project Creation Steps:
- Click “Create New Project”
- Configure project name and path
- Select programming language and framework
- Configure API settings
- Complete project creation
Import Git Repository
Section titled “Import Git Repository”If you already have an existing Git repository, you can easily import it into Hagicode.
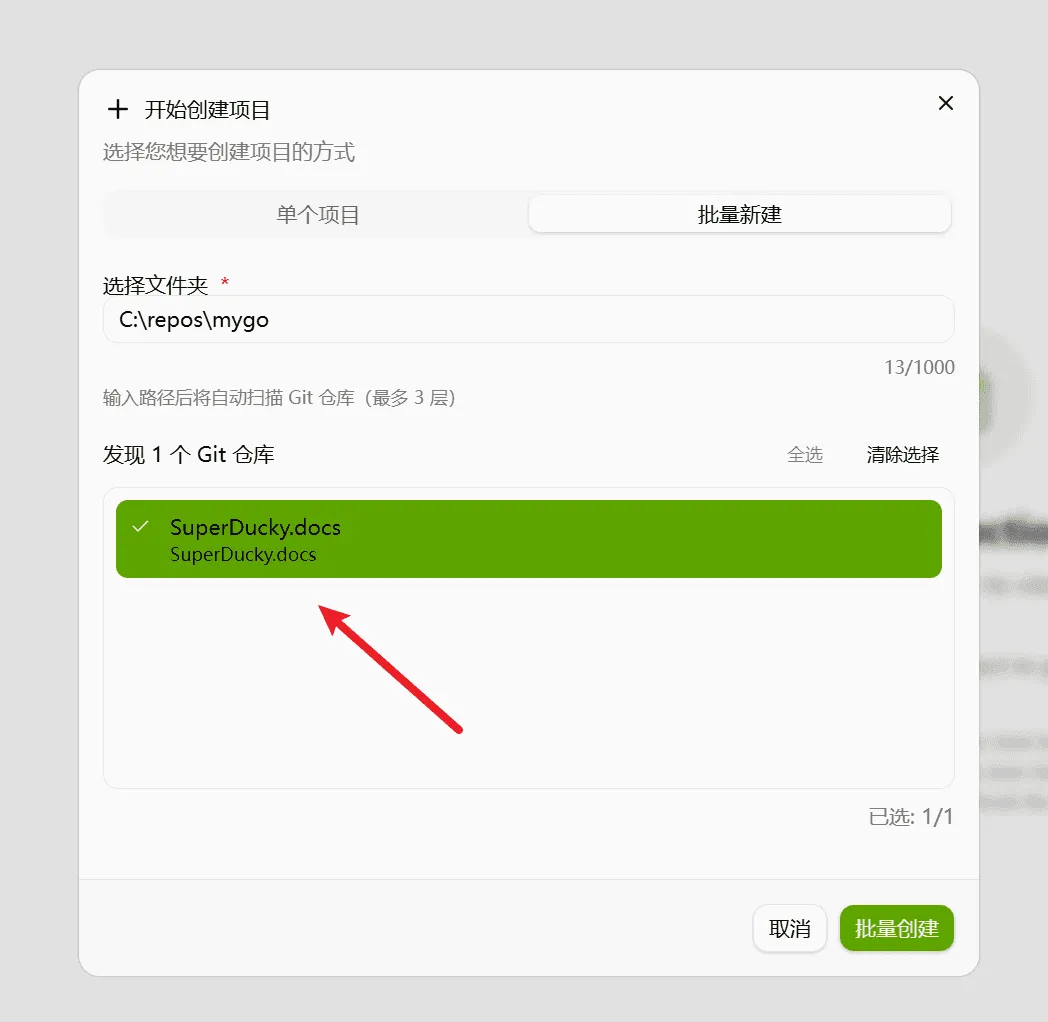
Import Steps:
- Click “Import Project”
- Enter the folder path containing Git repositories
- Hagicode will automatically scan all Git repositories in that folder
- Select the repository you want to import and confirm
Version Management
Section titled “Version Management”Hagicode Desktop supports multi-version management, allowing you to freely switch between different versions.
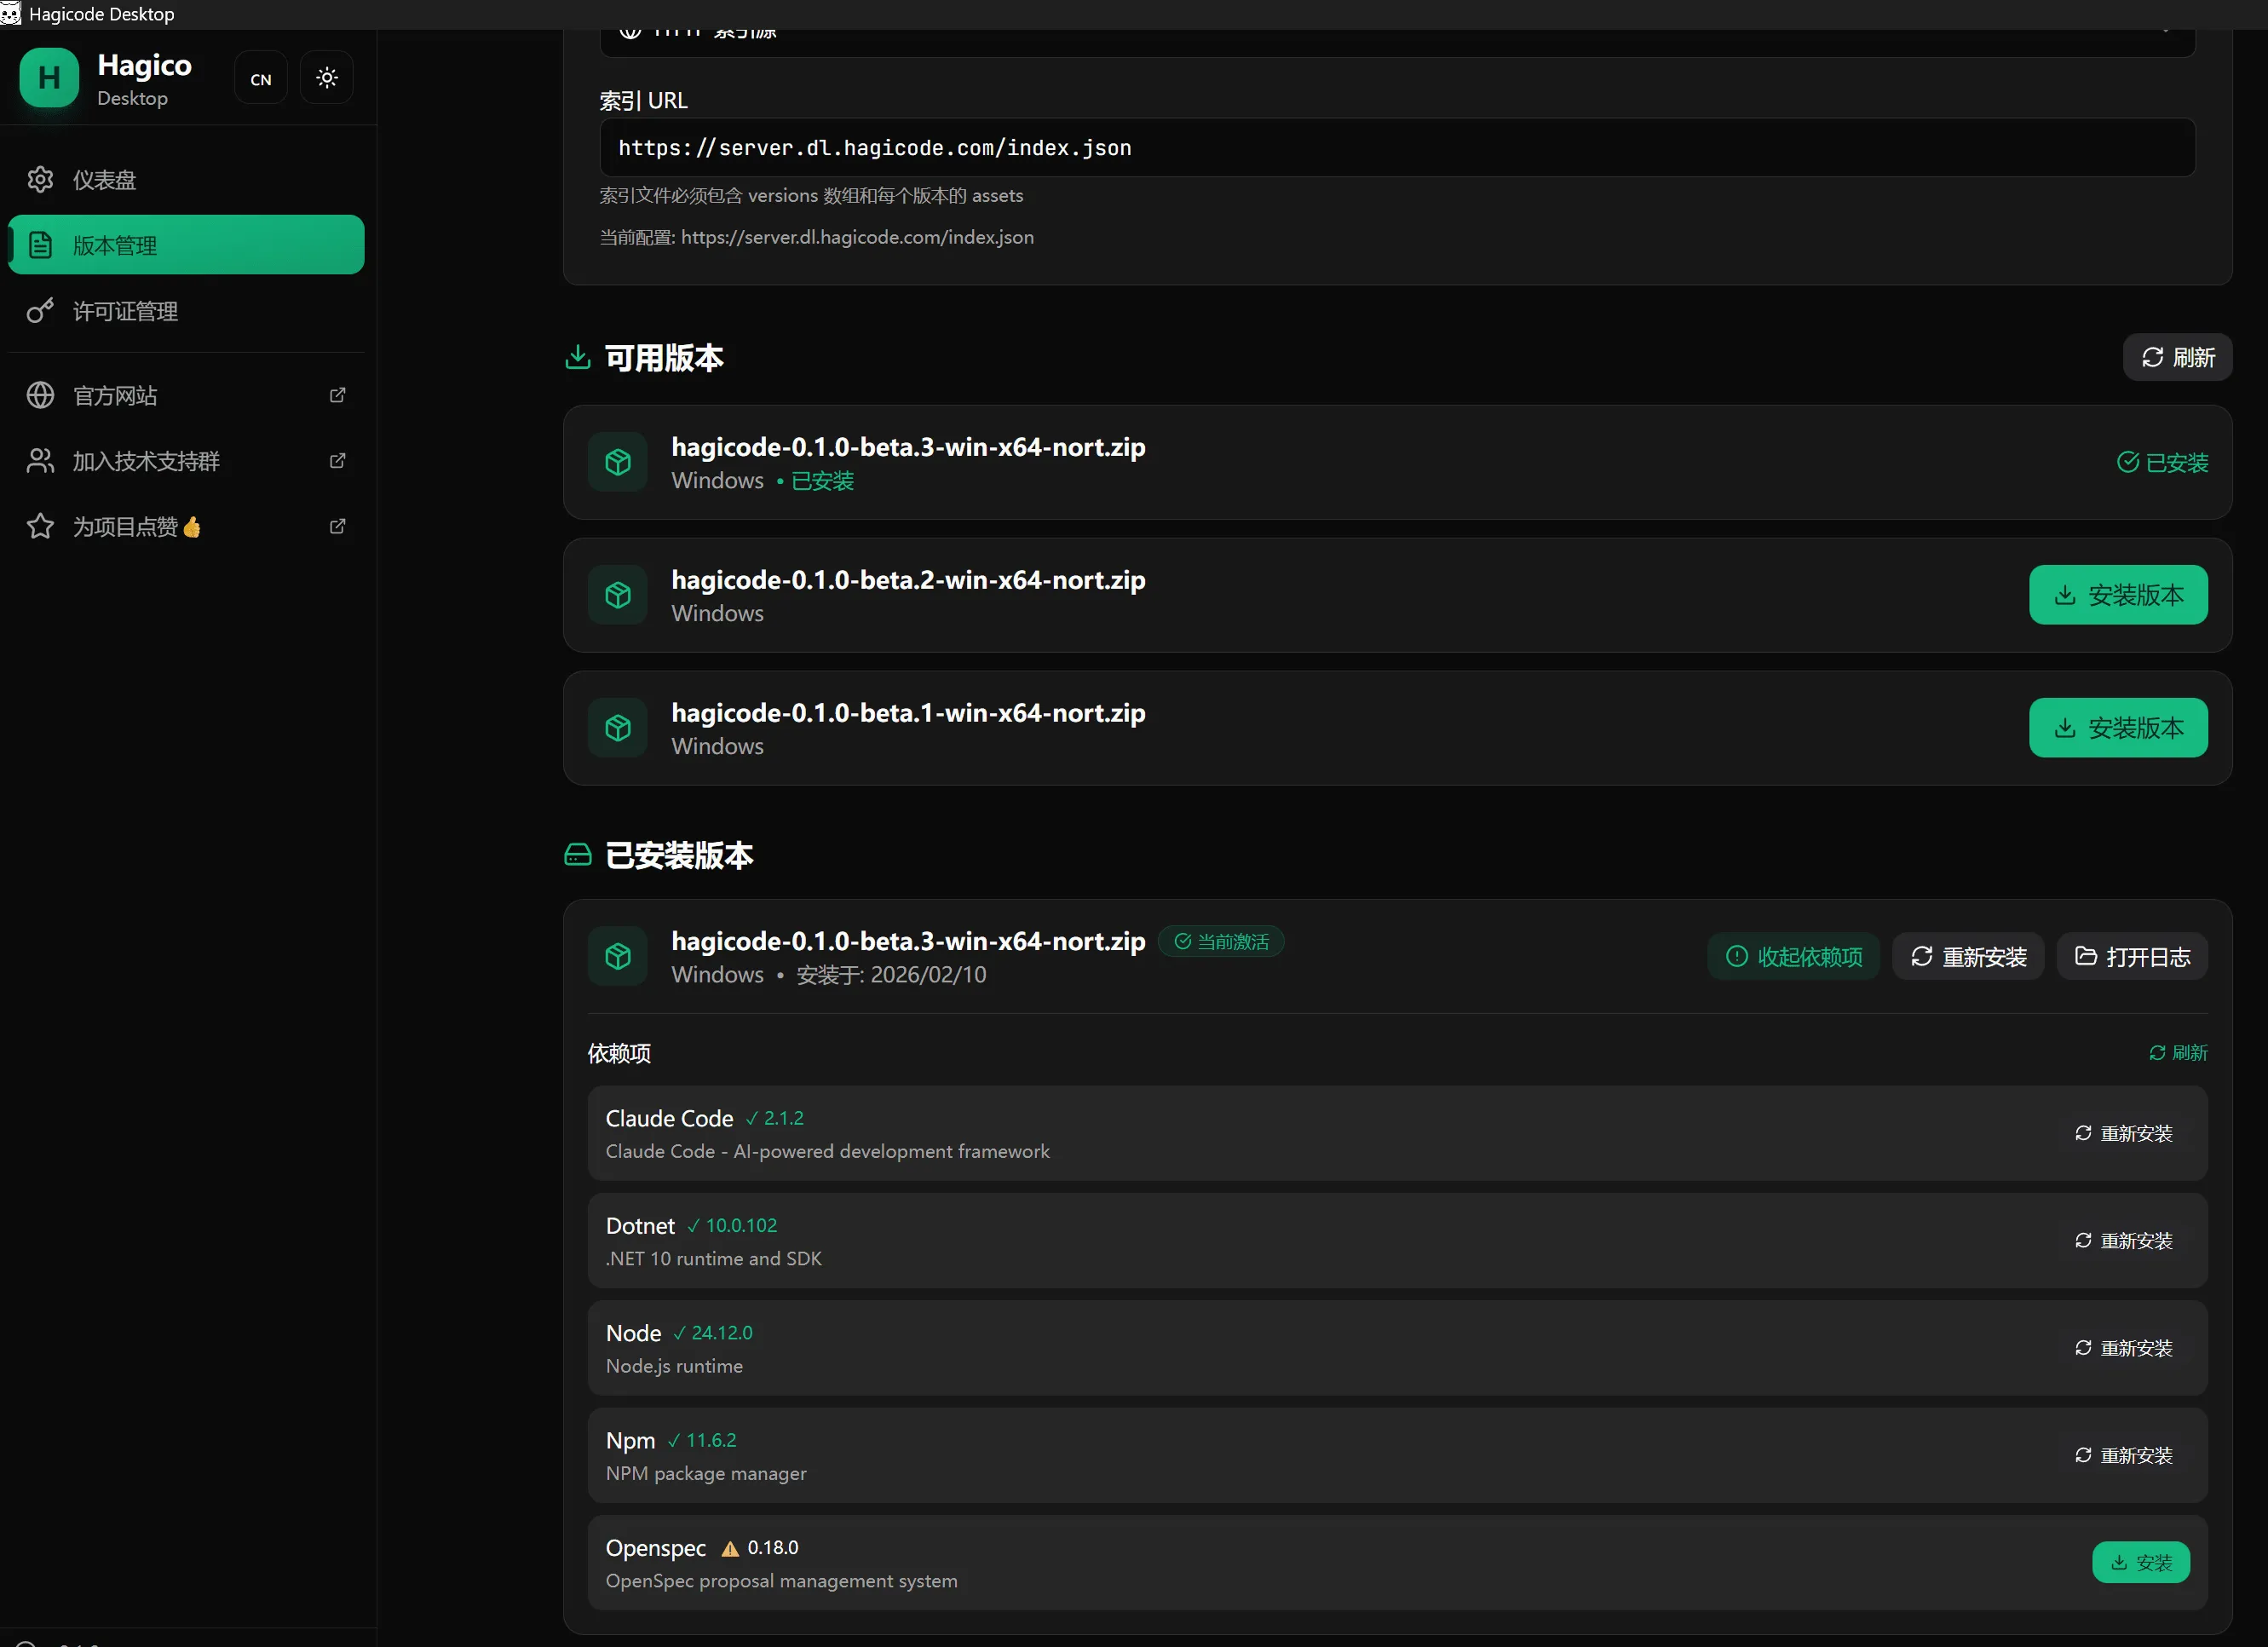
Switch Version
Section titled “Switch Version”- Open Hagicode Desktop
- Go to “Version Management” page
- Select the version you want to switch
- Click “Switch Version” button
- Wait for switch to complete
Start and Stop Service
Section titled “Start and Stop Service”Hagicode Desktop provides a simple way to manage Hagicode Server service.
Start Service
Section titled “Start Service”On the home page of the Desktop application, click the “Start Service” button to start Hagicode Server.
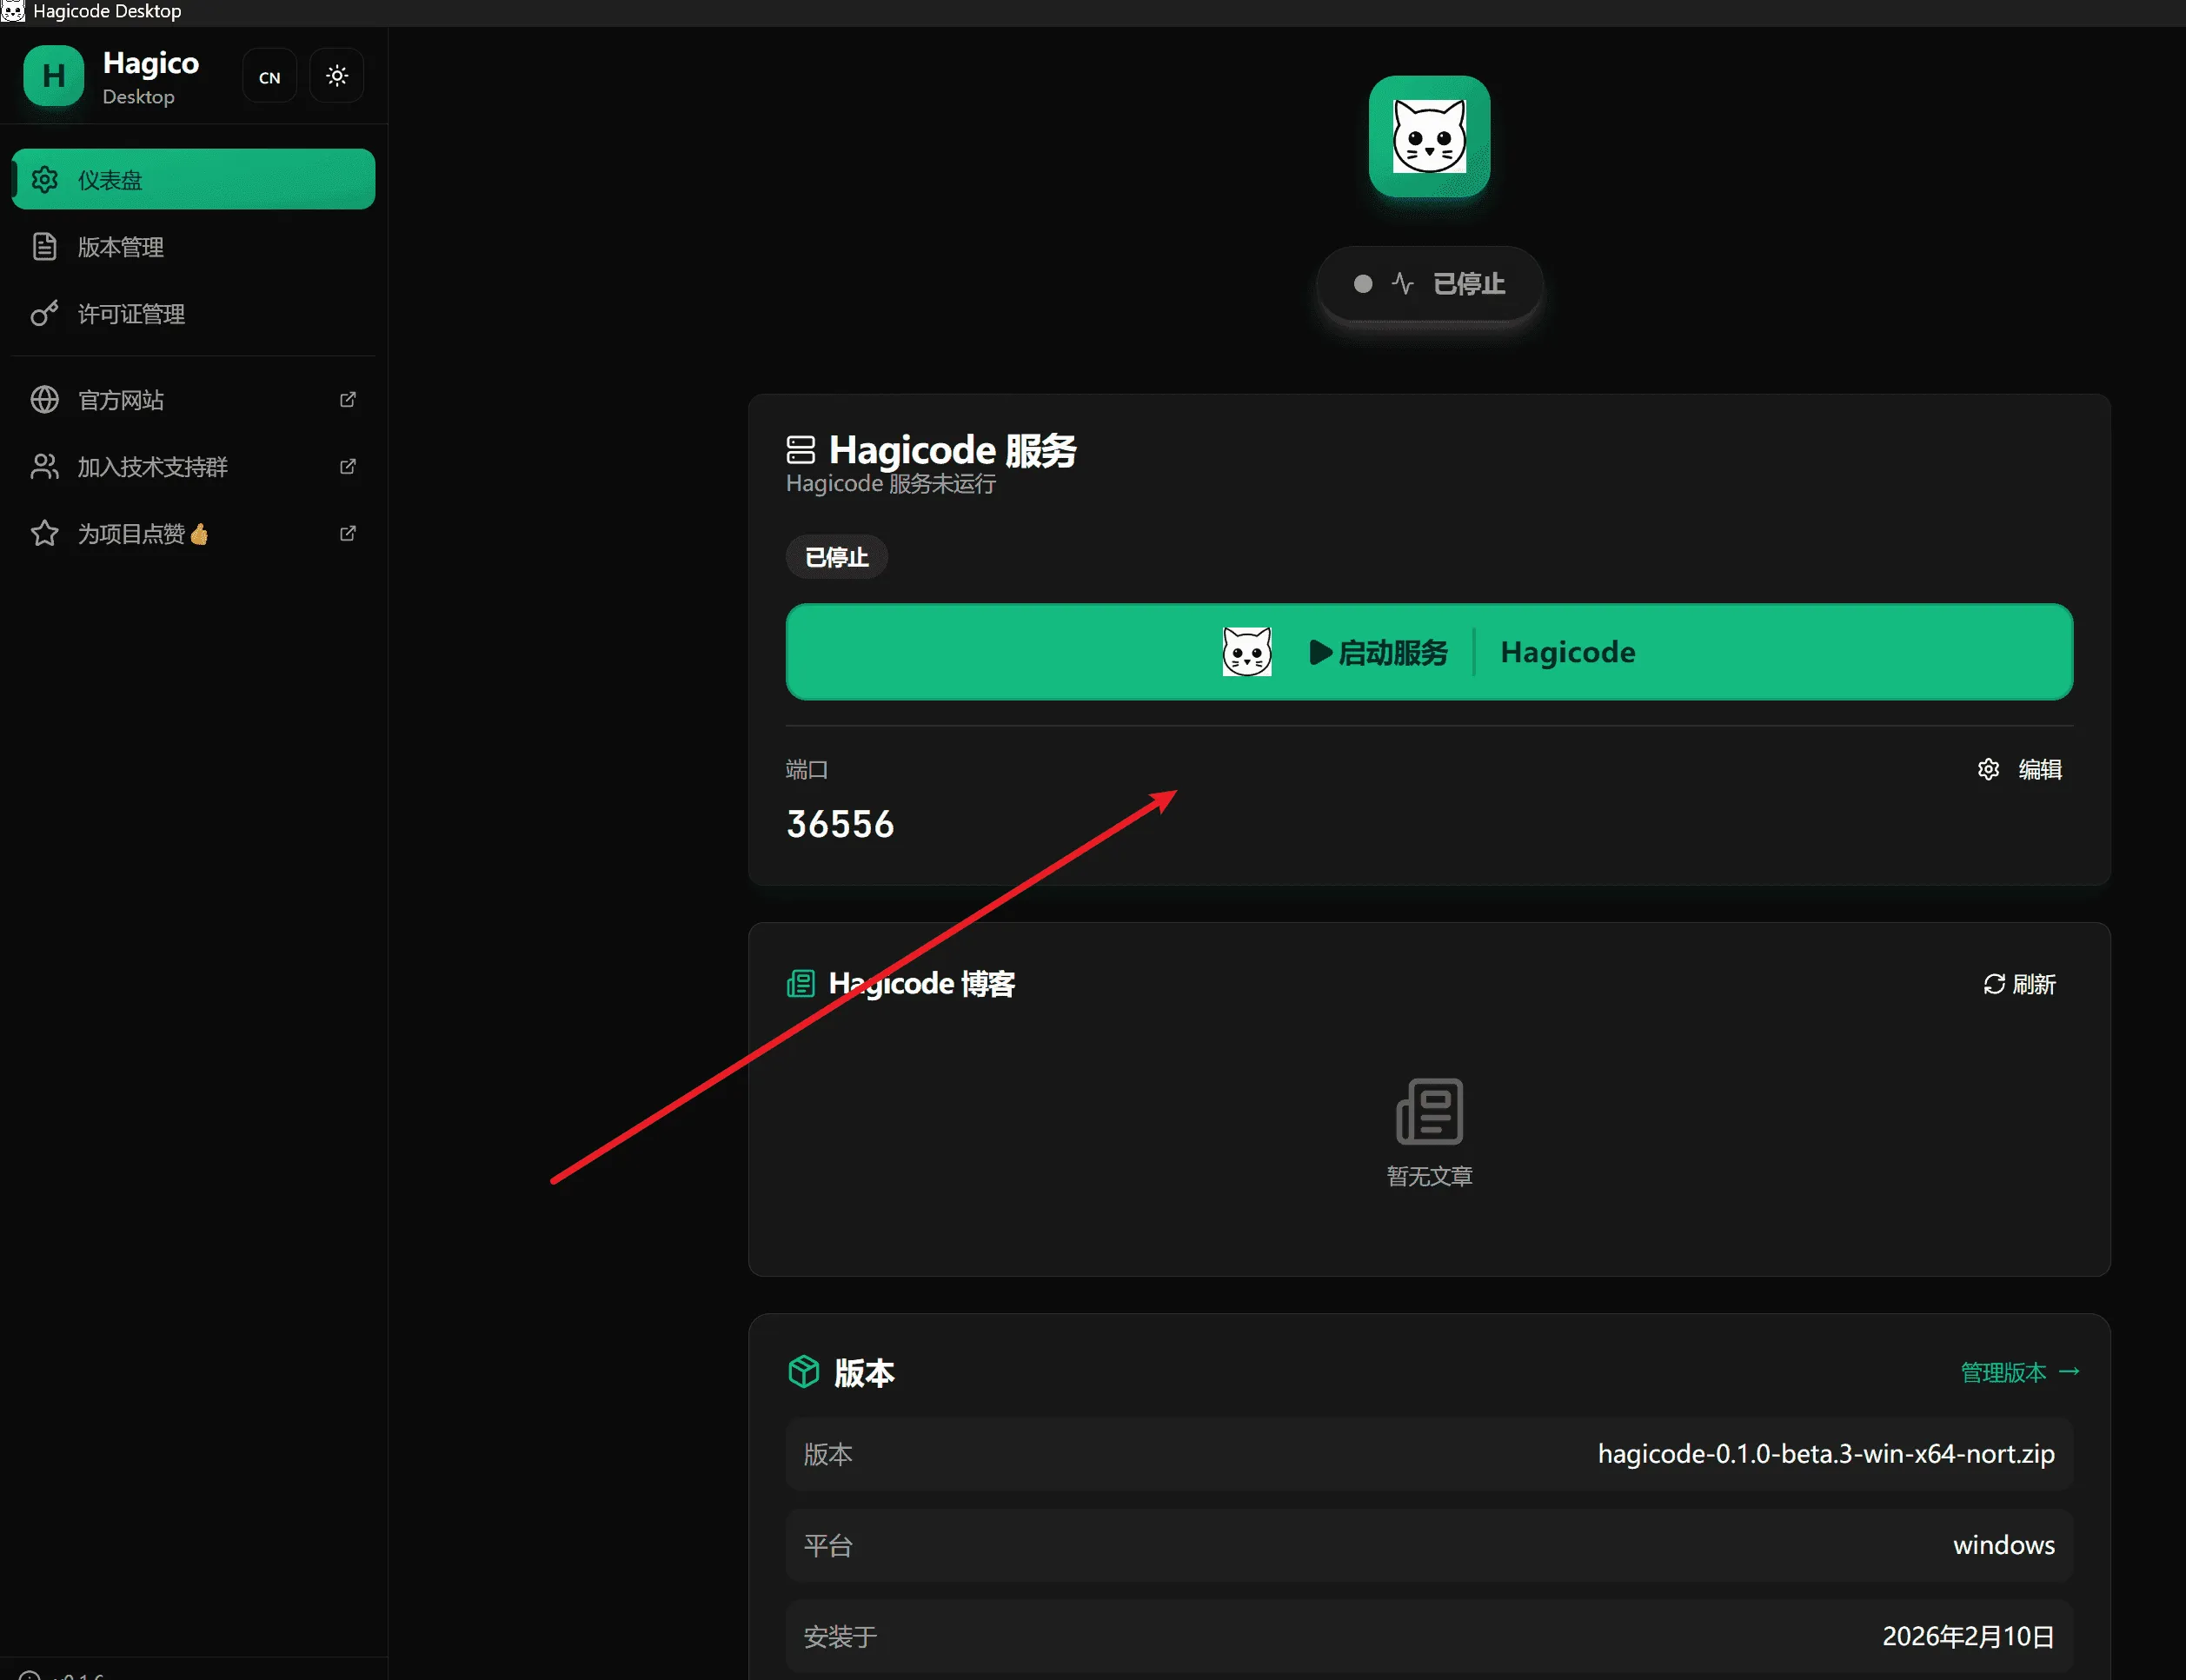
Stop Service
Section titled “Stop Service”To stop Hagicode Server, click the “Stop Service” button on the home page.
Next Steps
Section titled “Next Steps”After installation is complete, you can continue with the following steps:
Troubleshooting
Section titled “Troubleshooting”Installation Failure
Section titled “Installation Failure”If you encounter issues during installation:
- Check Network Connection: Ensure you can access the internet
- Check Disk Space: Ensure you have sufficient disk space
- Run as Administrator: On Windows, right-click the installer and select “Run as administrator”
- View Log Files: The installer generates detailed log files that can help diagnose issues
Dependency Installation Failure
Section titled “Dependency Installation Failure”If dependency installation fails:
- Check System Compatibility: Ensure your operating system meets minimum requirements
- Manually Install Dependencies: You can manually download and install .NET runtime
- Check Firewall Settings: Ensure firewall doesn’t block the installer
- Restart Application: Try restarting Hagicode Desktop
- View Logs: View detailed error logs in the Desktop application
Service Startup Failure
Section titled “Service Startup Failure”If Hagicode Server fails to start:
- Check Port Occupancy: Ensure port 45000 is not occupied by other programs
- Check Firewall Settings: Ensure firewall allows Hagicode Server network access
- Restart Application: Try restarting Hagicode Desktop
- View Logs: View detailed error logs in the Desktop application
Need More Help?
Section titled “Need More Help?”If you encounter issues not covered here:
- Check GitHub Issues for similar problems
- Visit our Community Forum for help
- Submit a new Issue, describing your problem in detail