Building Elegant New User Onboarding in React Projects: HagiCode's driver.js Practice
Building Elegant New User Onboarding in React Projects: HagiCode’s driver.js Practice
Section titled “Building Elegant New User Onboarding in React Projects: HagiCode’s driver.js Practice”When users open your product for the first time, do they really know where to start? In this article, I want to talk a bit about how we used driver.js for new user onboarding in the HagiCode project. Consider it a small practical example to get the conversation started.
Background
Section titled “Background”Have you ever run into this situation? A new user signs up for your product, opens the page, and immediately looks lost. They scan around, unsure what to click or what to do next. As developers, we often assume users will just “explore on their own” because, after all, human curiosity is limitless. But reality is different: most users quietly leave within minutes if they cannot find the right entry point, as if the story begins suddenly and ends just as naturally.
New user onboarding is an important way to solve this problem, but building it well is not that simple. A good onboarding system needs to:
- Precisely locate page elements and highlight them
- Support multi-step onboarding flows
- Remember the user’s choice (complete or skip)
- Avoid affecting page performance and normal interaction
- Keep the code structure clear and easy to maintain
While building HagiCode, we ran into the same challenge. HagiCode is an AI coding assistant, and its core workflow is an OpenSpec workflow that looks like this: “the user creates a Proposal -> the AI generates a plan -> the user reviews it -> the AI executes it.” For users encountering this concept for the first time, the workflow is completely new, so they need solid onboarding to get started quickly. New things always take a little time to get used to.
About HagiCode
Section titled “About HagiCode”The approach shared in this article comes from our hands-on experience in the HagiCode project. HagiCode is a Claude-based AI coding assistant that helps developers complete coding tasks more efficiently through the OpenSpec workflow. You can view our open-source code on GitHub.
Why We Chose driver.js
Section titled “Why We Chose driver.js”During the technical evaluation phase, we looked at several mainstream onboarding libraries. Each one had its own strengths:
- Intro.js: Powerful, but relatively large, and style customization is somewhat complex
- Shepherd.js: Well-designed API, but a bit too “heavy” for our use case
- driver.js: Lightweight, concise, intuitive API, and works well in the React ecosystem
In the end, we chose driver.js. There was no especially dramatic reason. The choice mainly came down to these considerations:
- Lightweight: The core library is small and does not significantly increase bundle size
- Simple API: The configuration is clear and intuitive, so it is easy to pick up
- Flexible: Supports custom positioning, styling, and interaction behavior
- Dynamic import: Can be loaded on demand without affecting first-screen performance
With technology selection, there is rarely a universally best answer. Usually, there is only the option that fits best.
Technical Implementation
Section titled “Technical Implementation”Core Configuration
Section titled “Core Configuration”driver.js has a very intuitive configuration model. Here is the core configuration we use in the HagiCode project:
import { driver } from 'driver.js';import 'driver.js/dist/driver.css';
const newConversationDriver = driver({  allowClose: true,           // Allow users to close the guide  animate: true,              // Enable animations  overlayClickBehavior: 'close', // Close the guide when the overlay is clicked  disableActiveInteraction: false, // Keep elements interactive  showProgress: false,        // Do not show the progress bar (we manage progress ourselves)  steps: guideSteps           // Array of guide steps});
The reasoning behind these settings is:
allowClose: true- Respect the user’s choice and do not force them to finish the guidedisableActiveInteraction: false- Some steps require real user actions, such as typing input, so interaction cannot be disabledoverlayClickBehavior: 'close'- Give users a quick way to exit
State Management
Section titled “State Management”Persisting onboarding state is critical. We do not want to restart the guide every time the page refreshes, because that gets annoying fast. HagiCode uses localStorage to manage guide state:
export type GuideState = 'pending' | 'dismissed' | 'completed';
export interface UserGuideState {  session: GuideState;  detailGuides: Record<string, GuideState>;}
// Read stateexport const getUserGuideState = (): UserGuideState => {  const state = localStorage.getItem('userGuideState');  return state ? JSON.parse(state) : { session: 'pending', detailGuides: {} };};
// Update stateexport const setUserGuideState = (state: UserGuideState) => {  localStorage.setItem('userGuideState', JSON.stringify(state));};
We define three states:
pending: The guide is still in progress, and the user has not completed or skipped itdismissed: The user closed the guide proactivelycompleted: The user completed all steps
For Proposal detail page onboarding, we also support more fine-grained state tracking through the detailGuides map, because one Proposal can go through multiple stages - draft, review, and execution complete - and each stage needs different guidance. The state of things is always changing, and onboarding should reflect that.
Target Element Selection
Section titled “Target Element Selection”driver.js uses CSS selectors to locate target elements. HagiCode follows a simple convention: use a custom data-guide attribute to mark onboarding targets:
const steps = [ { element: '[data-guide="launch"]', popover: { title: 'Start a New Conversation', description: 'Click here to create a new conversation session...' } }];In components, it looks like this:
<button data-guide="launch" onClick={handleLaunch}> New Conversation</button>The benefits of this approach are:
- Avoid conflicts with business styling class names
- Clear semantics, so you can immediately tell the element is related to onboarding
- Easier to manage and maintain consistently
Dynamic Import Optimization
Section titled “Dynamic Import Optimization”Because the onboarding feature is only needed in specific scenarios, such as a user’s first visit, we use dynamic imports to optimize initial loading performance:
const initNewUserGuide = async () => {  // Dynamically import driver.js  const { driver } = await import('driver.js');  await import('driver.js/dist/driver.css');
  // Initialize the guide  const newConversationDriver = driver({    // ...configuration  });
  newConversationDriver.drive();};
This way, driver.js and its stylesheet are only loaded when needed and do not affect first-screen performance. Not many people enjoy waiting for something they do not even need yet.
Onboarding Flow Design
Section titled “Onboarding Flow Design”HagiCode implements two onboarding paths that cover the user’s core scenarios.
Session Onboarding (10 Steps)
Section titled “Session Onboarding (10 Steps)”This onboarding path helps users complete the entire flow from creating a conversation to submitting their first complete Proposal:
- launch - Start the guide and introduce the “New Conversation” button
- compose - Guide the user to type a request in the input box
- send - Guide the user to click the send button
- proposal-launch-readme - Guide the user to create a README Proposal
- proposal-compose-readme - Guide the user to edit the README request content
- proposal-submit-readme - Guide the user to submit the README Proposal
- proposal-launch-agents - Guide the user to create an
AGENTS.mdProposal - proposal-compose-agents - Guide the user to edit the
AGENTS.mdrequest - proposal-submit-agents - Guide the user to submit the
AGENTS.mdProposal - proposal-wait - Explain that the AI is processing and the user should wait a moment
The idea behind this path is to let users experience HagiCode’s core workflow firsthand through two real Proposal creation tasks, one for README and one for AGENTS.md. There is a big difference between hearing about a workflow and going through it yourself.
The following screenshots correspond to a few key points in the session onboarding flow:
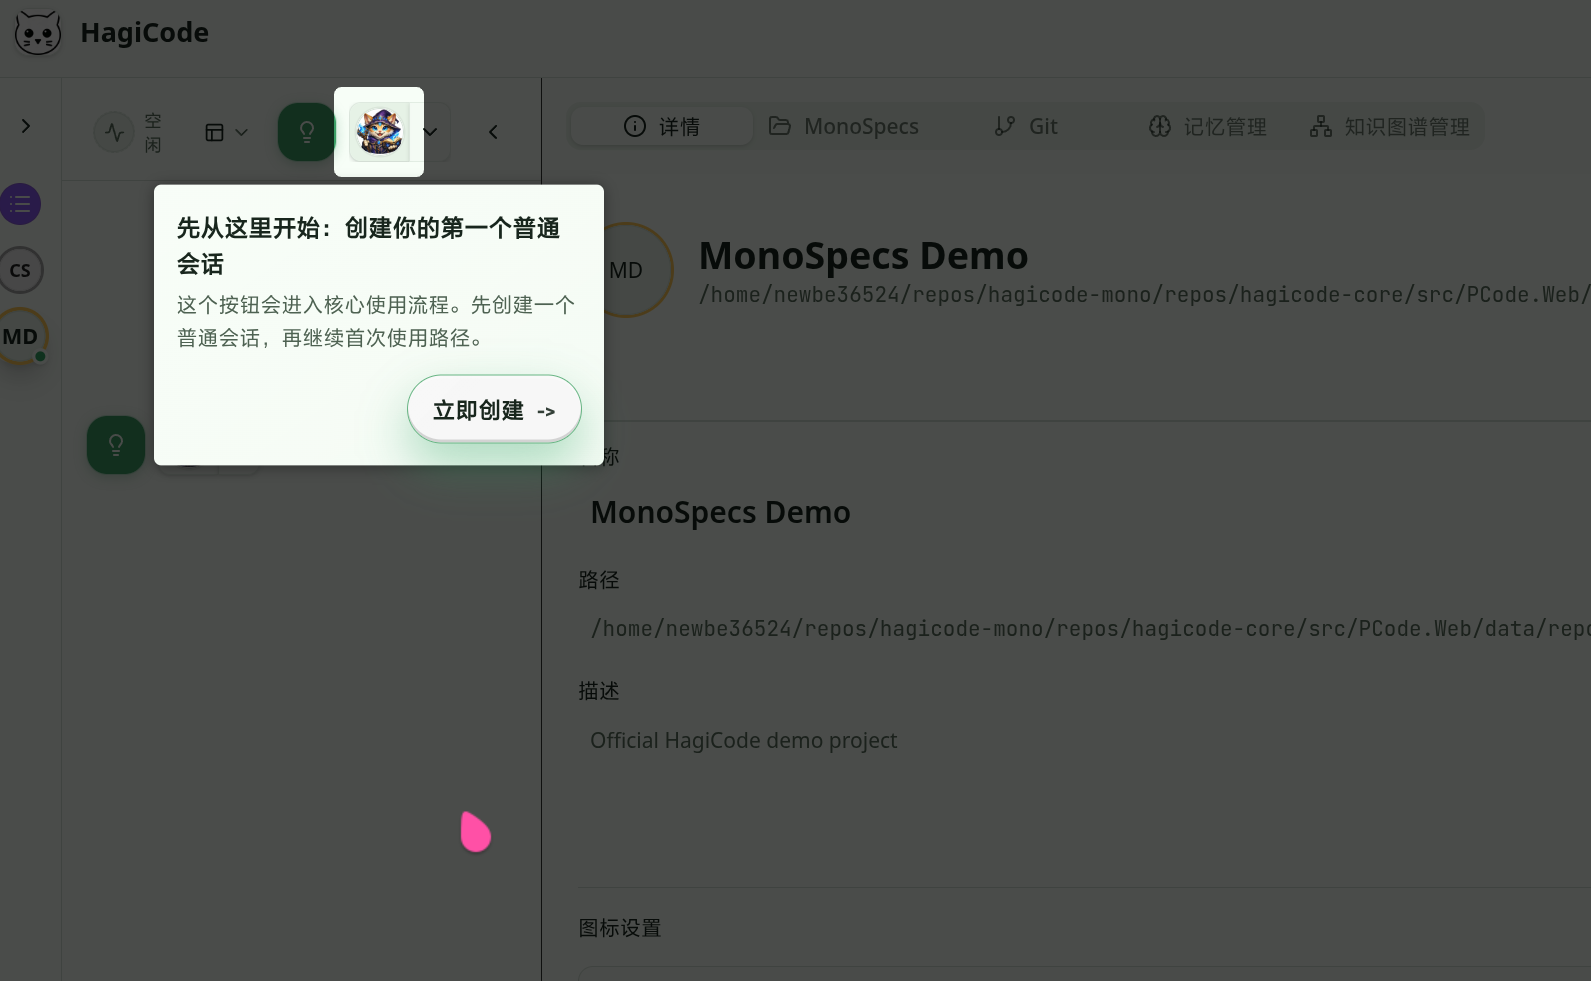
The first step of session onboarding takes the user to the entry point for creating a new Conversation session.
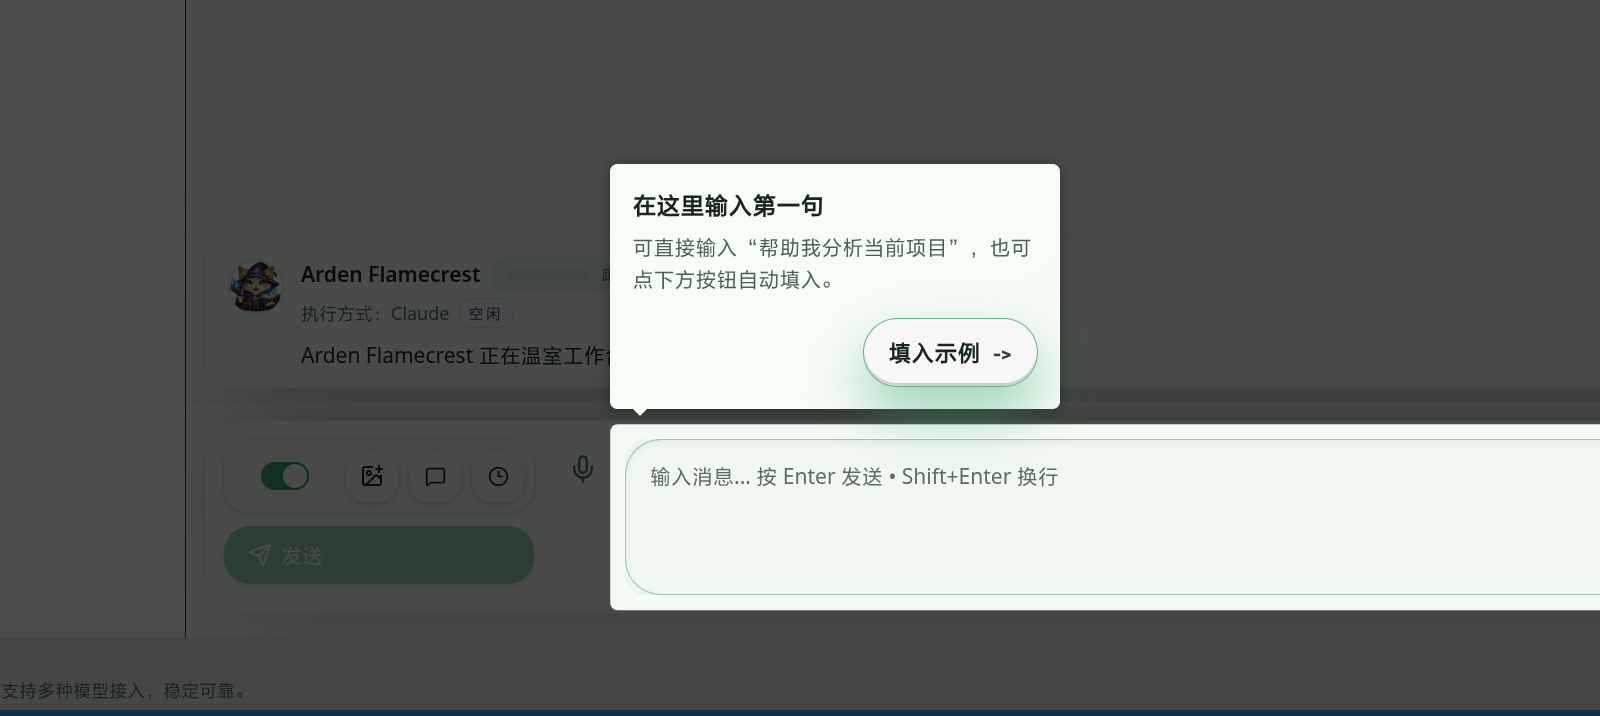
Next, the guide prompts the user to type their first request into the input box, lowering the barrier to getting started.
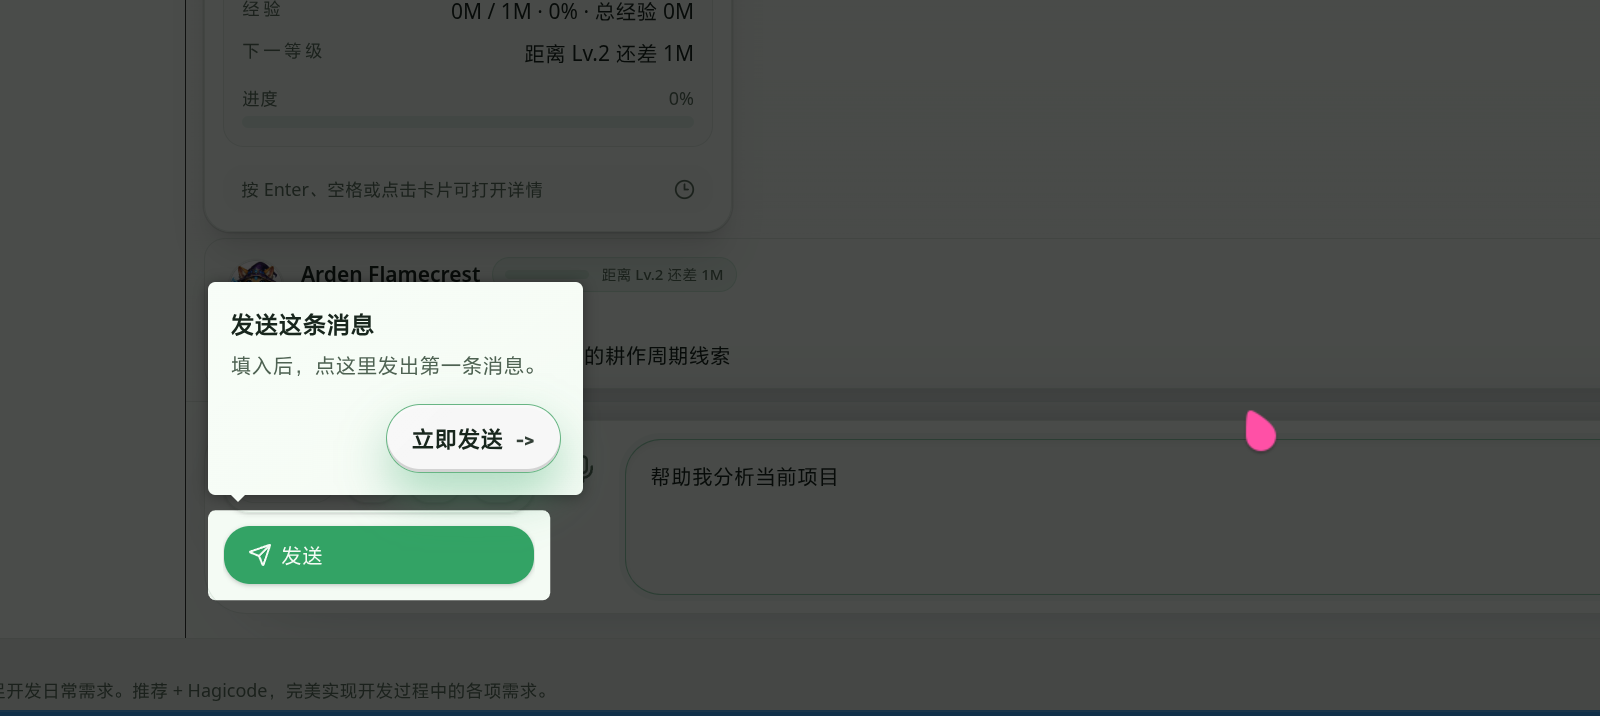
After the input is complete, the guide clearly prompts the user to send the first message so the action flow feels more connected.
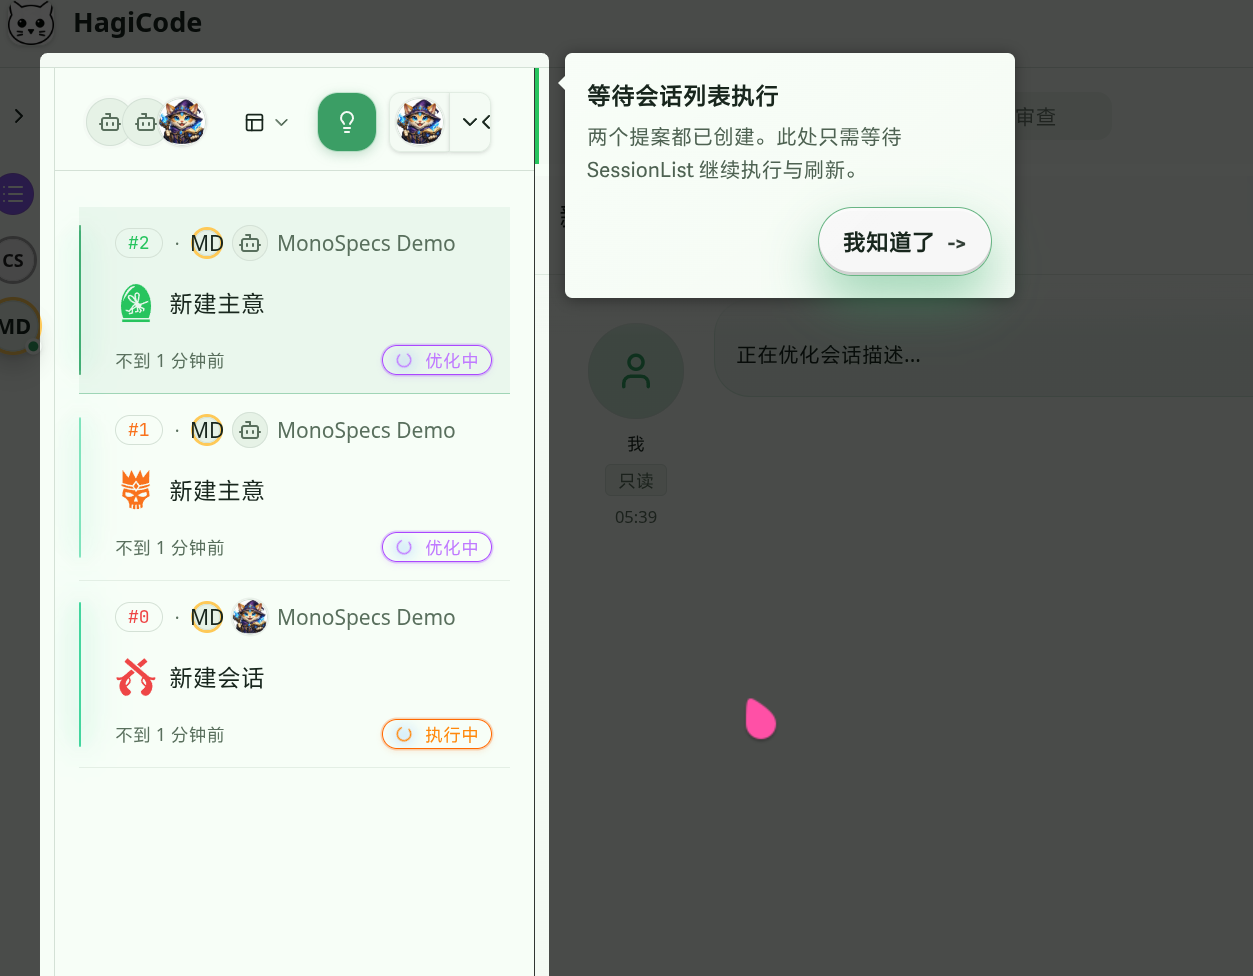
Once both Proposals have been created, the guide returns to the session list and lets the user know that the next step is simply to wait for the system to continue execution and refresh.
Proposal Detail Onboarding (3 Steps)
Section titled “Proposal Detail Onboarding (3 Steps)”When users enter the Proposal detail page, HagiCode triggers the corresponding guide based on the Proposal’s current state:
- drafting (draft stage) - Guide the user to review the AI-generated plan
- reviewing (review stage) - Guide the user to execute the plan
- executionCompleted (completed stage) - Guide the user to archive the plan
The defining characteristic of this guide is that it is state-driven: it dynamically decides which onboarding step to show based on the Proposal’s actual state. Things change, and onboarding should change with them.
The screenshot below shows the Proposal detail page in its onboarding state during the drafting phase:
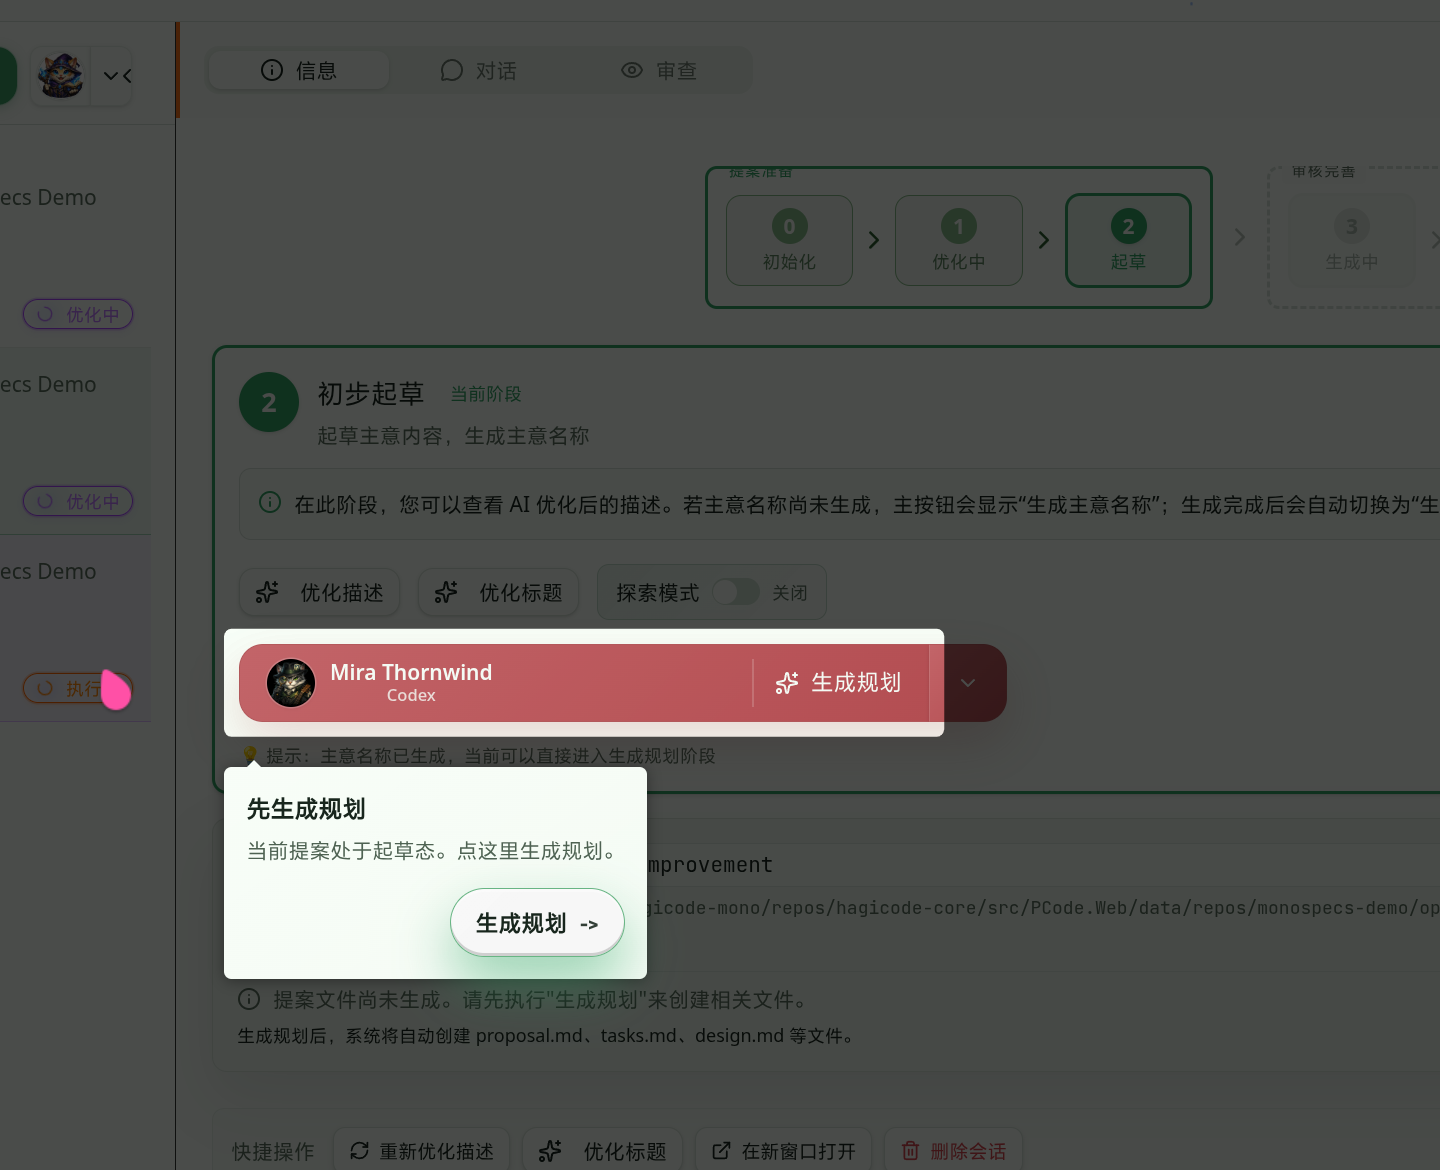
At this stage, the guide focuses the user’s attention on the key action of generating a plan, so they do not wonder what to do first when entering the detail page for the first time.
Element Render Retry Mechanism
Section titled “Element Render Retry Mechanism”In React applications, the target onboarding element may not have finished rendering yet, for example because asynchronous data is still loading. To handle this, HagiCode implements a retry mechanism:
const waitForElement = (selector: string, maxRetries = 10, interval = 100) => { let retries = 0; return new Promise<HTMLElement>((resolve, reject) => { const checkElement = () => { const element = document.querySelector(selector) as HTMLElement; if (element) { resolve(element); } else if (retries < maxRetries) { retries++; setTimeout(checkElement, interval); } else { reject(new Error(`Element not found: ${selector}`)); } }; checkElement(); });};Call this function before initializing the guide to make sure the target element already exists. Sometimes waiting a little longer is worth it.
Best Practices Summary
Section titled “Best Practices Summary”Based on HagiCode’s practical experience, here are a few key best practices:
1. Onboarding Should Be Easy to Exit
Section titled “1. Onboarding Should Be Easy to Exit”Do not force users to complete onboarding. Some users are explorers by nature and prefer to figure things out on their own. Provide a clear “Skip” button, remember their choice, and do not interrupt them again next time.
2. Keep Onboarding Content Short and Sharp
Section titled “2. Keep Onboarding Content Short and Sharp”Each onboarding step should focus on a single goal:
- Title: Short and clear, ideally no more than a few words
- Description: Get straight to the point and tell the user what this is and why it matters
Avoid long-winded explanations. User attention is limited during onboarding, and the more you say, the less likely they are to read it.
3. Keep Selectors Stable
Section titled “3. Keep Selectors Stable”Use stable element markers that do not change often. The custom data-guide attribute is a good choice. Avoid depending on class names or DOM structure, because those are easy to change during refactors. Code changes all the time, but some anchors should stay stable when possible.
4. Test Your Onboarding
Section titled “4. Test Your Onboarding”HagiCode includes complete test cases for the onboarding feature:
describe('NewUserConversationGuide', () => {  it('should initialize guide state correctly', () => {    const state = getUserGuideState();    expect(state.session).toBe('pending');  });
  it('should update guide state correctly', () => {    setUserGuideState({ session: 'completed', detailGuides: {} });    const state = getUserGuideState();    expect(state.session).toBe('completed');  });});
Tests help ensure that refactoring does not accidentally break onboarding behavior. Nobody wants a small code change to quietly damage previously working functionality.
5. Performance Optimization
Section titled “5. Performance Optimization”- Use dynamic imports to lazy-load the onboarding library
- Avoid initializing onboarding logic after the user has already completed the guide
- Consider the performance impact of animations, and disable them on lower-end devices if needed
Performance, like many things in life, deserves a bit of careful budgeting.
Conclusion
Section titled “Conclusion”New user onboarding is an important part of improving product user experience. In the HagiCode project, we used driver.js to build a complete onboarding system that covers the full workflow from session creation to Proposal execution.
The core points we hope to share through this article are:
- Technical choices should match actual needs: driver.js is not the most powerful option, but it is the best fit for us
- State management is critical: Use
localStorageto persist onboarding state and avoid repeatedly interrupting users - Onboarding design should stay focused: Each step should solve one problem, and no more
- Code structure should stay clear: Separate onboarding configuration, state management, and UI logic to make maintenance easier
If you are adding new user onboarding to your own project, I hope the practical experience in this article helps. There is nothing especially mystical about this kind of technology. Keep trying, keep summarizing what you learn, and things gradually get easier.
References
Section titled “References”- driver.js official documentation
- HagiCode project source code
- HagiCode official website
- OpenSpec workflow documentation
Copyright Notice
Section titled “Copyright Notice”Thank you for reading. If you found this article useful, feel free to like, bookmark, and share it. This content was created with AI-assisted collaboration, and the final content was reviewed and confirmed by the author.
- Author: newbe36524
- Original article: https://docs.hagicode.com/blog/2026-04-01-new-user-guide-with-driverjs/
- Copyright notice: Unless otherwise stated, all articles on this blog are licensed under BY-NC-SA. Please include the source when reposting.